
Crota’s End has returned as a reprised raid for Destiny 2. Bungie has brought the original Destiny raid into Destiny 2, and while it will be familiar to those who played it back in 2014, there are enough differences here that it ought to provide a decent challenge. The following Crota’s End raid guide details each encounter and what weapons to bring.
Spawn an extra red border chest at Crota! Find and activate the correct statues so you can get those weapon patterns.
Last updated September 5, 2023.
- Chalice of Light: How it works
- Descend into the Hellmouth
- Traverse the Abyss
- The Bridge
- Thrall hallway
- Ir Yut, the Deathsinger
- Crota, Son of Oryx
Shacknews World’s First Crota’s End raid attempt
Check out the following stream of my mates and me attempting to clear Crota’s End on Day One. The livestream went live at 9:00 a.m. PT / 12:00 p.m. ET on September 1, 2023. Crota’s End unlocked at 10:00 a.m. PT. Check out the VOD below of our Day One attempt.
Crota’s End weapon & build recommendations
Crota’s End is an enemy-heavy raid featuring several sections where going toe-to-toe with a tough opponent is unavoidable. As is always the case, any build and playstyle can get the job done, but these will be the tools you should use if you’re aiming for a clear.
As of Season of the Witch, there are a few Exotic weapons that will help you crush the various encounters. Try to have some of these in your kit before you head in:
Divinity and Leviathan’s Breath work well together to deal with Ir Yut, the Deathsinger. This is still one of the best damage strategies and due to the number of enemies that can be killed using Aeon’s, ammo should never be a problem.
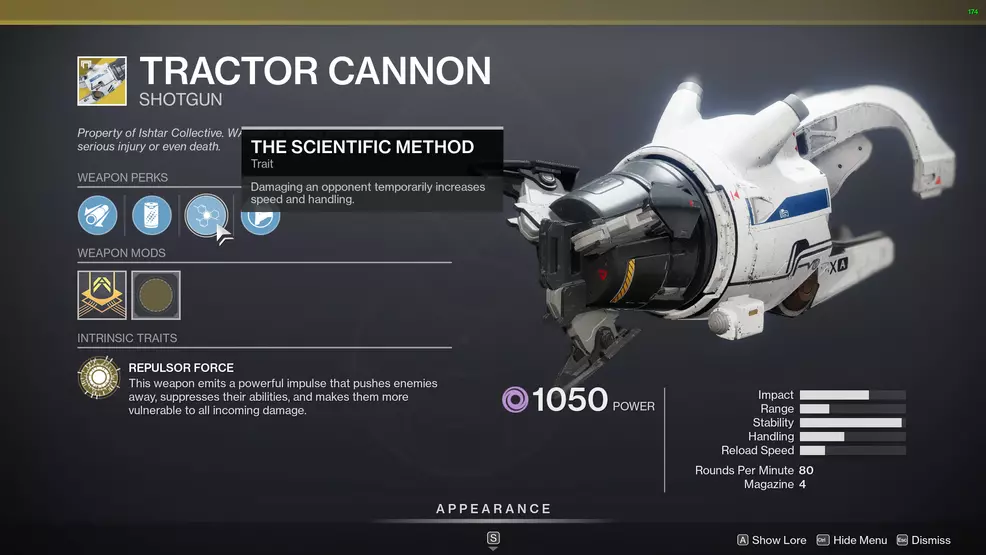
Tractor Cannon is used to debuff Crota, ensuring your team can deal a ton of damage to knock down the boss’ chunky health pool. With Crota weakened, The Lament offers some of the best DPS numbers for this encounter and can keep you alive if the tower Knights are firing down on you.
You might also like to use Riskrunner for the innate Arc damage resistance during the Abyss, Arbalest for the Barrier Champions during the Bridge, or even Thunderlord (with its Exotic catalyst), Sunshot, and Osteo Striga for the add-clear in each encounter.
Additionally, because there will be a lot of Hive Knights, bring a Shotgun to knock them down quickly. You want something that dishes out a lot of damage, potentially something with slug rounds (Heritage, Nessa’s Oblation), One-Two Punch (Wastelander M5), or Trench Barrel (Basso Ostinato).
There will also be plenty of long-range fights, specifically in the Bridge encounter, so a Sniper Rifle or Scout Rifles are great. When the fight shifts indoors, bring along an SMG or something for close combat. Submission is a great option thanks to its ability to heal you.
For your team composition, a Warlock with Well of Radiance is basically required. If you can have multiple Warlocks, then it will make the Crota fight far easier. Warlocks should be running Exotics to help with add-clear and Cenotaph Mask to help with Heavy ammo generation.
Titans will likely want to be switching it up throughout the raid, but by the end should shift to Burning Maul – Pyrogale Gauntlets are optional. Burning Maul can stunlock Crota, allowing your team to deal damage unopposed. When not in DPS, Synthoceps remain one of the best Exotics to help clear tough foes.
Hunters have a lot of freedom throughout the raid, but when it gets to Crota the best option is Gathering Storm with Star-Eater Scales. If you’re running multiple Hunters, space out the Super as the damage won’t stack.
Chalice of Light info |
|---|
The Chalice of Light is the main device you will use through the entire raid. It has a few status effects and allows you to do a variety of tasks. Here is a rundown of what it does, what each buff/debuff means, and what you can do with it.
- When holding a Chalice of Light, it will slowly charge up to maximum as indicated by the bar split into quarters on the side of your screen. Continuing to hold it after it’s charged will kill you.
- Enlightened: You receive this buff when someone takes the chalice from you after it has been fully charged. This buff lets you light lanterns, start/hasten the construction of bridges, pick up swords, cross the bridge, pass through barriers, expunge foes, and deal damage to the Oversoul.
- Engulfed in Light: When the chalice is fully charged, you will receive this 10 second debuff. Someone must take the chalice from you within 10 seconds or you will die.
- Drained of Light: 45 second debuff that prevents you from picking up a Chalice of Light. Acquired whenever Enlightened is used to perform one of the above actions.
- Preservation Node: A small node where you can place the Chalice of Light or pick it up.
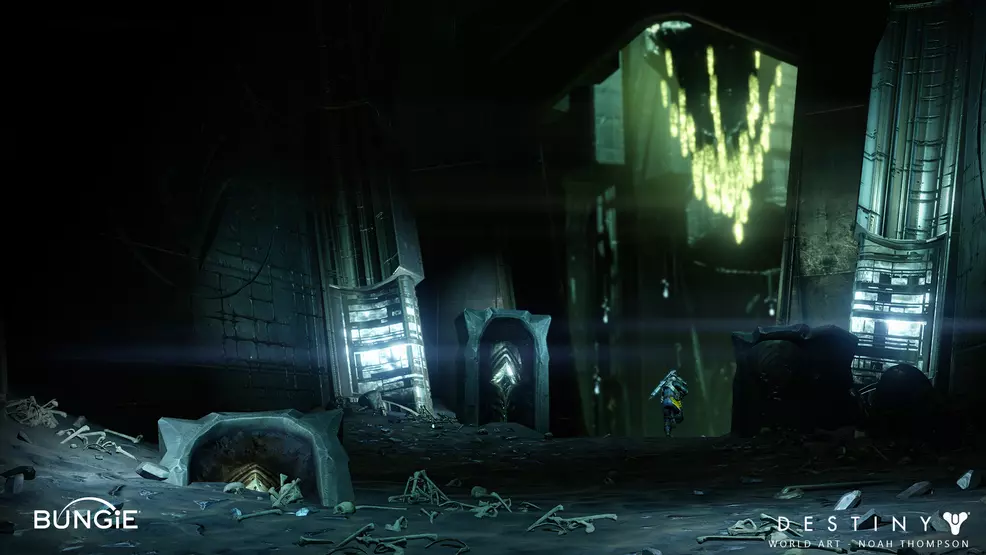
The Hellmouth |
|---|
Source: Bungie | Noah Thompson
Pick up the Chalice of Light and hold it until the bar fills. Interact with the plate to add the charge. Another player should grab the Chalice and do the same until the bridge builds.
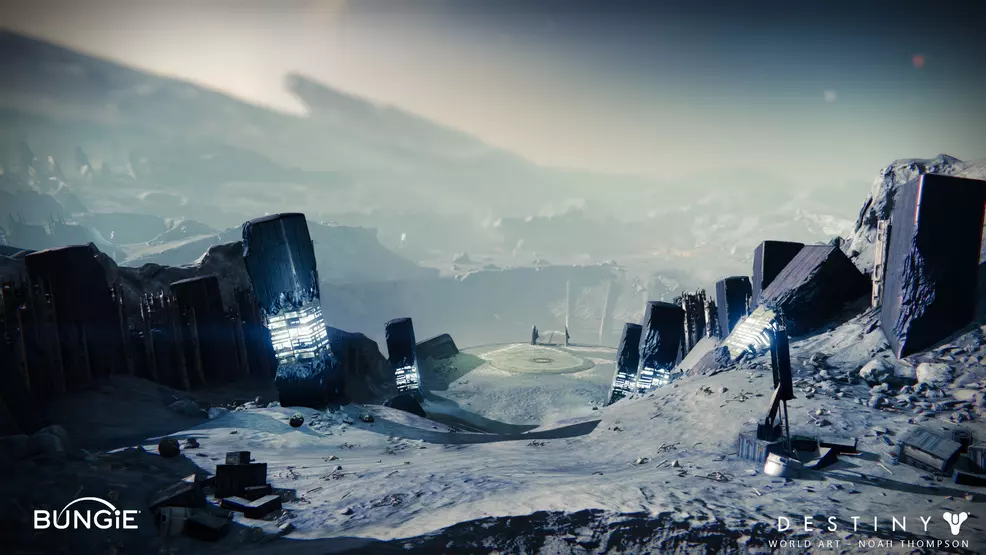
The Abyss |
|---|
Source: Bungie | Noah Thompson
Challenge: Conservation of Energy: You can only Enlighten a lantern if you preserve the Chalice of Light beside it first. This means you can only use roughly seven lanterns throughout The Stills. Lighting a lantern that does not have a preservation node will fail the challenge. Use Grapple Grenades an Eager Edge to speed through the darkness quickly, this helps negate the Weight of Darkness.
The Abyss is the first encounter in Crota’s End that requires players move along pathways into darkness, using Hive lanterns to guide their way. The aim is to reach the end, activate the bridge, and run through the doorway of light at the end.
- Weight of Darkness: Fills to x10, slows your Guardian's movement.
- Engulfed in Darkness: Counts down from 60 seconds, if it hits 0 seconds you die. Resets to 60 seconds when a lantern is ignited or the chalice is preserved.
- Lanterns: Slowly resets the Weight of Darkness debuff and instantly resets the Engulfed in Darkness debuff when ignited using an Enlightened buff. These explode after a few seconds.
- Preservation node: Small nodes beside some lanterns. Deposit the Chalice of Light in these to “preserve” it and activate the next set of lanterns. You can pick a Chalice of Light up from a preservation node. Preserving the chalice instantly refreshes the Engulfed in Darkness timer.
Here is an overview of the steps:
- Pick up Chalice of Light and let it charge. Continue to pass it around the group, ensuring that players become Enlightened.
- Check beside the lantern to see if there is a Preservation node. If there is, deposit the Chalice of Light to activate the next set of lanterns and then pick it back up and continue charging it up and passing it around.
- Use the Enlightened buff to turn on a lantern. Stand around the lantern to lose the Weight of Darkness (if you want, this isn’t necessary).
- Continue along the path, activating sets of lanterns, using Enlightened to turn on lanterns, until you reach the end.
- Use an Enlightened buff on the plate to begin building the bridge.
While traversing the Abyss, the Engulfed with Darkness debuff will be constantly ticking down from 60 seconds – if this reaches zero you will die. The Weight of Darkness debuff will be ticking up to 10 stacks, which prevents you from running and double jumping. The Weight of Darkness is non-lethal, so it’s not a major concern.
Along the path will be lanterns that must be ignited using an Enlightened buff from a charged Chalice of Light. Lighting a lantern will reset everyone’s Engulfed in Darkness to 60 seconds no matter where they are but only players beside the lantern will have their Weight of Darkness reset. The Weight of Darkness is slowly removed when standing beside a lantern.
The lanterns are also in groups. The last lantern of a set will have a node beside it where you can Preserve the Chalice of Light – this activates the next group of lanterns. The lantern that has a node beside it is random, but only within one or two options. Look along the path to see if the next lantern is dark or a bit green, if it’s dark then you’re at the lantern with a node beside it.
Keep in mind that once you use Enlightened to ignite a lantern, it will only have about 15 seconds or so before it explodes.
The Chalice of Light will be right at the start of the encounter. Either assign an order so each player knows who they’re grabbing it from or just go with the flow. When you’re ready, grab the chalice and move to the first lantern.
The first lantern will always have a preservation node beside it. Let the chalice charge and then get someone to take it. The player who took it should preserve the chalice while the original player ignites the lantern. Have someone grab the chalice and then move to the next lantern as a group.
It’s up to each group whether they stop at every lantern or just charge through as quickly as possible. The only limiting factor is the Engulfed in Darkness debuff.
When you reach the end of the path, use an Enlightened buff on the plate to begin building the bridge. You must now hold out against an onslaught of foes. There are Unstoppable Ogres, Hive Knights, and Thrall. You can cross the bridge when it says “The path forward is clear”.
The Bridge |
|---|
Source: Bungie | Noah Thompson
Challenge: Precarious Balance: The player(s) that crosses the bridge must do so as it is deforming.
The Oversoul Throne Bridge encounter is all about constructing a bridge, sending players with swords across to defeat Gatekeepers, and clearing a never-ending wave of enemies.
The bridge encounter introduces a new mechanic to the Chalice of Light and Enlightened buff:
- Chalice of Light (same as the first encounter): Charges over time up to four bars, at which point you become Enlightened if someone takes the Chalice from you. You can cross the bridge if you're holding the chalice.
- Enlightened: Used to start the construction of the bridge and pick up a sword that a Swordbearer drops. Can also be used to hasten the construction of the bridge.
- Annihilator Totems: Whenever a player is on the bridge construction plate these will activate and kill the entire team unless a player is standing below each one.
- Bridge: Can only cross the bridge if you are holding the Chalice of Light or a Swordbearer’s sword.
- Gatekeeper: Can only be damaged using a Swordbearer’s sword.
- Swordbearer: Drops a Hive sword when defeated. Appears when the bridge starts being constructed and then only after a Gatekeeper is defeated.
The bridge encounter is a sort of relay race an endurance test:
- Pick up the Chalice of Light and get the Enlightened buff. Deposit the Enlightened buff into the bridge plate to start construction.
- Stand on the center plate to continue building the bridge. Have one player under each Annihilator Totem.
- Defeat the Swordbearer that appears, have an Enlightened player pick up his sword, and then cross the bridge when it is constructed.
- The player with the sword must defeat the Gatekeeper on the other side using the sword. When defeated, deposit the sword into one of the nodes. When the Gatekeeper dies, a new Swordbearer will spawn.
- Continue getting Enlightened players, defeating Swordbearers, and sending players across until three players are on the other side.
- Have the three players on the far side stand on the bridge construction plate and under the Annihilator Totems on their side.
- Remaining three players get Enlightened buff and Hive swords to cross the bridge.
- When two players remain, one person gets a Hive sword and the other player carries the Chalice of Light across the bridge.
- Get five players Enlightened and the sixth person deposits the chalice. Defeat enemies until a group of Gatekeepers spawn.
- Enlightened players grab a Hive sword and defeat the Gatekeepers.
Grab the Chalice of Light, get Enlightened, and use it on the plate to start the construction of the bridge. Continue standing on the plate until the bridge is constructed. While on a plate, a player must be under each Annihilator Totem to prevent wiping (if the far side of the bridge is constructing the bridge, you don’t need to be under the totems on the starting side). You can speed up the construction of the bridge by depositing more Enlightened buffs.
As the bridge is being constructed, a Swordbearer will appear. This enemy drops a Hive sword when defeated, which can only be picked up by someone who is Enlightened. It will disappear if left on the ground. Only the player with the Hive sword or the Chalice of Light can cross the bridge.
Send the player with the Hive sword across to defeat the Gatekeeper. This foe is extremely tough and can only be damaged by the Hive sword. On harder difficulties, like Contest Mode and Master, you may need to do hit and runs until he is down. Alternatively, send across someone with the Chalice of Light so they can help with blinding grenades, Well of Radiance, or other abilities and Supers.
When the Gatekeeper is defeated, find a node and preserve the sword. The player on the far side must now survive until two more players arrive. Meanwhile, the starting side should keep passing the Chalice of Light around to get players Enlightened, defeat Swordbearers, and send players across. After the first Swordbearer, new ones will only appear when a Gatekeeper is defeated.
With three players on the far side, the responsibility of bridge construction shifts to the far side. Their objective is to have one player on the bridge construction plate and one player under each Annihilator Totem. As mentioned above, if the far side is constructing the bridge, the home side does not need to be under their totems and can retreat to safety up the stairs.
The process now is to get all remaining players across the bridge. When there are only two players left on the home side, have one player get Enlightened and use the Hive sword while the other player carries the Chalice of Light across.
When six players are on the far side, the goal is to defeat waves of enemies until Gatekeepers spawn. During this time, pass the Chalice of Light around to get players Enlightened. The last player can preserve the chalice at the node near the center door.
As the Gatekeepes spawn, Enlightened players can pick up Hive swords that were preserved. Use the swords to defeat the Gatekeepers to finish the encounter.
Now, there are a few strategies when it comes to handling the Chalice of Light, Enlightened, and the bridge construction and Annihilator Totems. One popular strategy is to get all players Enlightened except for one, and then send the Chalice of Light and Hive sword user across first. This ensures the first player has help defeating the Gatekeeper and there is no need to juggle the Chalice of Light. The drawback here is that the remaining players will need to avoid dying, lest they lose Enlightened. If they do die, someone will need to bridge the Chalice of Light back.
The alternative method is to juggle the Chalice of Light. This can be difficult given the need to stand under Annihilator Totems and keep the bridge up. If you choose to juggle, remember you can always swap the chalice back and forth continually between two players provided neither gets Enlightened – just swap it at 50 percent.
Additional tips would be to help each side of the bridge wherever possible. During Contest Mode, I used Sunbracers and threw as many Solar Grenades across as I could to help our first Hive sword user deal with enemies. It’s also worth using Scout Rifles or Sniper Rifles to help each side deal with enemies.
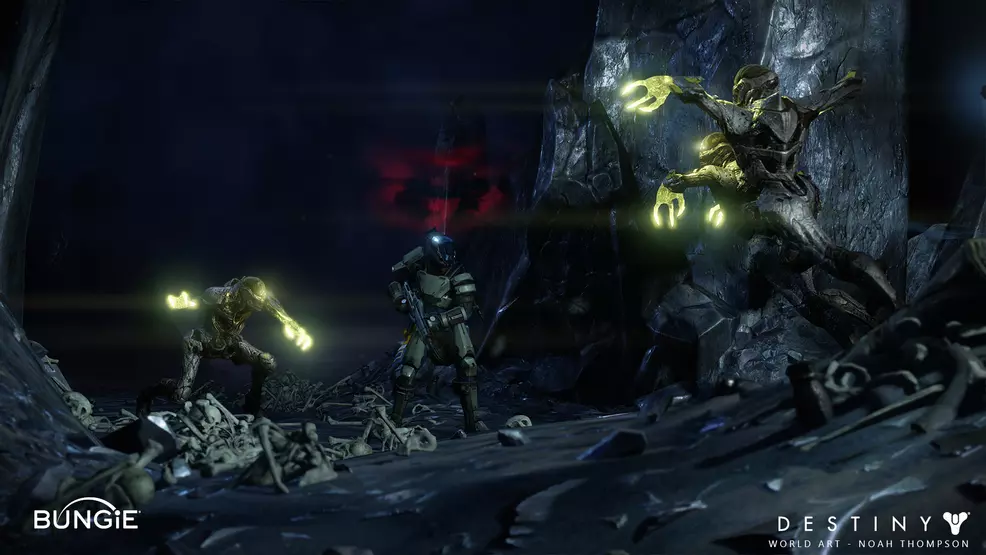
The Thrallway |
|---|
Source: Bungie | Noah Thompson
After the bridge section is complete, there is a mini section where you must fight up a literal hill while defeating Thrall and destroying Shriekers. Holding the Chalice of Light gives you the Enlightened buff which lets you pass through a barrier. Defeat the Shrieker to remove the barrier. Continue up the hill, moving through the barriers and defeating shriekers until you reach the end. Deposit the Chalice of Light to unlock the hole in the ground.
Ir Yut, the Deathsinger |
|---|

Source: Gamerant
Challenge: Equal Vessels: The Chalice of Light must be continually cycled between players in the same order, even during damage phase.
The fight against Ir Yut, the Deathsinger, is all about speed and lethality. The goal is to defeat Ir Yut before she finishes singing her Liturgy.
- Chalice of Light: Exact same mechanics as the previous encounters. Hold onto it to become Enlightened, you must have another player take it from you before you get Engulfed in Light.
- Enlightened: This buff allows you to pass through the green barriers around the room. You cannot pick the Chalice up if you are Enlightened. Once you lose Enlightened, you will have a 45 second debuff that prevents you from picking up the Chalice.
- Dark Liturgy: Starts as soon as a Wizard in the tower is defeated or once 3 minutes has elapsed since the start of the encounter. Wipes your team if it reaches zero unless you can deal enough damage to Ir Yut to reach the notch in her health bar.
The goal here is to locate Wizards that are behind the green barriers and then have Enlightened players defeat the Wizards. Once the Wizards are dead, Ir Yut can be damaged. After each damage phase, the number of Wizards you must kill increases by one (three, four, five).
Begin by splitting the team into two groups of three. Send one group left and the other right. Clear out enemies as quickly as possible, the sooner all the Blistered Knights are down, the sooner the Shriekers open up. Defeating the Shriekers opens the center crystal room where you can pick up the Chalice of Light.
Charge the Chalice of Light so that three players have the Enlightened buff. While this is happening, have one player scout the arena and call out the rooms where the Wizards are located. There will be one Wizard per room. The possible spawns are in the top and bottom floor of the towers in the corners and in the three rooms above the center crystal.
Try and defeat the Wizards at the same time because as soon as one Wizard is defeated, Ir Yut's shield will be removed and you can deal damage. When all the Wizards are defeated, all players should group up and deal damage to Ir Yut. You must deal enough damage to reach the notch in her health bar before the Dark Liturgy finishes or you will wipe. Anyone with the Enlightened buff can Expunge her to deal a chunk of damage and remove the Enlightened buff.
In terms of DPS for Ir Yut, the strategy my team used for Day One is Divinity and five Thunderlords. This allowed us to two-phase Ir Yut, we also Expunged her once per damage phase.
If you take too long to defeat all the Wizards and reach a damage phase, Ir Yut will automatically begin the Dark Liturgy. An on-screen message will state "Ir Yut begins her dark procession" and then the Dark Liturgy timer will start counting down.
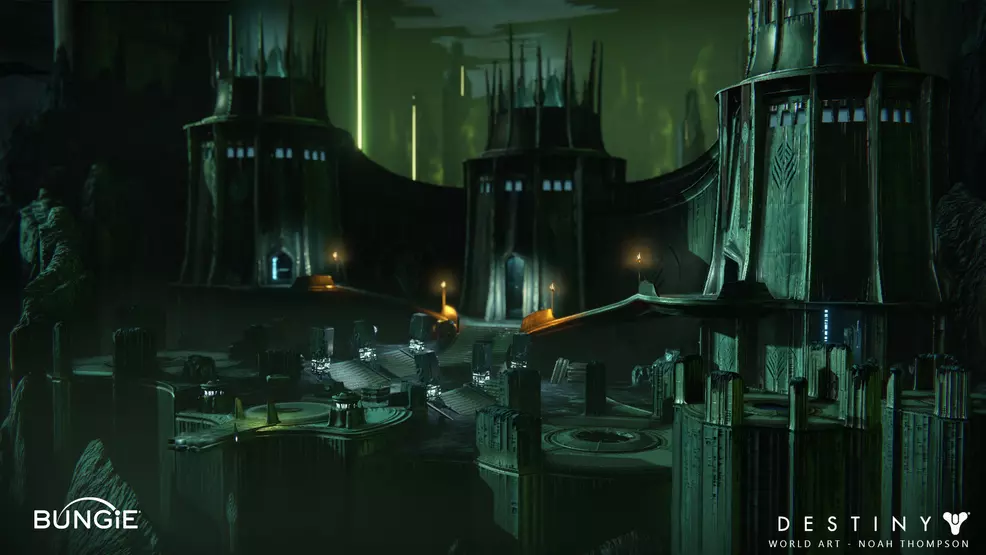
Crota, Son of Oryx |
|---|
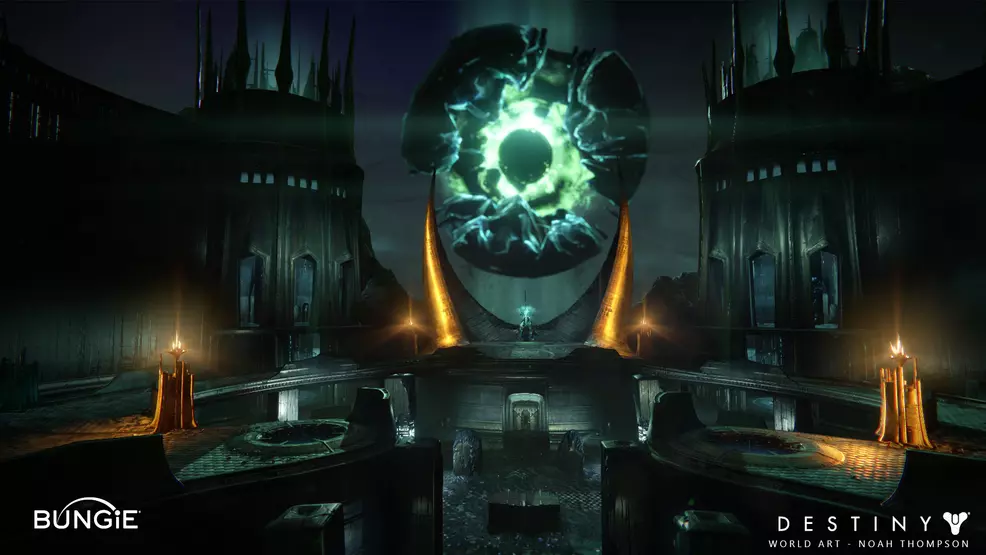
Source: Bungie | Noah Thompson
Challenge: All For One: Three swords must be used at the same time to take down Crota's shield.
- Chalice of Light: Exact same mechanics as the previous encounters, except this time you can only swap the Chalice when standing in a beam of Light.
- Enlightened: Acquiring by holding the Chalice of Light until the bar fills and then someone taking the Chalice from you. Allows you to pick up a sword, destroy the Oversoul, or Expunge on Crota. Once you do one, you lose Enlightened.
- Presence of Crota: This debuff prevents you from swaping the Chalice of Light except in a beam of Light.
- Swordbearer: Spawns in the middle door once the Hive Knights in the towers are defeated. Drops a sword on death. The sword will disappear after a few seconds.
- Expunge: Someone who is Enlightened can Expund on Crota, dealing a chunk of damage.
- Oversoul: Wipes the team after 30 seconds unless it is destroyed by someone who is Enlightened. Destroying it ends a damage phase.
The goal is to defeat the Hive Knight Boombers in the Towers to summon Ogres and a Swordbearer. Defeating the Swordbearer drops a sword which you must use to remove Crota's shield. You can only pick up the sword if you are Enlightened, which is acquired by holding the Chalice of Light until the bar is charged. It will take two to three swords to remove it.
Ideally, you can use one sword at a time to safely get in and out. This maximises the number of people that are on add-clear. Alternatively, keep holding onto swords until three players have a sword and then everyone dogpiles Crota at once. If you opt for the one sword at a time method, I'd recommend having someone with Healing Grenades throw in a 'nade once the player with the sword gets hit by Crota, this ensures they heal up enough to tank another hit.
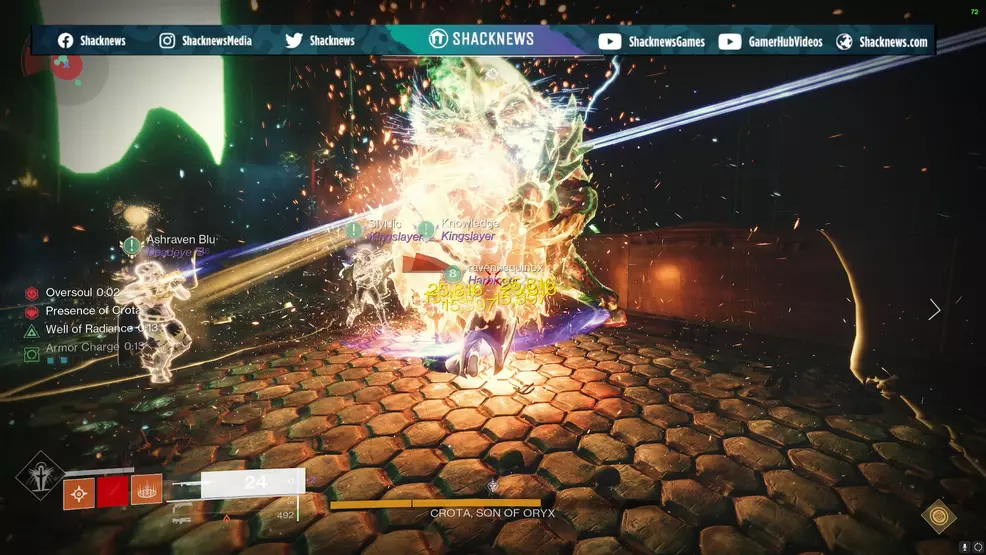
Source: Shacknews
The main challenge here will be dealing enough damage during each damage phase. One strategy that has worked is to use Lament and several Well of Radiances. If you're using the one sword at a time method, when the third sword user has their sword, a Well of Radiance Warlock should rush in, cast their Super, and have everyone collapse in. The sword user will bust down the last bit of shield and then everyone uses The Lament. On Contest Mode, this can remove roughly a quarter of Crota's health bar.
The trouble on Contest Mode is that Crota will destroy a Well of Radiance extremely easily. You either need multiple Wells or to use a Ward of Dawn to protect the Well. Alternatively, you can use a Burning Maul Titan Super to effectively stunlock Crota. At least one Hunter should use Gathering Storm for the massive damage. If you're not going to use The Lament, consider other sword options like Falling Guillotine or even a shotgun like Legend of Acrius, as it's damage is quite surprising. Other clears have succeeded when using any Controlled Burst Fusion Rifles as a backup. It is also absolutely critical to use the best buffs and debuffs. You need three Surge Mods in your boosts, Monochromatic Maestro, Lumina, Star-Eater Scales, Well of Radiance, Tractor Cannon, as well as Synthoceps.
After the damage phase, reset and run it all again. You'll need to do this at least three times to hit his final stand. Once you hit the last chunk of health, Crota will summon an Oversoul and you have roughly 30 seconds to remove the last chunk of health.
In addition to dealing damage to Crota, you must also mange the Oversoul. During each damage phase, Crota will summon an Oversoul that will wipe you after 30 seconds. Someone with the Enlightened buff must shoot and destroy the Oversoul to prevent this wipe. However, destroying the Oversoul ends the damage phase. Try to wait until the last possible second before destroying it. For this reason you should try to have at least four players become Enlightened throughout the encounter: three to pick up and use swords and one to handle the Oversoul. You can give additional players Enlightened so they can Expunge Crota, which is just a free burst of damage.
As for team composition, during Contest Mode my team had specific players dedicated to each role. A Titan with Burning Maul was responsible for clearing enemies around the door where the Swordbearer spawned and using Tractor Cannon on Crota. A player was responsible for always finishing the Swordbearer while using Aeons for guaranteed Heavy ammo. To help this player get Heavy ammo, another Warlock used Cenotaph to mark the Swordbearer before it was killed. One player was dedicated to each tower to take down the Knights. The remaining players were cycling the Chalice of Light buff to get Enlightened and picking up the sword. On top of this, one player can help each sword user by throwing a Healing Grenade at them as they're taking down Crota's shield to help them heal through the damage.
The first player to use the sword can go back into the Chalice of Light rotation to get another Enlightened buff. This should be used for the Expunge mechanic, that way you've hopefully got two players Expunging. Alternatively, it acts as a backup in case someone dies with Enlightened and there's not enough time to charge it again.
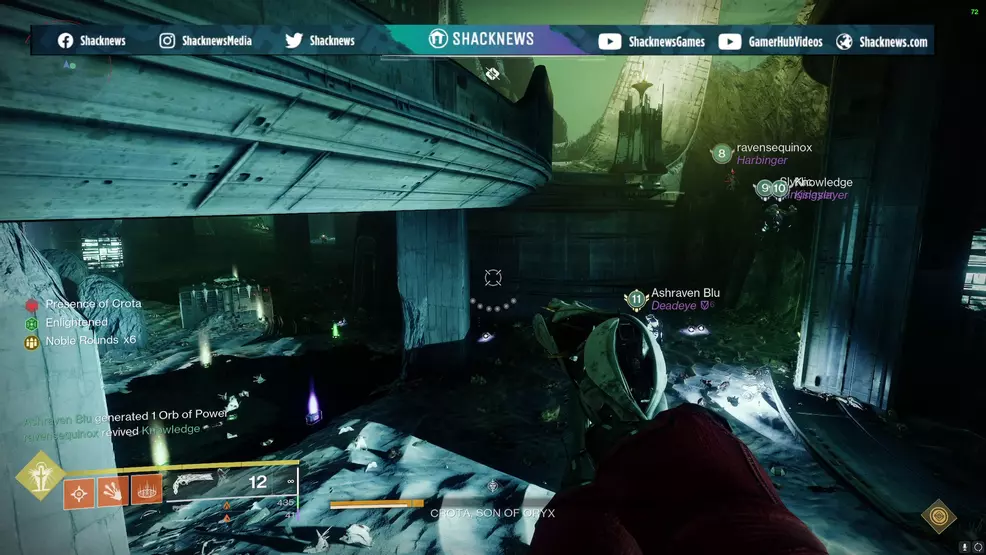
Source: Shacknews
As for handling Crota's final stand, you should finish your second damage phase with Crota's health bar almost at final stand. When you go for the third damage phase, conserve Heavy ammo and Supers (except for one Well of Radiance), and instead rely on Special weapons to push Crota into final stand - this ensures you save ammo. When Crota enters final stand, time your Well of Radiance, being sure to put one down before one disappears. You should also place a Well of Radiance if Crota shuffles out of one Well. There is no Oversoul between third phase and final stand, but you will need one Enlightened player to take down the final stand's Oversoul, so don't use it for Expunging. When you do hit Crota's last chunk of health, run away from him as he is immune for several seconds; take this opportunity to collect Heavy ammo. This will also ensure you don't get hit by his slam.
Crota’s End might be one of the smaller raids but it’s certainly one of the more challenging additions. This raid guide will be updated over the course of the Day One raid as my team and I work out the best strategies and completes it. Check back regularly for updates as I add new information after each encounter is cleared. There’s also our Destiny 2 strategy guide for more raid walkthroughs and raid challenge explanations.

-
Shacknews

 reply
replySam Chandler posted a new article, Crota's End raid guide - Destiny 2
