
The Root of Nightmares is the raid that launched two weekly resets after the release of Destiny 2: Lightfall. This guide will cover the entire Root of Nightmares raid including how to start it, Power requirements, recommended gear and loadouts, as well as detailed explanations for each encounter. The Root of Nightmares guide will be constructed from the launch of the raid on March 10, 2023 at 9:00 a.m. PT / 12:00 p.m. ET until it is completed. Use the following links to jump to the relevant section of the raid:
Make sure you do the Nezarec extra chest nodes before reaching the first encounter so you can get a bonus red border chest when defeating Nezarec
Last updated: March 13, 2023 at 9:57 p.m. ET.
- Cataclysm - Psions & Tormentors
- Scission - Connecting nodes & crossing gaps
- Macrocosm, Zo'Aurc, Explicator of Planets
- Nezarec, Final God of Pain
Shacknews World’s First Root of Nightmares raid attempt
Check out Sam and his mate’s Day One clear of the Root of Nightmares raid. The livestream is schedule to begin at 8:00 a.m. PT / 11:00 a.m. ET. Once completed, the livestream will be replaced by a VOD for your viewing pleasure.
Root of Nightmares Contest Mode rules
When Root of Nightmares firsts releases, it will have something called Contest Mode in effect. This is a common theme with newly released raids, giving players an opportunity to experience the raid at a more challenging level. During the Contest Mode, there are a few rules and limitations set on players:
- Contest Mode is active for 48 hours.
- Players are capped at 20 Power below each encounter. 1780 is the max Power.
- Completing the Root of Nightmares within the 48 hours and claiming the associated Triumph will award an emblem.
- The first team to complete each encounter, loot the final chest, and return to orbit will earn the title of World First and receive a wrestling-style belt, one for each member of the six-person fireteam.
In addition to Contest Mode, those who complete the raid before March 21 can purchase the Root of Nightmares themed raid jacket and the raid pin.
Root of Nightmares build, loadout, and weapon recommendation
Source: Shacknews
Given that Destiny 2: Lightfall shook up the weapon meta, it’s going to be too early to say definitively the best weapons you should be using. However, there will always be some important weapons and subclasses in any Day One raid attempt or even raid runs well into an expansion. We’ll update this section once we’ve settled on the ultimate weapons for you to use.
In saying that, there are certain Exotic weapons you absolutely must consider taking into the raid. The following list contains links showing you how to unlock these weapons:
- Divinity
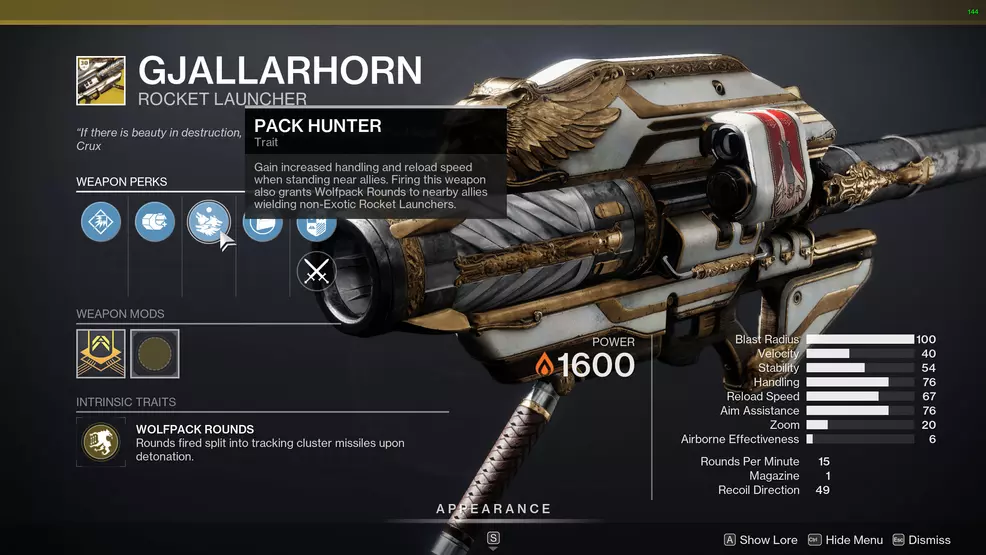
- Gjallarhorn
- Outbreak Perfected
- Arbalest
- Witherhoard
- Izanagi’s Burden
- Two-Tailed Fox
Divinity, despite its nerf, is still a viable option as it creates a large critical hit spot while also boosting weapon damage. Gjallarhorn ensures that other Legendary Rockets receive Wolf Pack rounds, vastly upping their damage output. Outbreak Perfected does more damage when more players are using it and it boosts Heavy ammo drop rates when you’ve got an ammo finder mod slotted.
As for Arbalest and Witherhoard, the former is great for popping shields and general damage output while the latter works great in certain builds. Izanagi’s Burden offers high damage output and excels when coupled with a Heavy that has Auto-Loading Holster. Two-Tailed Fox, especially with its catalyst, has huge damage potential.
When it comes to Legendary weapons, consider bringing in a Sniper Rifle like Thoughtless, Fugue-55, Succession, or IKELOS_SN. If a boss is close or you need to knock down powerful enemies Shotguns like Fortissimo-11, Heritage, First In Last Out, Sojourner’s Tale, or the Seventh Seraph CQC-12.
Consider bringing in Grenade Launchers with Disorienting Grenades to blind enemies, Submachine Guns like IKELOS_SMG, Funnelweb, or Calus Mini-Tool for add clear, and something to deal with long-range foes like a Pulse Rifle or Scout Rifle.
Cataclysm |
|---|
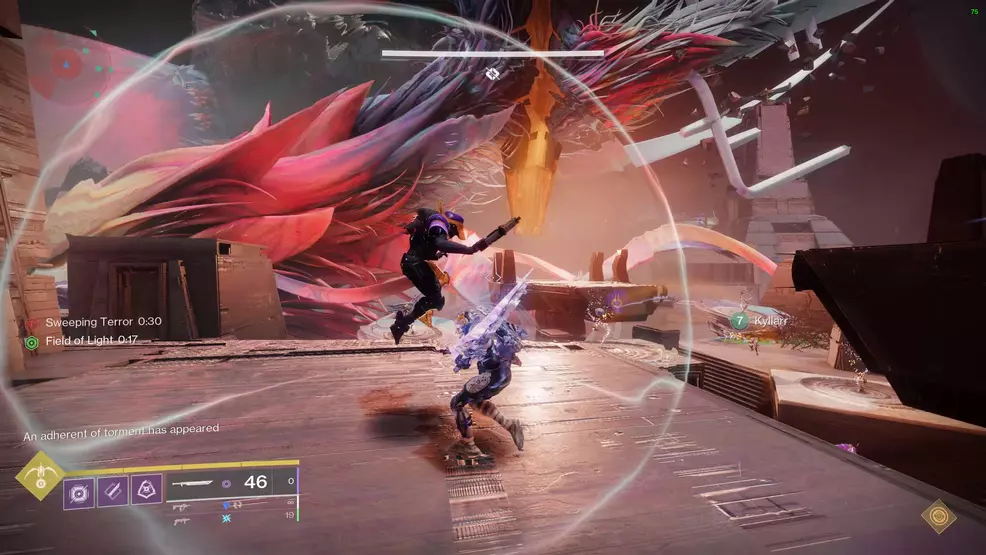
The first encounter in Root of Nightmares is called Cataclysm and the main goal is to create a network of nodes while killing Psions and Tormenters.
- Two players collect the Field of Light buff from the starting node and work together to complete the network
- Remaining players defeat Psions and Tormentors
Here are the main mechanics that are introduced with this first encounter:
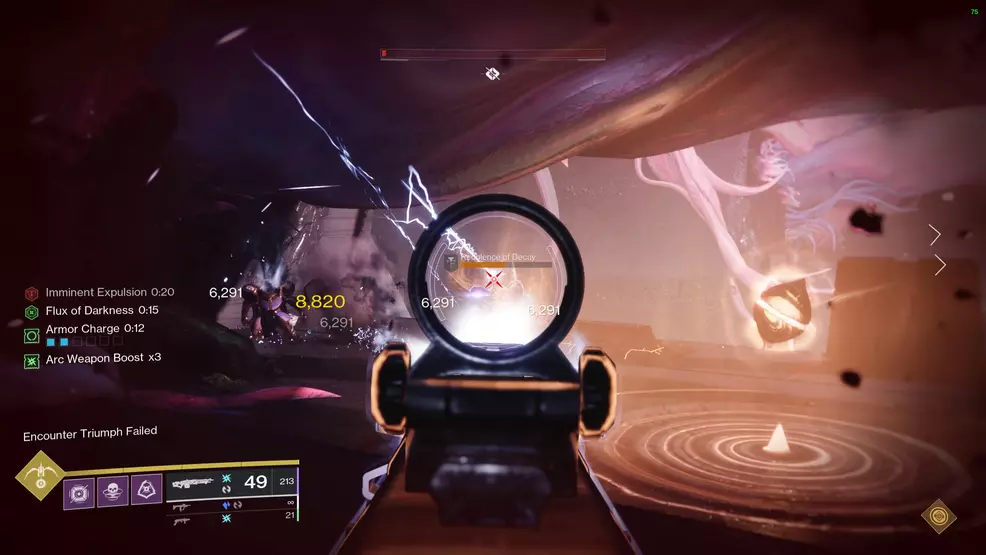
- Sweeping Terror: A 33 second debuff that wipes the team when it hits zero. Extended by defeating Tormentors.
- Nodes: A series of nodes that must be connected by shooting a node while holding the Field of Light buff. An activated node points to the next one in sequence. A complete set temporarily halts the Sweeping Terror debuff.
- Field of Light: A 15 second buff acquired by shooting the glowing node/one with the aura. Shooting the next node in sequence while holding the buff activates the node while also consuming the buff.
- Disruption: Players lose the Field of Light buff and must recollect it. This occurs when the aura node is activated if the next node has not been activated and someone has the buff outside of the aura.
Disruption example: Player A and Player B stand in the aura node. Player A shoots the node, both players have Field of Light. Player A leaves the aura to activate the next node in the network. Before Player A reaches the node, Player B activates the aura node again, refreshing their Field of Light buff. Disruption occurs, Player A loses the buff and must get it again. Solution: do not refresh Field of Light buff until a node is activated.
The Cataclysm encounter requires players to build a network of nodes. There are roughly four complete networks with each network containing five to seven nodes. Completing a network halts the Sweeping Terror debuff for a moment while you reposition for the next network. While this is happening, a pair of Psions spawn that summon a Tormentor when defeated. Destroying the Tormentor extends the Sweeping Terror timer.
Detailed walkthrough of Cataclysm
Begin by assigning two players the role of building the network. These players are responsible for handling the Field of Light buff, locating the next node in the network, and activating it. Standing in the aura and shooting the completed node (looks like a pearl) grants the 15 second Field of Light buff. The node will project a beam of light to the next node in the sequence.
Source: Shacknews
Locate the next correct node in the sequence; it will have a small, squishy orb floating above it. Stand on the plate and shoot the squishy orb to activate the node (turning it into a pearl-like sphere). This will consume the Field of Light buff. Find the node with the aura, go to it, refresh the Field of Light buff, and locate the next node. Repeat this process until the network is completed. You will know it’s completed because Sweeping Terror will disappear and the text “His hatred halts” will appear.
Only one node will have the aura that grants Field of Light. This node will change as you build the network.
Everyone else on the team is responsible for clearing enemies as quickly as possible. But more important than this is the killing of two Psions. A pair of Psions will appear, each one protected by a shield. Get inside the shield and defeat it. When the two Psions are gone, a Tormentor will appear, either on the inside of the arena’s curve or along the outside near the edge.
Source: Shacknews
Defeating the Tormentor will extend the Sweeping Terror timer by 35 seconds. This mechanic is simply to give the network builders time to complete their task. If they are quick enough, you won’t even need to defeat a Tormentor as the debuff will be removed.
The fight will progress around the arena, until you reach the opposite side. The faster you can build the network, the fewer Psions and Tormentors you will need to defeat. To make this easier for everyone, use a build that focuses on add control and clearing enemies. Suspending foes with Strand, using Shadowshot to generate Orbs of Power, Titans throwing hammers – whatever you’ve got that lets you clear the floor, use it. There will also be Barrier Colossus spawning throughout the fight.
Scission |
|---|
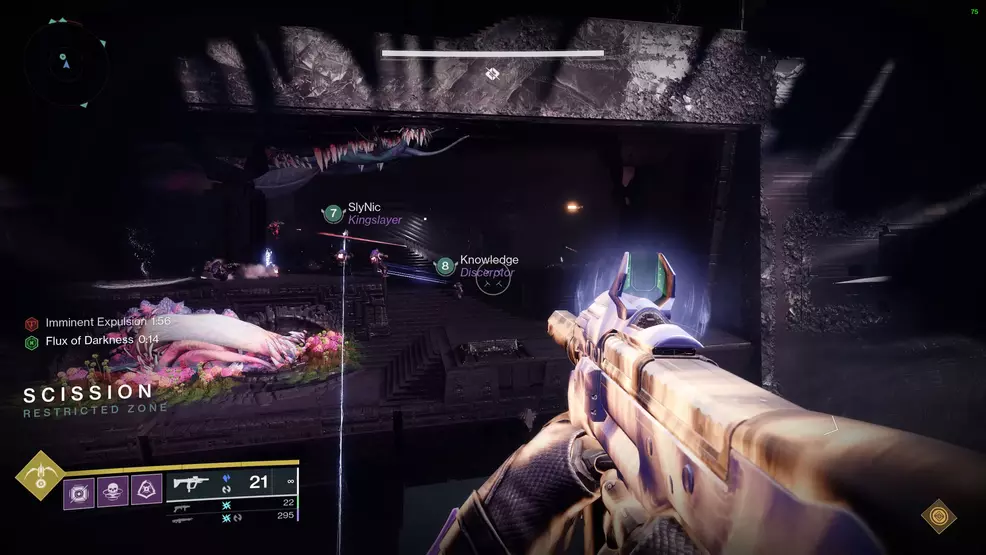
The goal of the Scission encounter is to create a network of nodes that crisscross the gap. There are three levels, each with a network of nodes.
- Collect Field of Light or Flux of Darkness and cross to the other side and activate the node
- Cross back to the starting side and activate the next node, repeat until all nodes on a level are connected
- Use the piston at the end to reach the next floor and repeat the process
The Scission fight builds upon the node mechanic introduced in the first encounter. Here are the mechanics:
- Field of Light / Flux of Darkness: A 15 seconds buff that allows a player to activate the next node. Buff is acquired by standing within the glowing aura and shooting the node. Shooting the next node in the sequence consumes this buff. The buff also allows players to damage the Redolence of Splendor enemies. Buffs cannot activate a node of the opposite color.
- Node: A series of nodes that are activated by shooting it while standing on its plate while also having a Field of Light or Flux of Darkness buff. Activating a node consumes the Field of Light / Flux of Darkness buff.
- Imminent Expulsion: A timer that will wipe the team. Timer disappears when both networks are completed.
- Redolence of Splendor / Redolence of Decay enemies: Unique enemies that can only be damage when a player has the Field of Light / Flux of Darkness buff.
- Pistons: Used to cross the gap. Shoot the shard to activate the piston. The piston at the end of a level activates once its network is built.
- Disruption: Removes the Field of Light / Flux of Darkness buffs. Occurs when an aura node is shot when a player with the buff is moving to activate the next node in the network.
While the mechanics may sound complex, the Scission encounter is rather straightforward. One player on each side will jump back and forth across the gap, activating nodes. The other players push forward, defeating enemies as they spawn. When a network is completed, use the piston at the end to launch up to the next floor and do it again.
Detailed walkthrough of Scission
Begin by splitting the group in half, sending three players left and three to the right. One player on each side is responsible for that side’s buff. Left has the Flux of Darkness while right has the Field of Light. Their job is to grab the buff, use the pistons to launch to the opposite side, activate the node, and launch back to refresh their buff. This is because the network of nodes crisscrosses the gap like a zipper or stitch.
Source: Shacknews
The player jumping the gap acquires the buff, stands in front of the piston and shoots the shard, lands on the other side, then finds and activates the node. They then return to their starting side to refresh the buff and locate the next node. This repeats until both networks are constructed.
Meanwhile, the other players are responsible for clearing enemies. Each new wave of enemies will bring with it a Redolence of Splendor that can only be defeated when you have a buff. Stand near the aura node so you can get it when your gap jumper returns to refresh their buff.
When a network is completed, a Major Redolence of Splendor will spawn. As with the minors, this one can only be damaged when you have a buff. Additionally, Barrier Colossus enemies will spawn at the far side. When the Major is defeated, a shard will appear for the piston at the end. Launch to the next level and repeat the process.
Source: Shacknews
There are a lot of different strategies that can be implemented to speed this encounter up or make it easier. Use whatever works for your team. However, for my Day One clear, we found great success with the following method that had one additional player activating nodes for their respective side.
Of the two players that are clearing enemies, have one assigned to shoot the node to collect the Field of Light buff. When the gap jumper confirms activation of the node across the gap, this other player should grab the buff, move forward to the next node in the sequence, and activate it. Meanwhile, the gap jumper will return to their original side, refresh the buff, and go back across to get the next node.
This method means that as the gap jumper is returning to their home side, their allies are already activating the next node in the sequence. The gap jumper only needs to refresh their buff and jump back across the gap instead of refreshing buff, activating node, refreshing buff, and then jumping across.
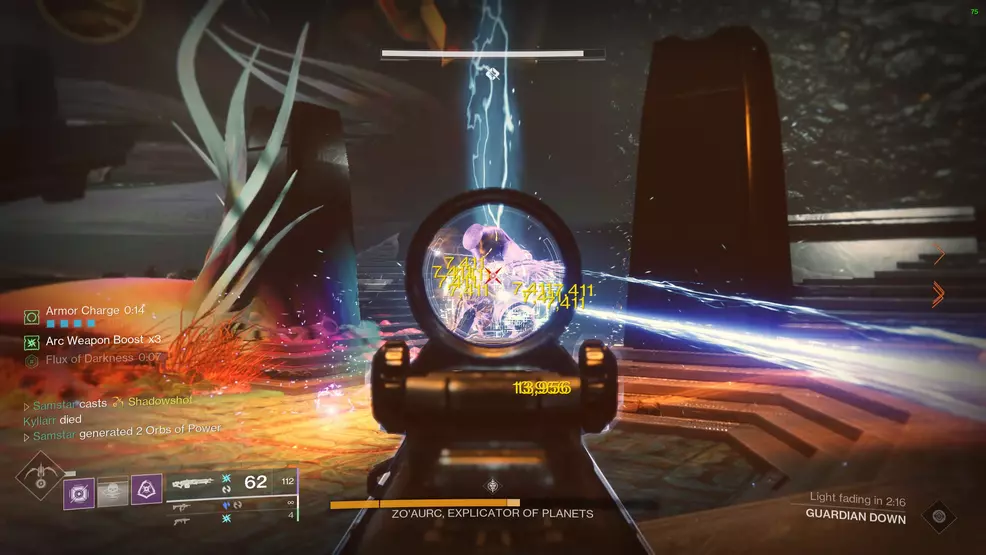
Zo'Aurc, Explicator of Planets (Macrocosm) |
|---|
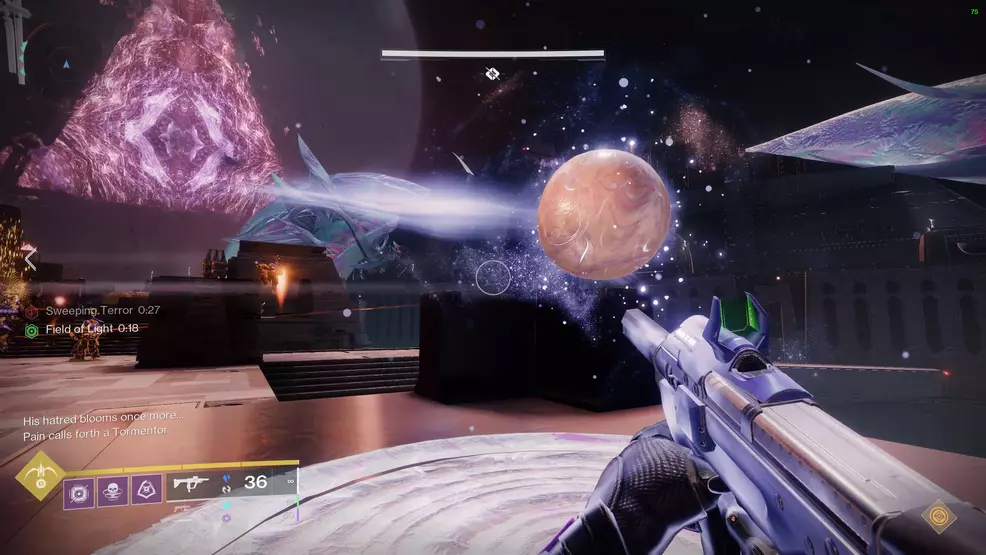
The fight in the Macrocosm against Zo’Aurc, Explicator of Planets, is all about finding the odd one out planets and swapping them to the other side of the room. Then, grabbing three planets and taking them to the middle for a damage phase.
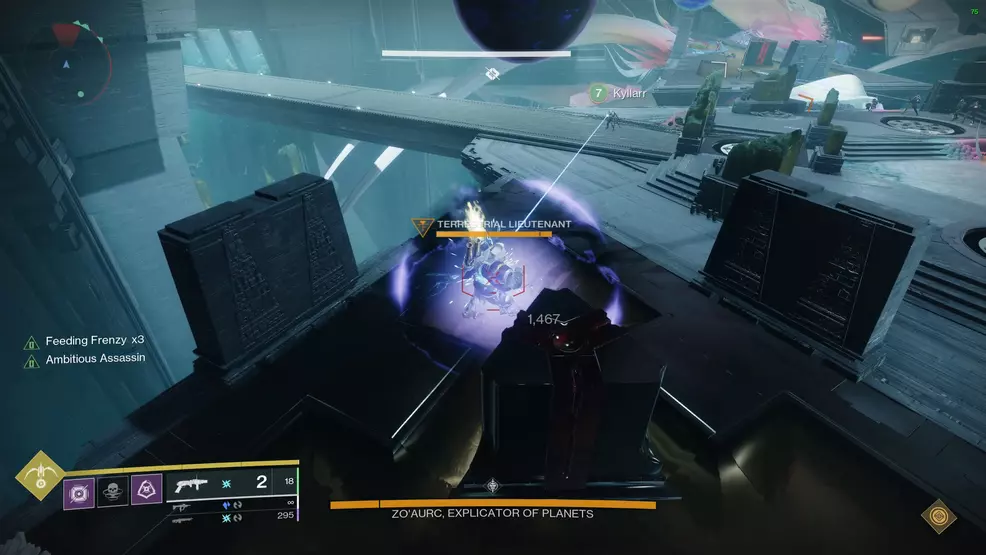
- Defeat Honored Centurions to spawn Terrestrial Lieutentants, defeat them to get Planetary Insight
- Call out odd one out planets and take them to the opposite side of the room (left all Light, right all Darkness)
- Defeat enemies, defeat Lieutenants, call out three planet colors in the middle
- Collect planets and deposit them into correct positions
- Deal damage to boss while standing below planets that correspond to its shield
There are a lot of Planetary-related on-screen words during the Zo’Aurc, Explicator of Planets fight. Here are the mechanics of the Macrocosm encounter:
- Planetary Insight: Ability to see the planet’s color, either Light or Darkness. Acquired by defeating Terrestrial Lieutenants.
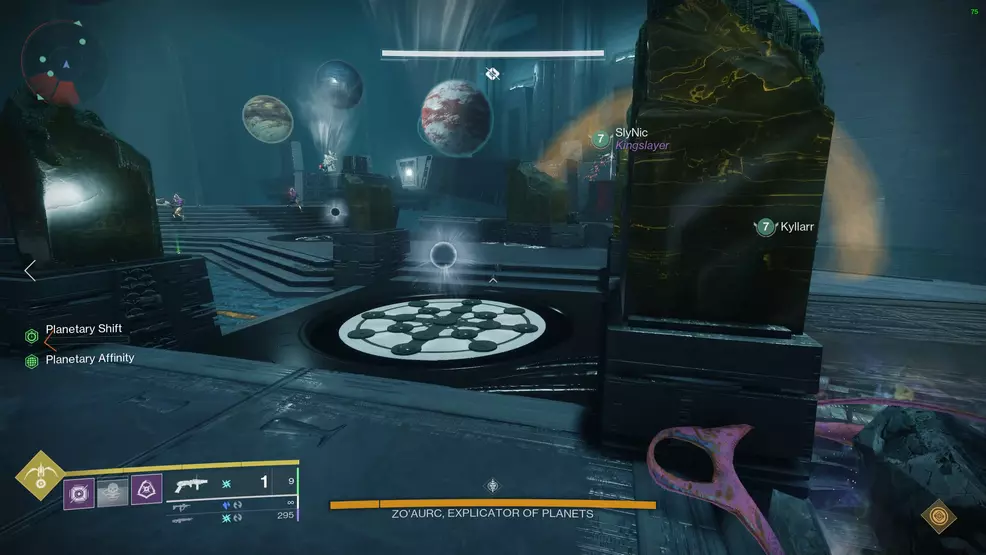
- Planetary Attunement/Alignment: On-screen text when standing below a planet. Attunement is when grabbing a planet, Alignment is when you’re delivering a planet.
- Planetary Affinity: Holding a planet as you take it to another location.
- Planetary Shift: The time you have to place a planet in another location.
- Field of Light / Flux of Darkness: A 7 second buff that grants bonus damage to the boss. Acquired by standing below the planets
- Shard: Shoot to speeds up the processes of the encounter. If all planets are inserted, shoot it to move to the index phase. If you miss a planet, shoot it to move to the Centurion/Lieutenant phase.
Defeat Lieutenants to see the true colors of the planets. Take the Light planets from the right side and deposit into the left side. Take the Darkness planets from the left side and deposit into the right side. Planets are deposited wherever its counterpart was taken. Planets will switch and lock in. Defeat Lieutenants again to see the color of the planets in the center (two Light and one Darkness or two Darkness and one Light). Take any planet from the side and put it into its correct plate location. Stand on plate that matches the bosses’ shield to deal damage. Move to the next plate when needed. Repeat until the boss is defeated.
Detailed walkthrough of Zo’Aurc, Explicator of Planets, in Macrocosm
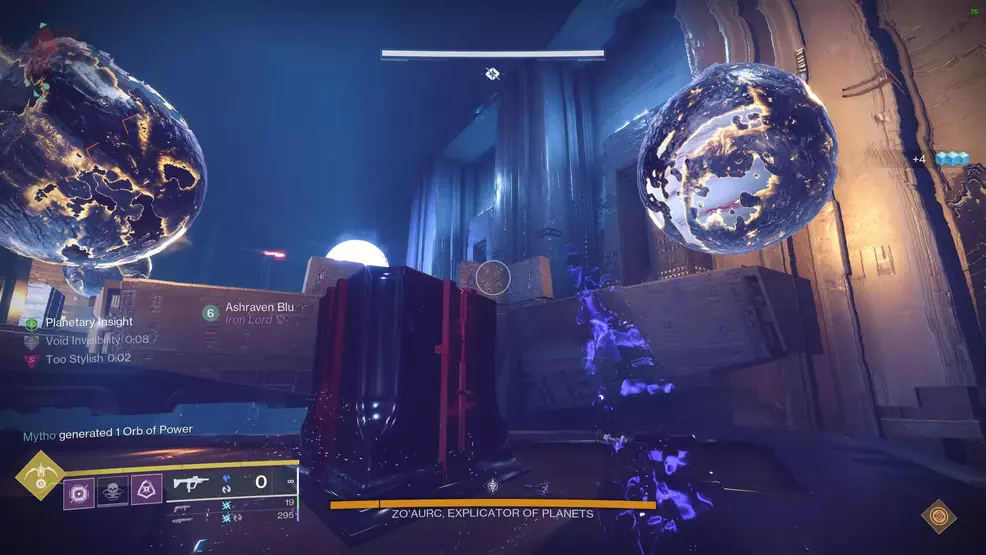
The arena against Zo’Aurc is split into a few distinct sections. Along the left and right are triangular platforms with a planet above each corner. In the middle are three planets floating in a formation that matches three plates on the ground.
Begin by assigning four players to swap the planets. One pair will swap the close planets while the other pair will swap the far ones (low and high triangular platforms). The last two players are on enemy-clearing duty.
Source: Shacknews
Defeating Honored Centurions will spawn Terrestrial Lieutenants. Getting the killing blow on a Lieutenant will give that player the Planetary Insight buff (a Lieutenant’s buff will only let you see the planets on its side). Look at the planets and call out the position of the ones that do not match. The right side will have two Light planets and the left side will have two Darkness planets as the odd ones out.
Source: Shacknews
Stand below the odd one out planet and interact with it to “pick it up”. Cross to the other side of the room and deposit it wherever your partner picked up their planet. For example, if they grabbed it from the lower corner, you must place yours in the lower corner.
When all four planets are slotted in and essentially swapped to their correct sides (all Light on the left, all Darkness on the right), then the planets will be indexed. This is confirmed by the on-screen message: The indexed planets reveal themselves.
At this point, clear enemies again, defeat the Honored Centurions and then the Terrestrial Lieutenants. The player with Planetary Insight can now see the true color of the three planets in the center of the arena. There are only be two patterns: two Light and one Darkness or two Darkness and one Light. The position of the planets corresponds to the plates on the ground.
Source: Shacknews
Collect any planet from the sides of the room and deposit it into the matching plate. For example, if the left planet is Darkness, it needs a Darkness planet deposited into the left plate. If the middle planet is Light, it needs a Light planet deposited in middle plate. Remember that at this point, all the planets on the sides of the room will be grouped together: all Light on the left, all Darkness on the right.
Source: Shacknews
When the planets have been deposited, a damage phase will begin. Stand on the plate that matches the boss’ shield to deal increased damage. When the boss is immune, go to the next plate. Repeat until all the plates are done.
At each plate, you must deal enough damage to reach the notch in the boss’ health bar. If you fail to reach this notch, you will not be able to use all plates. Furthermore, the boss’ shield always alternates between Light and Darkness. It starts and ends on whichever color has two.
Repeat the whole process until you reach the final stand. At this point, you will still need to stand on plate that matches the boss’ shield to deal increased damage.
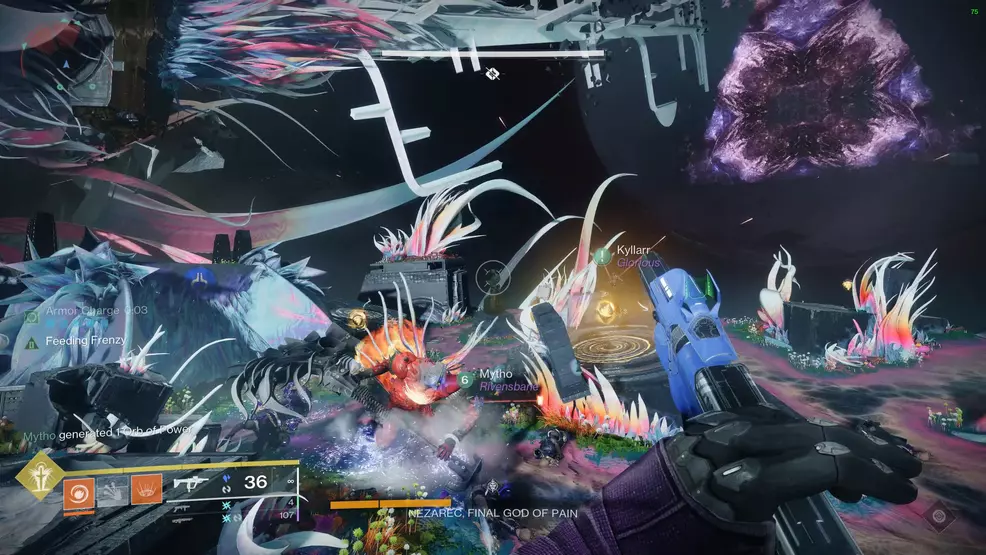
Nezarec, Final God of Pain |
|---|
The last encounter in Root of Nightmares is against Nezarec, Final God of Pain. This encounter is about creating a network of nodes, stunning Nezarec by shooting his weak points, and dealing damage.
- Collect Field of Light and Flux of Darkness and complete both networks of nodes
- Meanwhile, shoot Nezarec’s weak points to stun him, changing his attacks and preventing his wipe mechanic
- Group up and deal damage to Nezarec after shooting his chest once more
The node mechanic returns for the final fight, though it has evolved to include a Refuge effect. Here are the mechanics to keep in mind during the Nezarec fight:
- Field of Light / Flux of Darkness: A 15 seconds buff that allows a player to activate the next node. Buff is acquired by standing within the glowing aura and shooting the node. Shooting the next node in the sequence consumes this buff. Taking a buff to an opposite node creates a Refuge.
- Node: A series of nodes that are activated by shooting it while standing on its plate while also having a Field of Light or Flux of Darkness buff. Activating a node consumes the Field of Light / Flux of Darkness buff. A line points from an activated node to the next one in the sequence.
- Light’s Refuge / Darkness’s Refuge: An aura that protects you from Nezarec’s wipe mechanic. Light is created by taking Darkness to a Light node. Darkness is created by taking Light to a Darkness node. The color of Nezarec’s shoulder when it breaks dictates the Refuge you need.
Create two full networks of nodes, one made of Light and one made of Darkness. Continually break and damage Nezarec’s weak points (shoulders and chest) to get him off his platform, interrupt and change his attacks, and delay the team wipe. Group up and deal damage to Nezarec after both connections are made and he’s been blasted with a beam. Create a Refuge to protect yourself from Nezarec’s wipe mechanic if necessary.
Detailed walkthrough of the Nezarec fight
Start the Nezarec encounter by having two players create the two networks of nodes. The faster they create the networks, the sooner you will get to the damage phase. The Light nodes are on the left and the Darkness nodes are on the right.
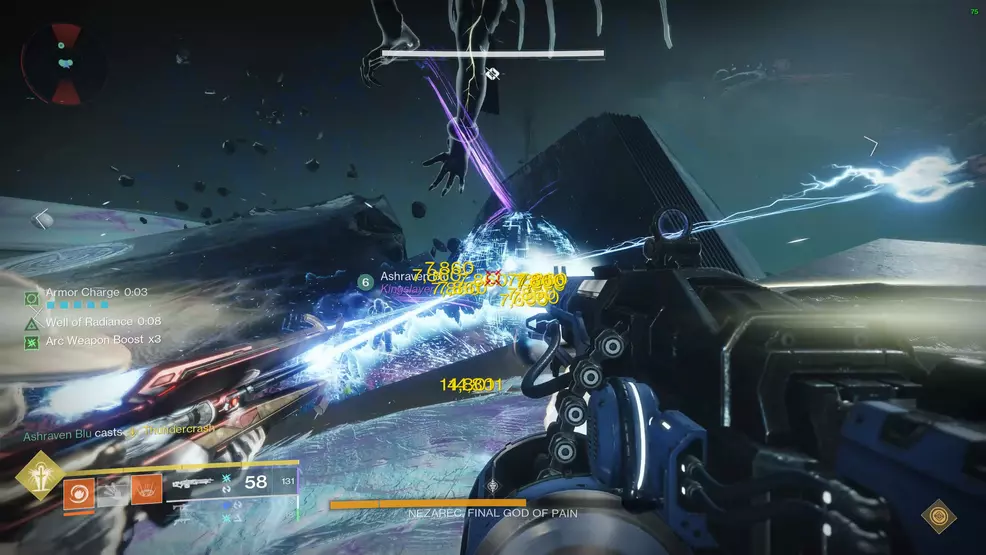
While this is happening, Nezarec will be standing up on his platform and then roaming around the battlefield. Nezarec begins roaming once his shoulders and chest are shot while he’s up on the platform.
Source: Shacknews
When roaming, he must be stunned by shooting his chest. If you fail to stun him, Nezarec will perform a team wipe. This wipe can only be survived by standing in a Darkness’s Refuge or Light’s Refuge (created by taking a Field of Light to a dark node or a Flux of Darkness to a light node – more on this below).
Nezarec will perform his team wipe mechanic if you take too long to build both networks. Avoid this by building the networks quickly, entirely skipping the need to use a Refuge.
Source: Shacknews
When both connections are completed, group up on a platform (we used one on the left). Once Nezarec is blasted with a beam of light the proper damage phase will begin. At this point, unleash on him. For our day one clear, we utilized Gjallarhorn and Legendary Rockets as well as Starfire Protocol Warlocks with Fusion Grenades. It’s also important to debuff Nezarec with Nightstalker Shadowshots or Void weaken grenades. Thunderlord and one Divinity does wonders here too. As soon as Nezarec goes immune, reset your positions and repeat the process.
On subsequent rounds, the building of the networks and Nezarec’s chest cracking must be done even faster. The time between the start of a phase and him doing his wipe mechanic is much tighter. Build the network quickly to skip this mechanic, failing that, you should build a Refuge.
Source: Shacknews
To create a Refuge, you must know the color of Nezarec’s shoulder when it breaks. As it breaks, he will glow either white or dark. This indicates the protection you need.
- If his shoulder is dark, you need a Darkness’s Refuge: take a Field of Light buff to a Flux of Darkness node.
- If his shoulder is light, you need a Light’s Refuge: take a Flux of Darkness buff to a Field of Light node.
The buff cannot be taken to an aura node of the opposite buff. Take it to a node that has already been created.
This will create a safety zone similar to the one you used to get through the jumping puzzle right before the fight. Stand in this aura to get a buff that lasts for 15 seconds. You can return to the node to refresh your buff. This will protect you from Nezarec’s wipe but not from his attacks or other foes’ attacks. If you use this buff to survive a wipe, Nezarec will jump back up to his platform and you’ll need to crack his weak points again.
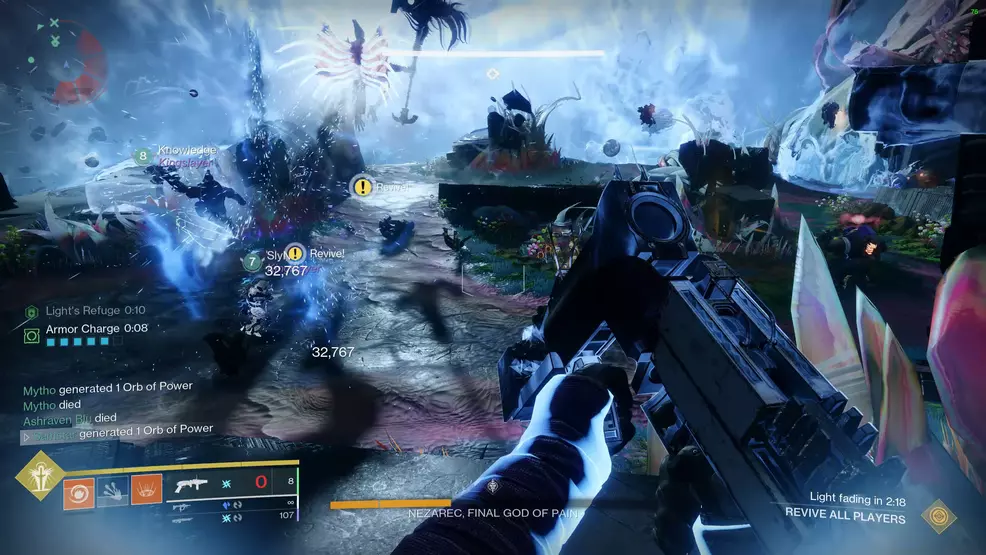
Nezarec also has a final stand. There’s not much to be said about this other than you’ll need to knock his health down or he’ll wipe your team. Try and save some Heavy ammo for this or even a one-and-done Super.
The Root of Nightmares raid is a pinnacle Destiny 2 experience offering players a power fantasy of smashing through tons of enemies and enticing rewards. Check back with us as we continue to update this guide with new weapon recommendations and ideal strategies. You can also find more help with other raids on our Destiny 2 strategy guide.

-
Shacknews

 reply
replyBill Lavoy and Sam Chandler posted a new article, The Root of Nightmares raid guide - Destiny 2
