
Outbreak Perfected Exotic Pulse Rifle - Destiny 2
Learn everything you need to know about the Outbreak Perfected Exotic Pulse Rifle in Destiny 2.
Added with Destiny 2 update 2.2.2., the Outbreak Perfected Exotic Pulse Rifle is the newest Exotic weapon to join the ranks of Destiny 2’s Exotics. The Outbreak Perfected Prime appears to be an upgraded version of the original Destiny’s Outbreak Prime, and this SIVA infused weapon is just waiting for players to unlock it and add it to their collections. This guide will walk you through the entire process from start to finish.
How to get the Outbreak Perfected Exotic Pulse Rifle
There has been a lot of information going around, especially on Reddit, with many users trying to figure out the exact method with which you can kick off the quest for the Outbreak Perfected Exotic Pulse Rifle. Naturally, there are always differing opinions when it comes to new Exotic quests list this. The method that I’ll be describing below was completed twice on two different characters with varying levels of game completion. Let’s gets started.
Outbreak Perfected Exotic Pulse Rifle quest steps
- Complete Destiny 2 main campaign
- Complete Enemy of My Enemy
- Get the Fallen Transponder
- Decrypt all six Nodes on the Fallen Transponder
- Find the Rendezvous site
- Complete Zero Hour mission
Complete Enemy of My Enemy
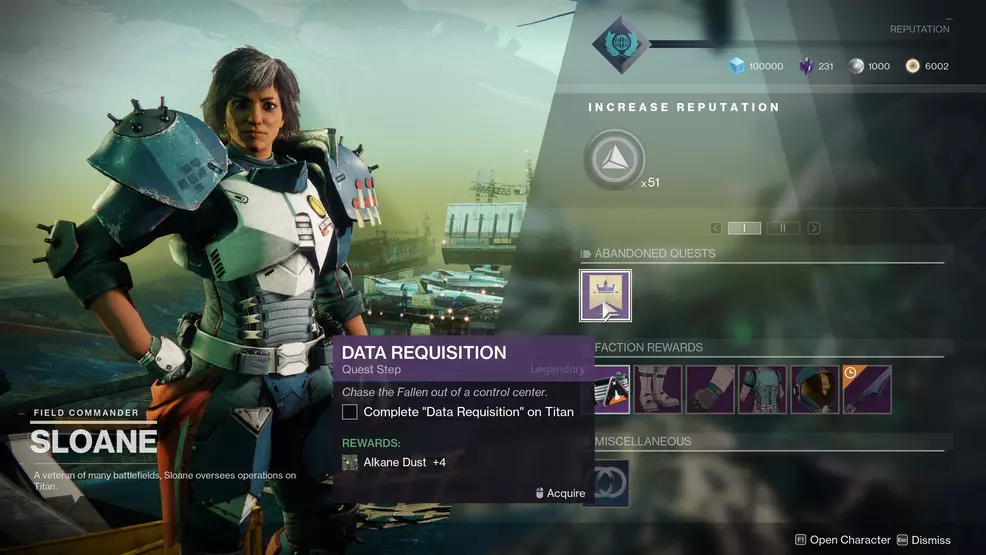
First, you’re going to need to complete a series of missions and unlock the quest for the Rat King Exotic Hand Cannon. To do this you’ll need to have completed the main campaign in Destiny 2. This will allow you to pick up the mission Enemy of My Enemy from Sloane on Titan. The missions have a recommended level of 290 and are quite easy to knock out when you’re already leveled up for the latest DLC. Just for record keeping, I completed this step of the process with a character that was above Power Level 600, as well as one that was Power Level 462. Luckily, Power Level doesn’t play a big part in this step, aside from the overall difficulty of the missions themselves.
I had actually abandoned the quest line earlier in my Destiny 2 playthrough, so make sure you check with Sloane and talk to her if you don’t remember completing it and don’t have the Rat King Crew’s quest step in your inventory.
Play through the Enemy of my Enemy quest steps until you reach the reactor room and recover the reactor. Here you’ll actually encounter a Fallen Captain named Mithrax, as well as a Hive Knight. It’s been speculated that you have to keep the Mithrax alive (if you don’t attack him, he does not attack you) in order to be able to unlock the door to the room that holds the Fallen Transponder. However, during my testing, I killed Mithrax once, but saved him the next time. It didn’t change anything about the Exotic Quest drop, which means it isn’t directly tied to whether he lives or dies.
After grabbing the reactor, return to Sloane and talk to her to bring the Enemy of my Enemy quest line to an end. This will also reward you with the Rat King’s Crew quest step, which you need to obtain the Rat King Exotic Hand Cannon. Now you can move on to the next part and acquire the Fallen Transponder.
Get the Fallen Transponder
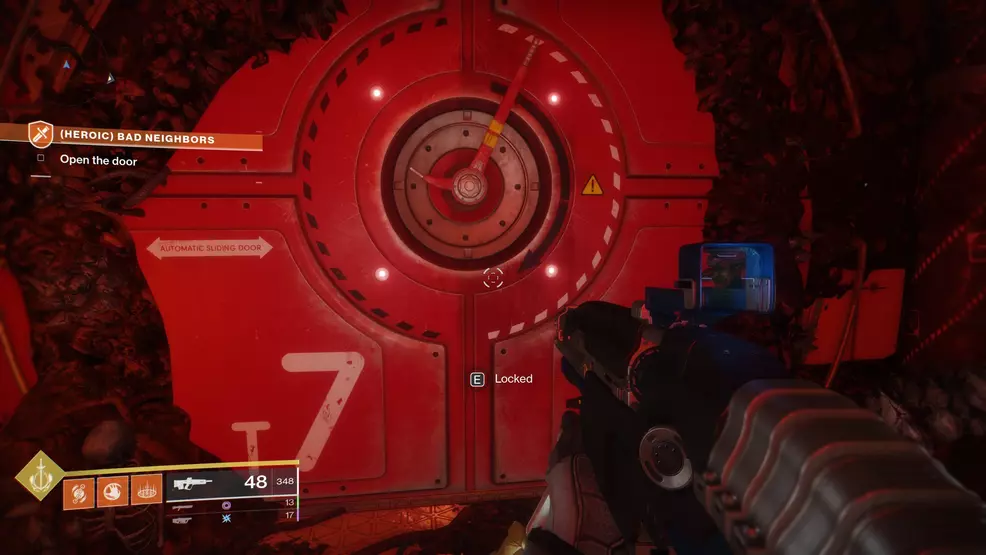
The first actual part of the quest to get the Outbreak Perfected Exotic Pulse Rifle is to find and collect a Fallen Transponder. This item can be found on Titan. Many have advised that you need to complete this portion of the quest in the Heroic version of the Adventure, Bad Neighbors. However, I was able to access the room where the Fallen Transponder is found in both the Adventure and normal free roam Patrol.
Either way, spawn in at Titan and make your way towards Tidal Anchor. This is the area directly south of The Rig on Titan. Head across the massive bridge and continue down the path until you pass through some Hive gunk and come to a long hallway-like room with either a Wizard or a Shrieker. It doesn’t appear to matter which enemy is in the area, you just need to kill it.
With the enemy killed, continue through to the small area beyond the corridor. Here you will have a door to the left as well as a large door in front of you. Many players will probably notice that this is the same door that you use to enter the Command Center in the Enemy of my Enemy mission. If you’ve come here before completing the Enemy of my Enemy quest line, the door will be locked. Now, with the mission steps completed, it should be unlocked.

Open the door and head inside, passing through one of the doors on the sides. This will lead further into the control room. The Fallen Transponder can be found in a box of junk further in the room along the right-hand side of the various control booths. Pick it up and you’ll unlock the first step of the quest to obtain the Outbreak Perfected Exotic Pulse Rifle.
How to complete the Fallen Transponder

If you open up the details of the Fallen Transponder in your inventory, you’ll learn that there are six nodes that you need to complete. Each node has a riddle attached to it, which gives you a small clue as to where you’ll find the information you need to decrypt it. Thankfully, you won’t have to solve these riddles yourself, as we’ve outlined everything you need to do to find them below, as well as included handy gifs that should make the process much easier.
Each of the six Nodes that you need to find are hidden in a Lost Sector. You do not need to defeat the boss of each Lost Sector. In fact, for the purpose of this guide we actually ran through each of the Lost Sectors without completing them to ensure you could do so. We had no issues collecting all of the Nodes.
Node 1: The Drain, EDZ
The first node can be found inside The Drain Lost Sector in the EDZ. This particular Lost Sector is found in The Outskirts, so make your way there and into The Drain. The easiest way to reach this particular Node is through the back entrance of the Lost Sector. It’s located at the bottom of a cliff area outside the underground structure featured in this Lost Sector.
Node 2: Whispered Falls, EDZ
The next Node can be found in the Whispered Falls Lost Sector in the EDZ. This Lost Sector is also found in the Outskirts region. Make your way there and then traverse through the Lost Sector until you reach a ledge that drops off. Continue straight off the edge and then stick to the right, following it through to a area with a greenish glow. The node can be found inside of this little cubby hole and to the left.
Node 3: Atrium, EDZ
The Lost Sector that holds this Node can be found inside of the church in Trostland. Look for the entrance to the Lost Sector near the back of the church. Drop down into it and continue through the main pathway, following it down until you reach a room with several enemies. Continue past the enemies, taking a left through an archway that leads off a small drop. Immediately turn to the left and look for this Node in the back corner of the small room with the bunkbed below.
Node 4: Widow’s Walk, EDZ
To find the fourth Node, players will need to make their way to the Widow’s Walk Lost Sector in Trostland. This one is a bit trickier to find. From the Trostland spawn, follow along the left side of the church until you spot the Lost Sector sign on a couple of boards blocking one of the old shop windows. Head inside the sector and follow it through. Keep moving through this Lost Sector to the massive area where you fight the boss and the main group of enemies in this sector. The Node can be found inside a destroyed room to the right of the boss chest at the end of the Lost Sector.
Node 5: The Carrion Pit, Nessus
To find the fifth Node, players will need to make their way to Nessus. Here they will want to spawn in the Exodus Black area. Immediately follow the path to the left from spawn and make your way to the Glade of Echoes. Here you can find this Lost Sector in the debris that lines the area.
Head down into the Lost Sector and make your way through it. This Node is a bit trickier to get to without fighting through the enemies, so don’t be afraid to take some time and clear them out first. Continue through The Carrion Pit until you reach the very end. Along the right-hand side of the area is a small cubby hole that you can jump into. You’ll need to time your jump correctly, though, as you have to jump out and around a portion of wall to access the Node.
Node 6: The Rift, Nessus
Finally, the sixth Node can be found in The Rift, a Lost Sector found in the Exodus Black region on Nessus. Spawn at the Exodus Black spawn, then immediately look out for the Lost Sector sign on some debris along the far side of the wall. Make your way over here and into the cave. Follow it through until you come out to a massive cavern. At this point, look out for a pillar on your left that you can jump to, and then use that to jump across a large gap to another platform on the left-hand side of the room. Here you’ll find a small alcove that you can jump and then crouch into. The last Node can be found here.
Find the Rendezvous
Now that you’ve decrypted all six of the Nodes, you can hover over the center of the Fallen Transponder to view a long string of numbers and letters. Here is the string:
1((3000)o20)(JS01)((3000b2))(EA3Q)((3000) r20)2((3000)p18)(WJOS)(3000)(1J0E)(3000)( AT3W)(3000)(XW3G)((3000)k18)3((3000)a16 )(JE0A)(3000)(TZOX)(3000)(WJOS)(1J3B)(30 00)(AT3W)(3000)(XW3G)((3000)k16)4((3000 )a14)(JE0A)(3000)(TZOX)(3000)(WJOS)((300 0)a4)(JE3X)(3000)(TZ3U)(3000)(WJ3P)((300 0)a14)5((3000)b12)(EAOT)(3000)(ZXOW)((30 00)b6)(00Q7)((3000)a6)(JE3X)(3000)(TZ3U) ((3000)o12)6((3000)b10)(SI0J)(3000)(EAOT)( (3000)r4)(XWOJ)(S13G)((3000)w4)(ATOZ)(X W3G)((3000)k3)(IJ3B)(3000)(AT3W)((3000)p 10)7((3000)o8)(JS01)(3000)(JE0A)((3000)14)( ZXOW)(JS3F)(JE3X)(3000)(TZ3U)(WJOS)(30 00)(1J0E)(ATOZ)(XW3G)((3000)k3)(1J3B)(300 0)(AT3W)((3000)p8)8((3000)o6)(JS01)(3000) (JE0A)((3000)14)(ZXOW)(005J)(005S)(0051)( 005J)(EA3Q)(ZX3T)(3000)(JS01)(JE0A)(005 T)(005Z)(005X)(005W)(JS3F)((3000)b4)(EA 3Q)(3000)(ZX3T)((3000)b6)9((3000)k4)(1J0 E)(3000)(ATOZ)((3000)p12)(WJOS)(0051)(00 5J)(EA3Q)((3000)02)(XW3G)(3000)(S13G)((3 000)w4)10((3000)s5)(TZOX)((3000)o32)(JS3 F)((3000)b5)
Thanks to Reddit user u/TheFerntuckian for copying out the string from the game. Unfortunately, nobody has really decrypted what the meaning of these numbers are. However, all hope is not lost, as players happened to stumble across the next step.
To find the Rendezvous, players will need to make their way over to The Farm, the very first social area that you were able to explore in Destiny 2. Here you’ll find a now opened basement door along the right-hand side of the massive building where most of the NPCs have always resided. If you head down the stairs here and follow the path down, you’ll reach a dark room. At the end of the dark room, crouched behind some old bookshelves, is Mithrax, the Fallen Captain that you encountered during the Enemy of My Enemy missions. It seems that Bungie has decided he should be alive no matter what choice you made in the previous missions. Interacting with Mithrax will launch you into a new mission called Zero Hour.
Complete Zero Hour
Check out our Zero Hour mission guide, a separate article that details every puzzle solution and the fastest way to get to the boss room. This is an extremely challenging mission, so make sure you're prepared for a fight before you set off. Talking to Mithrax will immediately begin Zero Hour, so make sure your Fireteam is ready before you rendezvous with the Fallen Captain.
Zero Hour takes place in The Old Tower, and you’ll have to complete the entire thing in less than 20 minutes. The big kicker here is that all of the enemies in this mission are Power Level 690, which means you’re going to need to bring along your strongest friends if you want to succeed and unlock the Outbreak Perfected Exotic Pulse Rifle. When you have completed the mission, you’ll be rewarded with the Outbreak Perfected, allowing you to add it to your collection.
Completing this mission also unlocks the Zero Zour Heroic version, which adds a few more twists to the whole experience. You will need to finish the Heroic version if you want to get the Outbreak Perfected Exotic Catalyst.
We will, of course, continue to update this guide with more information if it becomes pertinent to the quest. For now, you should have everything you need to know to obtain the Outbreak Perfected Exotic Pulse Rifle in Destiny 2. You can also return to our Destiny 2 guide for more help completing the other Exotic quest lines in Bungie's hit shooter.

-
Shacknews

 reply
replyJosh Hawkins posted a new article, Outbreak Perfected Exotic Pulse Rifle - Destiny 2
