
Destiny 2 - Last Wish raid guide
A complete walkthrough of Destiny 2: Forsaken's Last Wish raid.
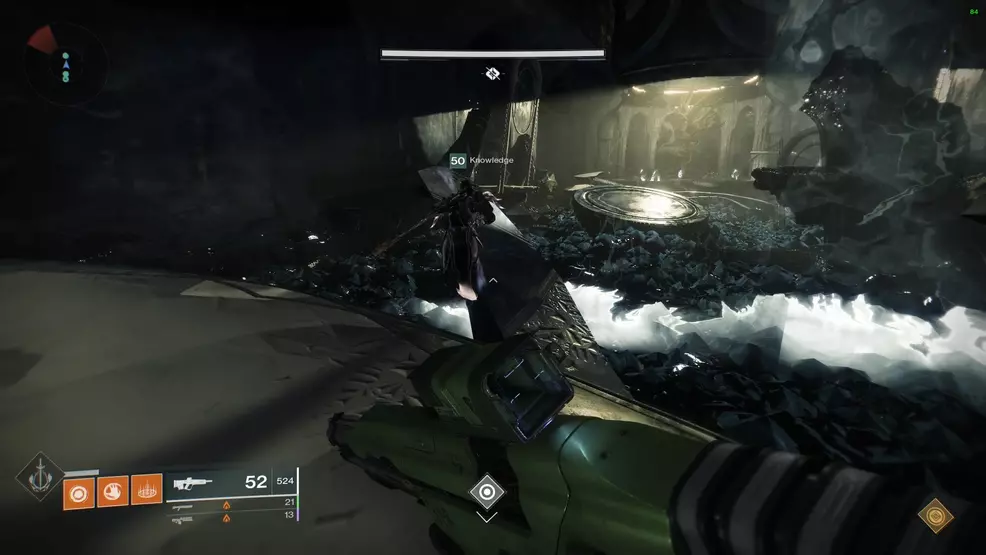
Last Wish is the first raid included in Destiny 2: Forsaken, and it is one of the most challenging raids in the entire franchise. This is a full-blown raid on the scale of Leviathan and the raids in the original Destiny, and the entire premise takes place shortly after the conclusion of the campaign.
Players are tasked with diving into the Dreaming City and slaying the beast that waits at the end, an Ahamkara, the last of its kind. Last Wish is a true end-game experience, requiring multiple weeks to prepare for, so those who are looking to raid should begin the process of grinding Powerful Engrams in order to level up. Players should take advantage of the Wall of Wishes and all of the wishes to unlock emblems and skip to specific encounters.
- Symbol Callout Guide
- Kalli, the Corrupted guide
- Shuro Chi, the Corrupted guide
- Morgeth, the Spirekeeper guide
- Vault guide
- Riven of a Thousand Voices guide
- Riven’s Heart guide
Last Wish
Before beginning the Last Wish raid, players should be well-prepared for what lies ahead. The first encounter has a recommended Power of 560, which is quite demanding for those who are not yet at an appropriate level. It’s possible to clear the encounter at a lower Power, but player skill will need to make up for any Power deficit. Furthermore, each encounter increases by 5 Power, with the final encounter requiring 580 Power.
What classes to take
As for the team composition and ideal weapon loadouts, a Nightstalker with tether is nigh essential for Orb of Light generation and add (enemy/mob) control. A Dawnblade Warlock with Well of Radiance is also critical for the overshield and increase damage output, as well as Lunafaction Boots – an extremely powerful Warlock Exotic. Titan’s should consider using the Sentinel class or Sunbreaker, as the ability to remain in their Super and clear adds is important for team survival.
What weapons to take
When players are a lower Power level the weapons that they take play a larger role, but as Power is accrued, there is more flexibility for experimentation. Because of this, players should take the time to unlock Sleeper Simulant (here are all Sleeper Node locations) and Whisper of the Worm. These two Exotic Power weapons are the two best options for dealing damage. As for the Energy slot, the Ikelos Shotgun is one of the highest DPSing guns in the game, but players can get away with using Badlander.
For the Kinetic slot, any weapon will do, though Midnight Coup is an obvious choice. For a Year 2 weapon, a Go Figure with good rolls is a great option (look out for a Go Figure with Outlaw and Rampage, as this is a god-tier roll). It’s also worth equipping it with a Minor Spec mod so it deals more damage to red-bar enemies.
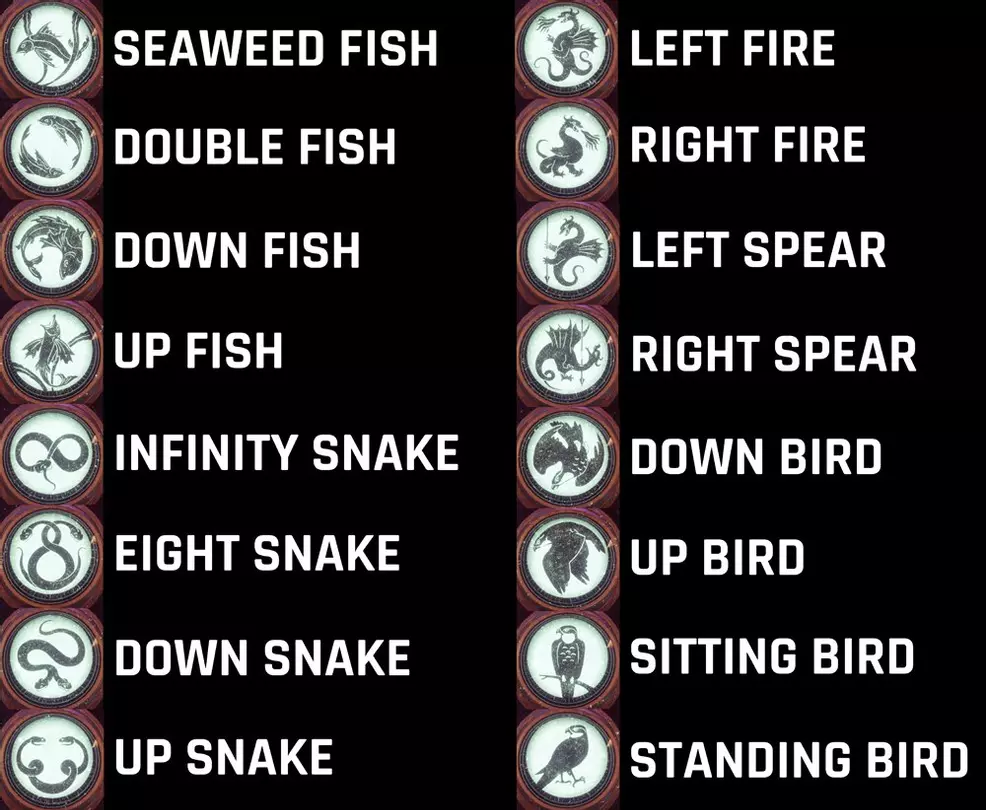
Symbol Callouts
As the raid progresses, more symbols will be added into the mixture. Be sure to refer back to this symbol callout graphic if your team is struggling to come up with what to call each of the sixteen symbols.
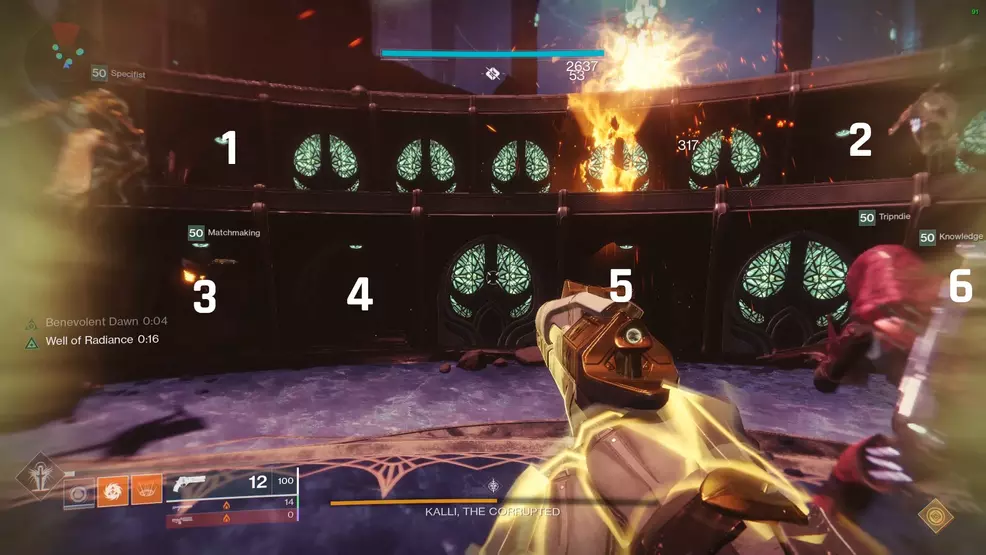
Kalli, the Corrupted – Power 560
Kalli, the Corrupted, is the first boss encounter in Last Wish, and although there are few mechanics, keeping track of what’s going on can become troublesome. The main elements to focus are pairing up with a partner and finding the plates that match the symbols in the center. The nuances of the fight will be elaborated upon, but for now, the main steps are:
- Take note of the 6 symbols around the middle sunken arena
- Find plates around the room that match the 6 symbols
- Stand on them until a Knight spawns, kill the Knight
- Group up in the middle and deal damage to Kalli
- Hide in the safe rooms to avoid wiping, exit to deal damage when possible, repeating this until the next phase begins
- Repeat process
Check out our guide on the Summoning Ritual challenge.
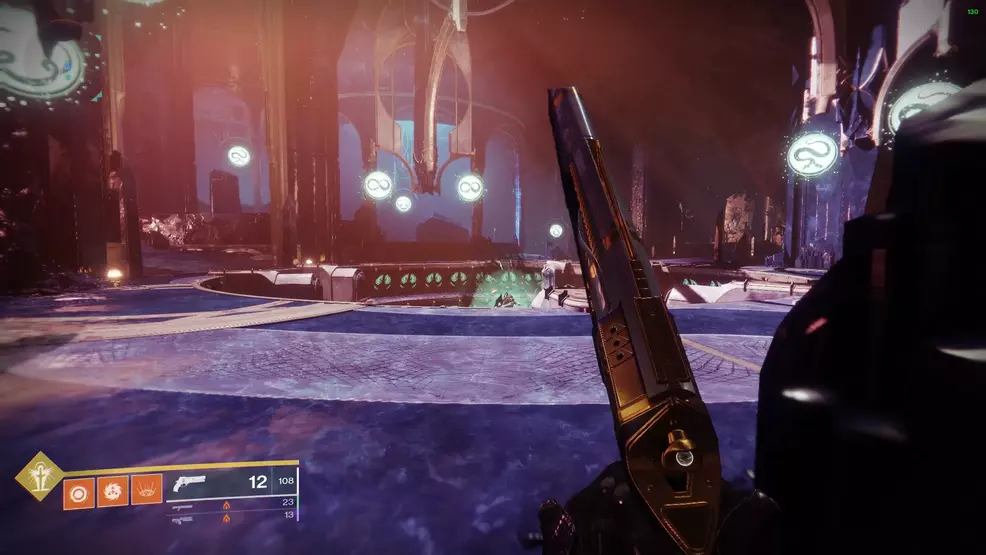
The room is split into three distinct sections, all centered on a middle, sunken arena and around this arena hang six snake symbols. Assign a symbol to a pair of players, and it is up to them to find the symbols hanging above the plates around the outside.
Players must then work together to stand on the correct plates, all while clearing enemies and avoiding Kalli as she teleports around the arena interfering. Each plate is split into three sections, and two sections at random will spawn a Taken bomb – standing on these sections will kill the player.
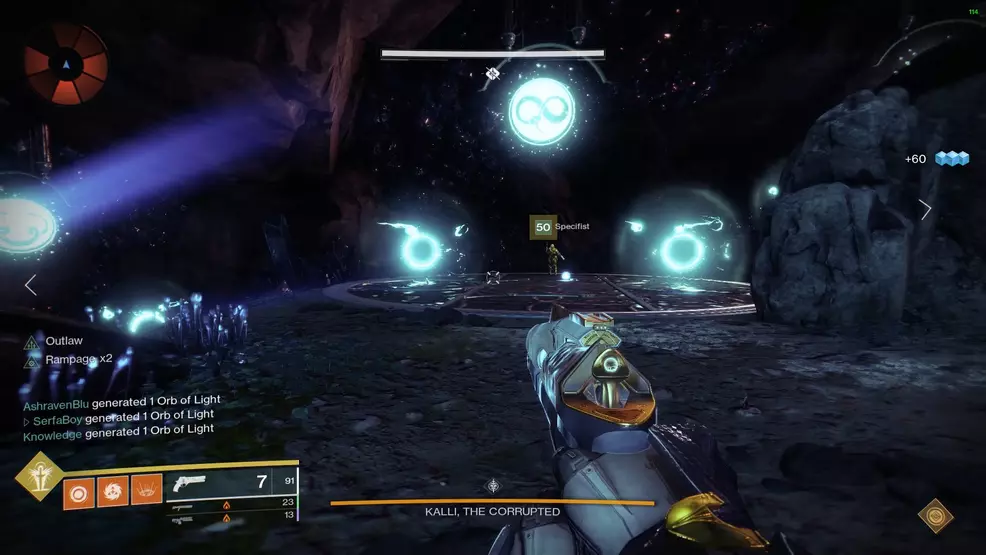
To successfully complete the plate section, players must stand on the clear section of the plate and wait for the Taken bombs to explode three times (or 4 if an error occurs) and then kill the Knight that spawns. Killing the knight marks the plate as “complete” and removes a symbol hanging from the center.
Players can choose whether to clear one plate and then clear the second of the pair or have each player go to one plate and clear it solo. It is obviously easier to clear a plate with two people, as it makes killing enemies far easier.
It’s important to note that an extra set of symbols can be found around the outside of the arena, hanging above a plate. If a player activates a plate whose symbol is not in the center, a Power 580 ogre will spawn, indicating the incorrect plate was cleared. For teams below Power 580, this constitutes a wipe.
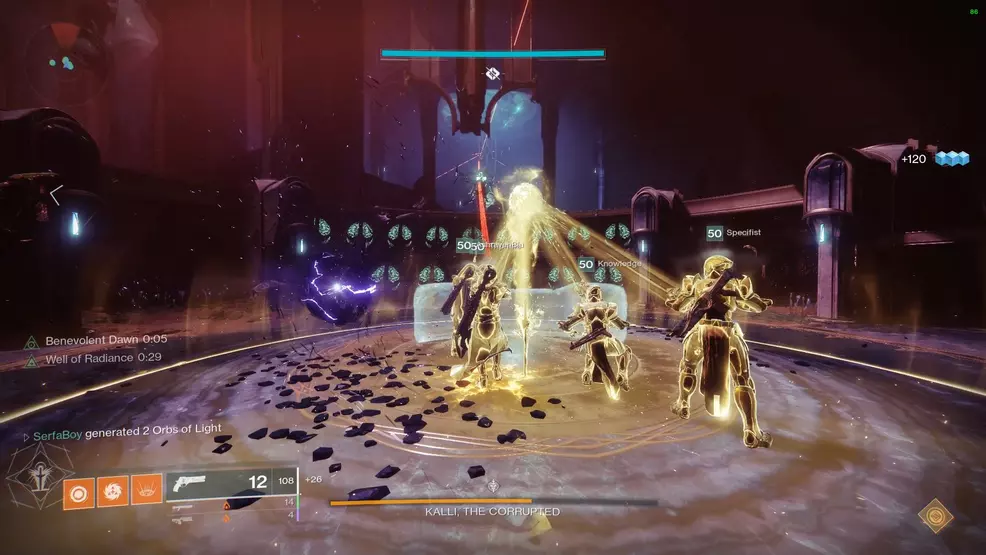
Once all six plates are cleared, all six symbols will be removed from the center and Kalli will enter a damage phase. Group up in the center and damage her as much as possible. After several seconds, an on-screen message will appear that states, “Kalli prepares to wield her weapon”, at this point six doors will open directly below Kalli and players will need to hide in one of these rooms to avoid wiping. An explosion will go off, the doors will open, and players will need to damage Kalli again. After every explosion, a group of Psions will spawn in the middle, this is a good opportunity for a Shadowshot Super. After dealing damage to Kalli, the same message will appear on-screen and players will need to hide in the new safe rooms that unlock below Kalli's new position. This process of hiding in a safe room occurs three times during the damage phase.
It’s important to note that for every correct Knight killed – resulting in a plate and symbol being cleared – three doors will unlock, granting access to the safe room during the wipe attack. This means that if a team fails to kill one of their Knights before the Kalli damage phase, three fewer safe rooms will be available.
After all three sections of the arena have been used for their safe rooms, the above process will repeat with different symbols. At this point, the pairs of players will need to quickly figure out what new symbols they are finding, locate the appropriate plates, and begin the process of clearing the plate and killing the Knight. This entire process repeats until Kalli, the Corrupted is killed or the team wipes.
Naming the symbols
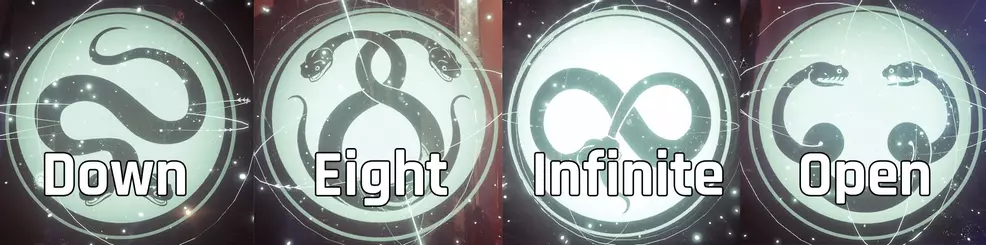
All the symbols use snakes, so creating names that can be referenced clearly during a fight can be difficult. The image shows the names my team used during the encounter, feel free to use them or choose your own.
Naming the three sections
Because it can be difficult to work out the layout of the room and what to name each section, a good recommendation is to label the left side “caves”, the right side “lights”, and the back area “stage”. Labelling them makes it easier for pairs to call out where the other symbol is during the various phases. Alternatively, use whatever naming method you prefer.
Assigning a safe room
Players have only a few seconds to pick a safe room and enter it before Kalli fires her team-wipe weapon, which is why it’s important to know what room to aim for at any given moment. A few popular methods is to split the team in half and assign one side to have the “top” rooms and the other to have the “bottom”. The downside to this is that sometimes only one room will spawn up the top or bottom, and players will need to work it out on the fly. To combat this, within the split, players can decide who will go left, mid, and right, and who will go up or down if there aren’t enough rooms.
An alternative is to assign players a number and that number corresponds to the safe room starting with the top left-most safe room being “one” and the bottom right-most being “six”. Pick a method or create one that best suits a given team.
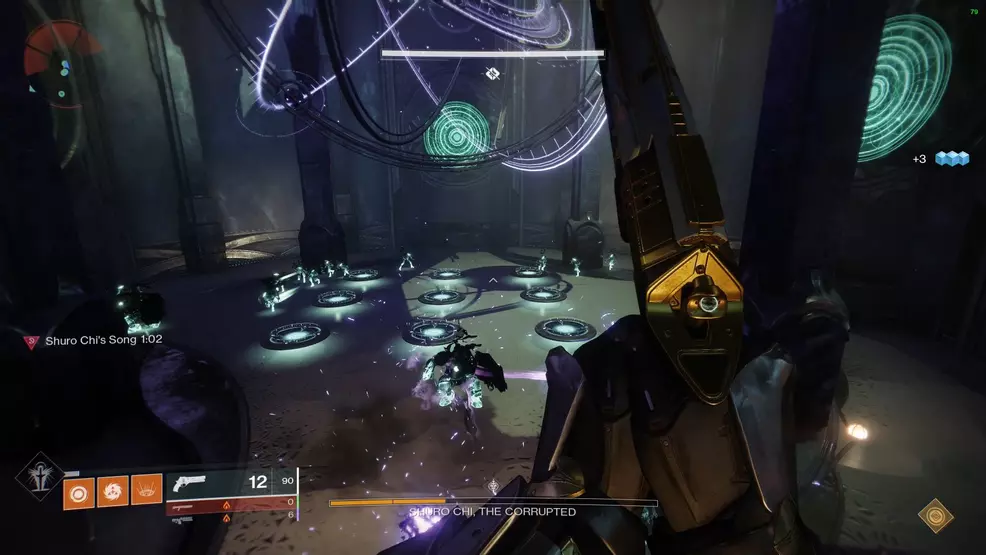
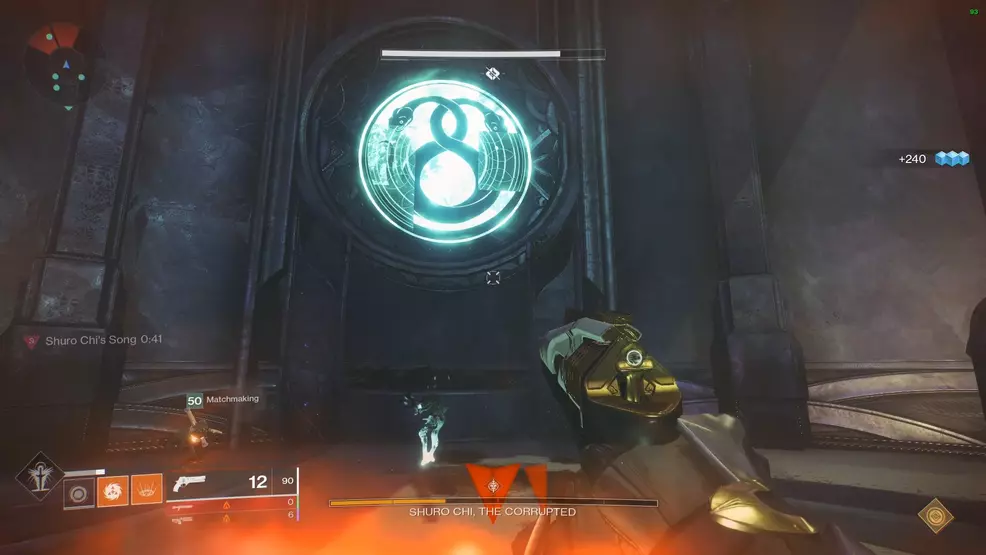
Shuro Chi, the Corrupted – Power 565
The fight against Shuro Chi, the Corrupted, takes place in 4 minute intervals whereby if players do not solve the puzzle room at the end of the 4 minutes, they will wipe. Upon completing the puzzle room, the 4 minute timer will reset. The nuances of the fight will be expanded upon, but for now the steps are as follows:
- Clear adds and approach Shuro Chi
- One player collects Eye of Riven
- Pick up Prism Weapon, jump on plate, and shoot player to the right to form a triangle to remove Shuro Chi’s shield
- Damage Shuro Chi until one segment of health is removed, player with Eye of Riven uses the Super to interrupt Shuro Chi’s team-wipe attack
- Enter puzzle room, two players clear adds
- Four players stand on appropriate buttons to complete the image, then do the next two in sequence
- Jump up the rotating half-spheres to next level
- Repeat process
Check out our guide on the Which Witch challenge.
As is evident, the Shuro Chi fight has a lot of moving parts, with a few more buffs and debuffs to contend with than the previous fight. Players will need to learn the spawn points of all the enemies, snowball Supers into other Supers, and be able to make on-the-fly adjustments.
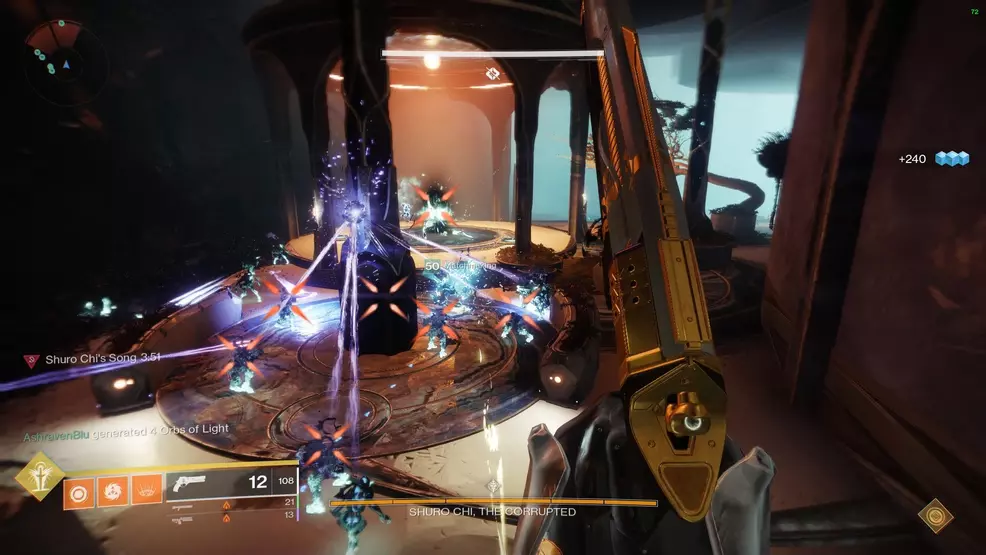
There are three main roles during this fight: Prism Weapon holders, Eye of Riven holders, and puzzle solvers. The Prism Weapon holders will be responsible for picking up and firing the lasers, the Eye of Riven users will need to time using the weapon’s Super to interrupt Shuro Chi, and the puzzle solvers will need to work together to solve the puzzle.
The entire fight takes place over three levels of the building, with the only difference being that on the bottom level Taken Thrall spawn, on the second level Taken Psions spawn, and on the top level Taken Acolytes spawn. All levels will have Taken Knights, a Taken Captain (Eye of Riven), and a Taken Ogre.
The fight begins (and the 4 minute timer will start counting down) once the door opens. Clear the adds inside and push up to the pergola/stage. A special Taken Captain called Eye of Riven will spawn, killing it drops an Eye of Riven, a Taken weapon that is used to interrupt Shuro Chi’s team-wipe attack. It's important to note that after picking up and using the Eye of Riven, the player will be given a debuff that prevents them picking up another Eye of Riven for 90 seconds. Another player will have to take the role of using the Eye of Riven to interrupt Shuro Chi's attack.
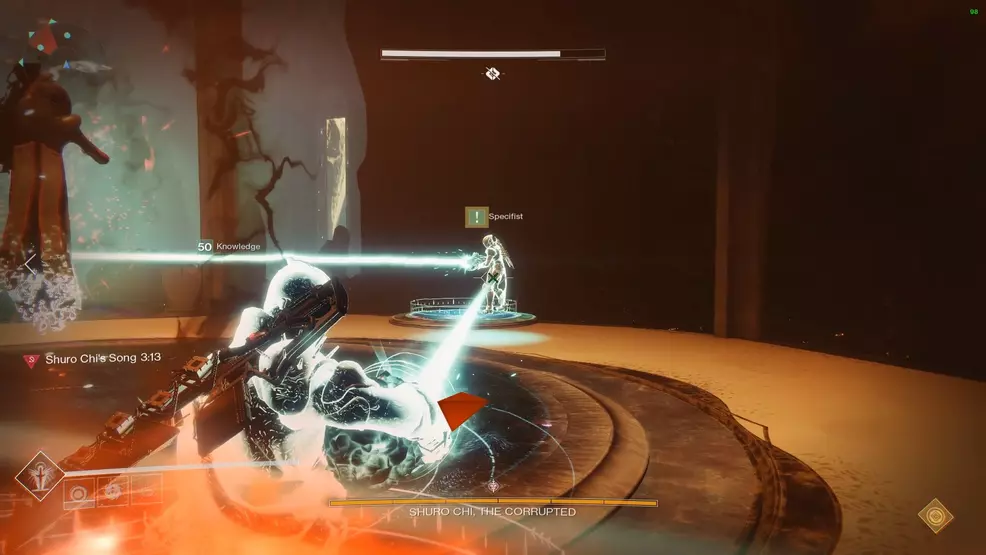
Once the Prism Weapons spawn, Shuro Chi will fasten the rate at which the timer counts down until her shield is removed. The faster players remove her shield, the more time is saved. With her shield down, players need to deal enough damage to remove one segment of her health bar. After a few seconds Shuro Chi will begin a wipe mechanic, at which point the player holding the Eye of Riven will need to fire the Super at her, interrupting the wipe. At this point, players will have one chance to finish removing the segment of health before she does another wipe attempt. With the health segment removed, Shuro Chi will move along to the next area.
Push forwards again, being sure to kill the Taken Ogre that spawns under the next pergola. Players will need to clear adds to reach Shuro Chi a second time and repeat the process of damaging her and interrupting the wiping action using the Eye of Riven. With the next segment of health removed, players will need to enter the puzzle room.
The puzzle room has 9 buttons on the floor and three pictures on the walls. Players will need to solve each puzzle, starting on the left, and working around to the right. To solve a puzzle, stand facing it and work out which pieces are missing – the buttons on the floor correspond to a piece of the puzzle. Assign each player a button and then stand on them at the same time to complete the puzzle. Rotate to the right and complete the next puzzle in the same manner, and then the next one. One thing to remember is that players cannot stand on the same button twice. What this means is that if someone stands on the center button to solve the first puzzle, they can’t stand on the center button to solve any other puzzle.
Completing all three puzzles resets the 4 minute timer and activates the half-spheres floating above the puzzle area. Climb up the spheres to reach the second level where the above will need to be completed again. The same time constraints apply, the only difference is the change of scenery and the Taken Thrall will be replaced by Taken Psions. The same holds true for the top level, instead of Taken Psions there will be Taken Acolytes.
There is one more key difference when removing the last segment of Shuro Chi’s health when on the top level: enemies will continue to spawn after the Prism Weapons appear and during the damage phase. This is why a Warlock with a Well of Radiance is so powerful, it prevents players from taking damage, allowing them to focus entirely on dealing damage to Shuro Chi. With the last segment of health removed, players will have successfully completed the second boss fight in the Last Wish raid.
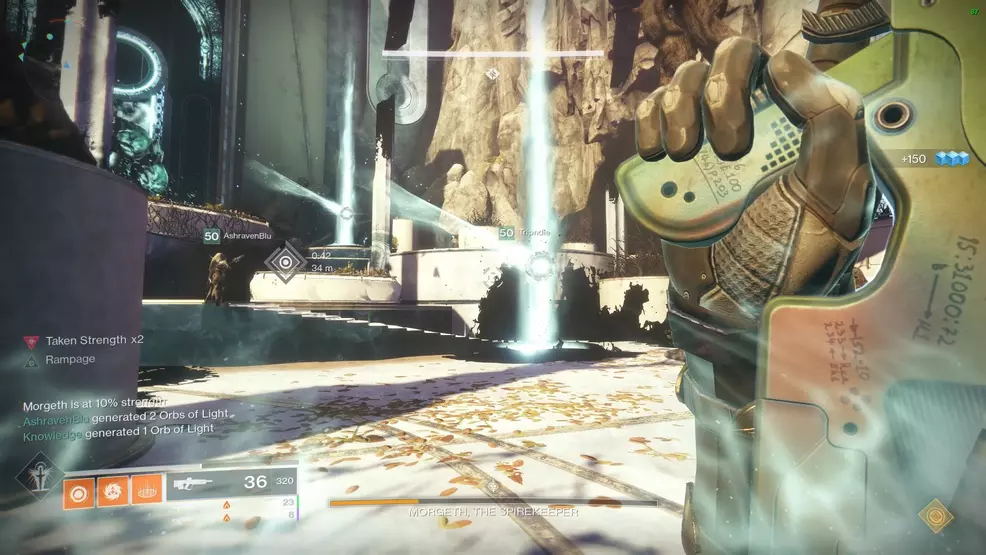
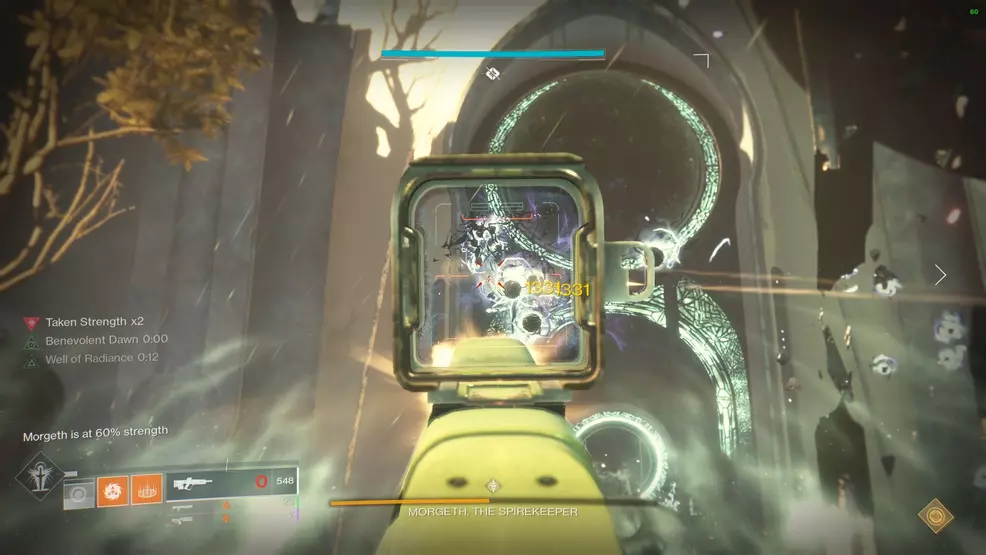
Morgeth, the Spirekeeper – Power 570
Morgeth, the Spirekeeper, is the third boss encounter in the Last Wish rad, and arguably easier than the first two encounters. Morgeth’s main challenge will be managing enemies at a higher Power level and clear communication. The main steps are as follows, with further clarification below:
- Collect Taken Strength that appears around the map
- Kill Eye of Rivens
- Cleanse anyone who gets locked down by Morgeth
- Collect last Taken Strength in front of Morgeth
- Collect Taken Essence from Eye of Riven
- Deal damage to Morgeth
- Interrupt Morgeth’s wipe mechanic with Taken Essence super
Check out our guide on the Forever Fight challenge.
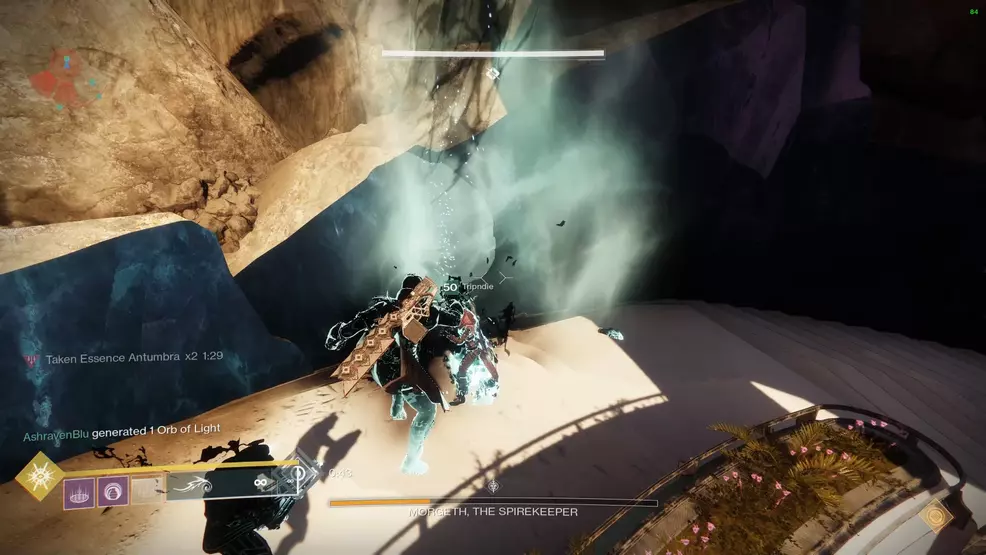
When the fight against Morgeth begins, Taken Strength will start appearing around the arena, feeding Morgeth power. If Morgeth manages to draw 100% power from these black pillars, he will initiate a team wipe. The main goal of this encounter is prevent Morgeth from growing stronger by collecting all of the Taken Strength.
Players can only hold two Taken Strength at once, as denoted by the x2 beside the debuff. Collecting a third Taken Strength immediately kills the player. Once a player has Taken Strength x2, there is a chance Morgeth will lock them in place with Umbral Enervation, at which point they must be cleansed in 20 seconds or die.
To cleanse a player that is locked, another player with zero Taken Strength must kill an Eye of Riven, pick up the Taken Essence, and use the grenade ability on the locked player. Using the Taken Essence on a locked player transfers the Taken Essence from the locked player to the cleanser. What this means is that if a player with Taken Strength x1 uses the Taken Essence on a player with Taken Strength x2, the player will take the x2 and add it to their x1, bringing their Taken Strength to x3, and immediately killing them.
This repeats until all the Taken Strength is collected from the arena. The final Taken Strength appears directly in front of Morgeth, in the same spot used to start the fight. This last Taken Strength spawns once the final Eye of Riven is defeated.
The player with the least amount of Taken Strength will need to collect the final Taken Strength that appears in front of Morgeth, and either they, or someone else, will need to collect a Taken Essence from an Eye of Riven. Meanwhile, the other five players will need to group up (ideally at the furthest point from Morgeth) and deal damage.

During the damage phase, players will need to focus on shooting Morgeth’s large protuberance on its back, as this is the crit spot. Morgeth will begin sending out volleys of homing orbs that explode on impact – these can be shot out of the sky by one player. While all this is going on, Morgeth will be gaining strength again, and once its strength reaches 100%, it will wipe the team. In order to avoid this, the player holding the Taken Essence will need to use the super on Morgeth when the strength reaches 90% to interrupt the team-kill mechanic.
Before starting the Morgeth fight, split the Fireteam in two, sending three players to each side of the arena. Within these two groups, assign two players the role of collecting Taken Strength. The last remaining person on the team will be in charge of collecting the Taken Essence from the Eye of Riven and using it to cleanse anyone who gets locked down by the Umbral Enervation.
There are some finer points to the Eye of Riven enemies and the Taken Essence that they drop. At certain points during the encounter, two Eye of Riven enemies will spawn. Typically, an Eye of Riven will spawn on each side of the arena, however, there are instances where two might spawn on one side. If this happens, the player selected to be the cleanser will need to rotate to the other side in preparation, as they will need to pick up the Taken Essence and carry it back across to the opposite side. Alternatively, alert the other side that one of them may need to come over and cleanse one of your teammates.
It’s worth noting that after killing an Eye of Riven, the Taken Essence will remain on the ground for 45 seconds, allowing players to leave it unattended until it is needed. Upon picking up the Taken Essence, players will receive the debuff, Taken Essence Antumbra, which slowly counts up to x10, at which point the player will die. After successfully cleansing another player, the player who picked up the Taken Essence will have a 90 second counter, during which time they will be unable to pick up another Taken Essence. Whoever was cleansed will now be responsible for picking up the next Taken Essence if needed.
As for team builds, a Warlock with Well of Radiance allows players to deal more damage to Morgeth while also surviving any stray Taken orbs that sneak through. Titan’s with a ranged roaming super will be able to manage add-clear, and a Nightstalker Hunter can generate plenty of orbs each round. Using a Sleeper Simulant or Whisper of the Worm is an excellent idea, as these two weapons will be able to burst Morgeth’s health down in one or two rotations.
The Vault
The Vault is the fourth encounter in the raid, and entirely without a boss fight. The main goal is to open the vault by removing the duplicate symbols using the correct Taken Essence within three minutes.
- Stand on locks
- Call out duplicate symbols
- Kill Eye of Riven
- Collect Taken Essence, confirm status: Penumbra or Antumbra
- Use Taken Essence to cleanse lock with the correct duplicate symbol
Check out our guide for the Keep Out challenge.
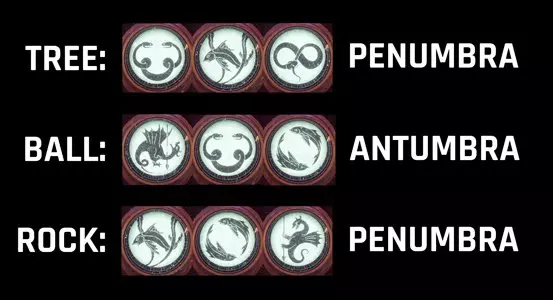
The Vault is split into four sections, the central lock mechanism and three distinct arenas which can be labelled: tree, ball, rock. Using these three locations as a callout is critical to knowing what lock to cleanse with the Taken Essence grenade ability.

Standing on all three locks at the same time causes three sets of symbols to appear on the central lock mechanism, one set for each player standing on a lock. Only the middle symbol is the “real” one while the two that flank it are potential duplicates.
Each person on a lock will see their own set of symbols and must communicate this information with the other two players. The goal is to call out the middle symbol and find its left or right duplicate on the other locks. As an example: if one player’s middle symbol is infinity snake and another player has infinity snake as their left symbol, theirs is a left duplicate.
The importance of this comes into effect whenever an Eye of Riven is killed, as the Taken Essence they drop will either be a Penumbra or Antumbra status effect. Depending on which status it is dictates what duplicate must be cleansed: a left or right duplicate.
- Penumbra must cleanse a left duplicate symbol
- Antumbra must cleanse a right duplicate symbol
Using the above example of infinity snake symbols, the player who has the left duplicate of infinity snake must have their lock cleansed with a Penumbra Taken Essence.
Whenever an Eye of Riven dies and the Taken Essence is picked up, two of the three arenas will be sealed off by a Taken barrier. The player holding the Taken Essence will need to run through the connecting tunnels in order to reach the central lock mechanism. During this time, they must note which status they have (Penumbra or Antumbra). It’s worth mentioning that after picking up a Taken Essence, the player will receive a debuff, preventing them from picking up another one in close succession.
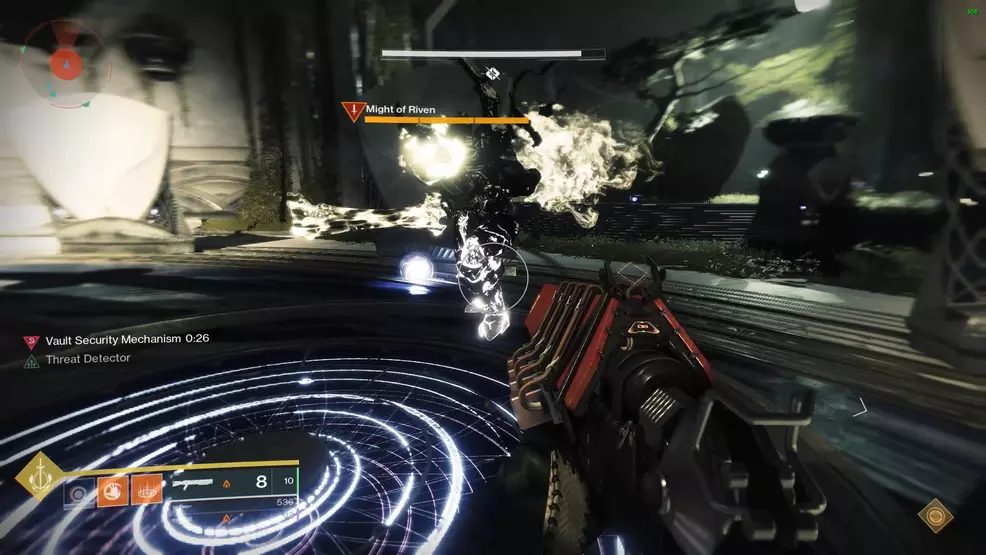
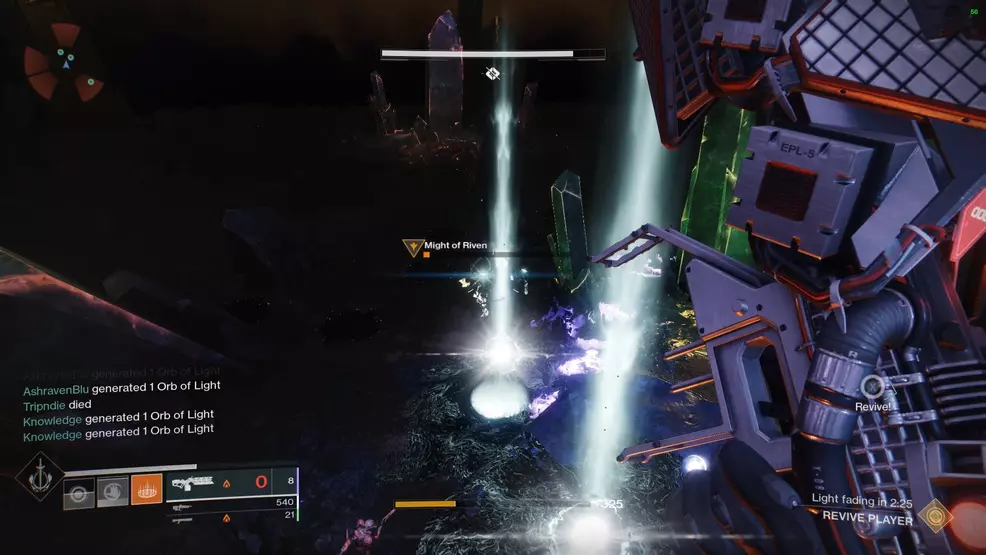
While the player runs with the Taken Essence, a large Taken Knight called the Might of Riven will spawn and approach the lock. If the Taken Knight manages to thrust its sword into the lock and hold it there, it will wipe the team. The first round will have one Taken Knight, the second will have two, and the third will have three Might of Riven Knights. These numbers reset once all three locks are cleansed.
Once all three locks are cleansed, a beam of light will connect the mechanism to the vault door and the entire process will repeat. Players must return to the locks, read out the new symbols, figure out the duplicates, kill Eyes of Riven, and cleanse the correct locks. This repeats until three beams of light shine on the vault.
The main difficulty of this fight will be wrapping your head around how the symbols work. Here’s an example of the symbols players might see when standing on their locks. Tree has the up snake duplicate of ball on the left, so it requires Penumbra. Ball has the double fish symbol of rock on the right, so it needs an Antumbra. Rock has the seaweed fish duplicate of tree on the left, so it needs a Penumbra.
If a Penumbra Taken Essence is used on a duplicate symbol that needed an Antumbra, an explosion will occur, killing the Taken Essence holder and anyone standing nearby. With only three minutes on the clock, there is no time for mistakes, and even one incorrect cleanse can result in a wipe.
As loadouts, players should pick something offensive, like the new Blade Barrage or the bottom tree of the Dawnblade subclass. There are a lot of enemies during this fight, and clearing them quickly is essential. The one real threat will be the Might of Riven Knights that spawn, as they have an incredible amount of health and will likely one-hit most players. For this reason, Tractor Cannon is a viable option, as it can stun and push back the Knight, preventing it from reaching the lock, which gives other players time to come and help. As always, Sleeper Simulant and Whisper of the Worm deal excellent damage to the Knights, as do shotguns, though they require players be up close and personal.
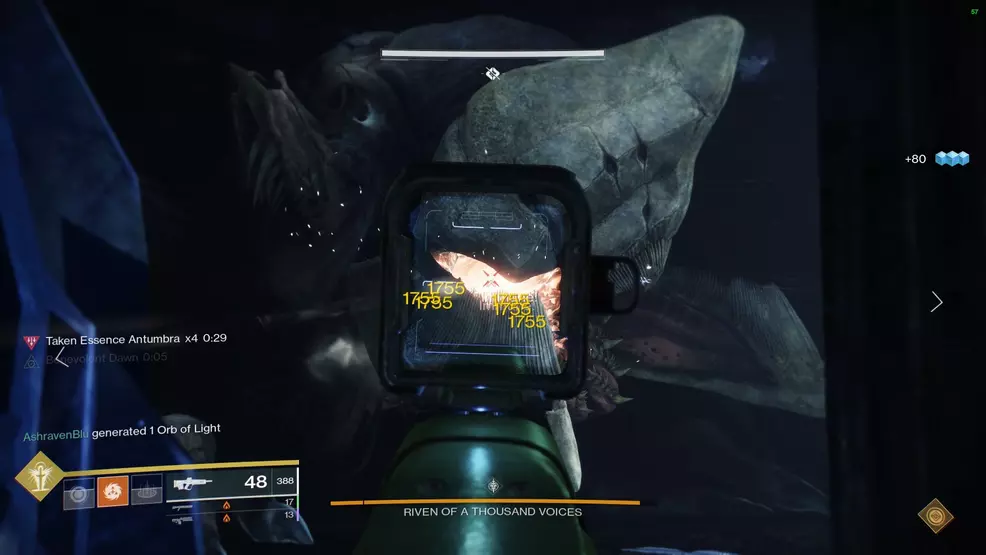
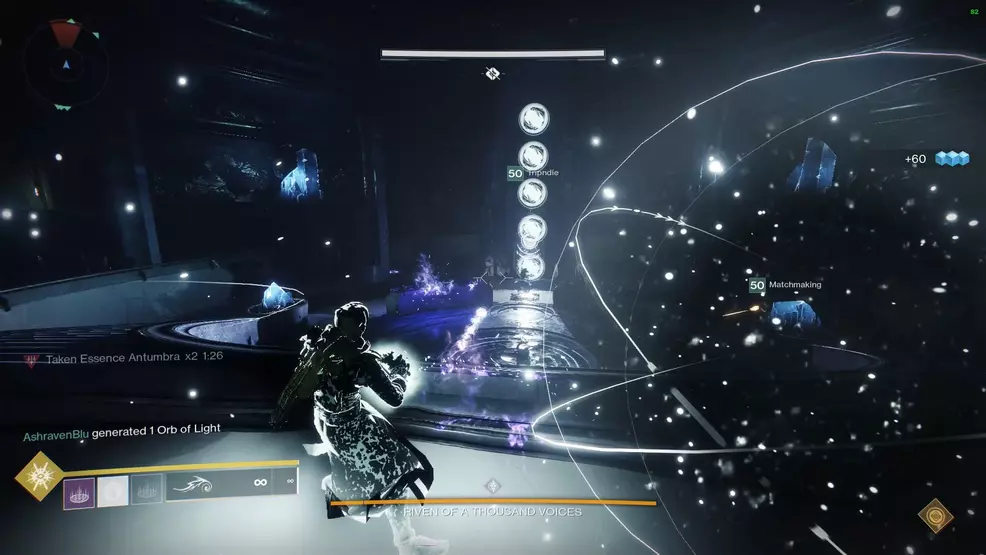
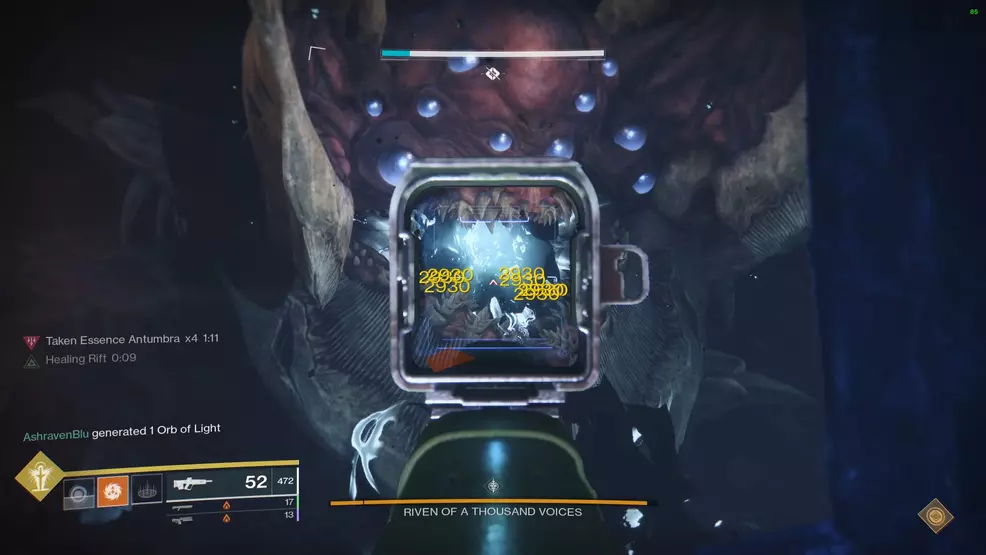
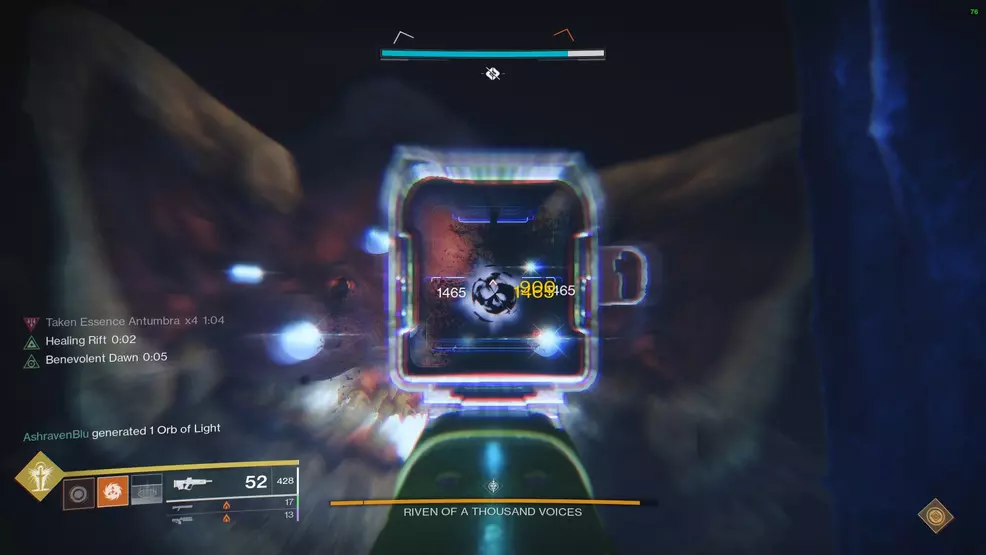
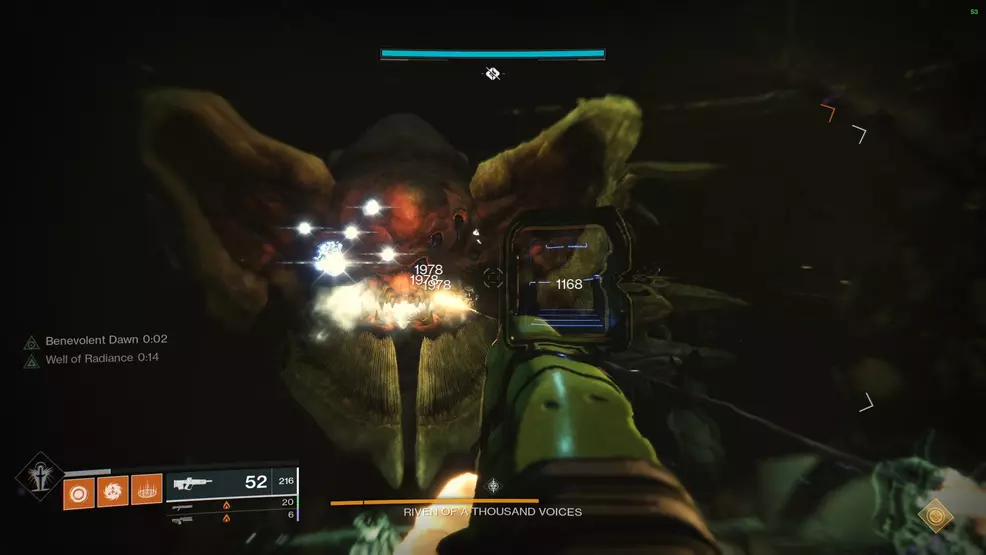
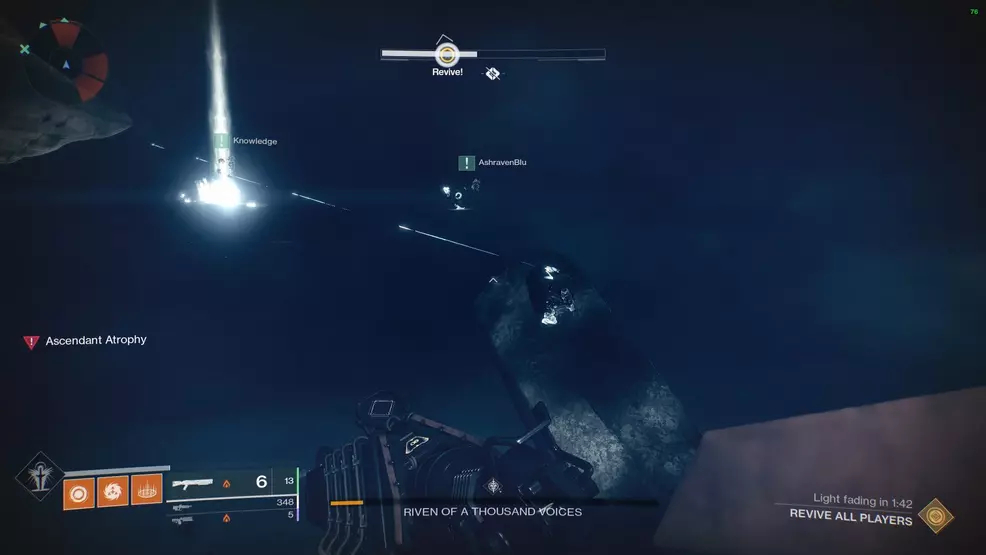
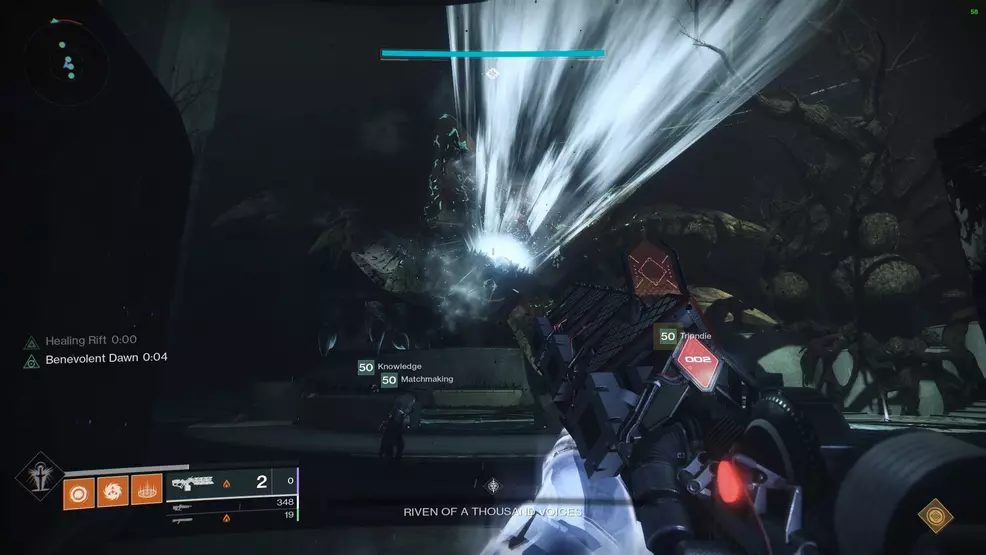
Riven of a Thousand Voices – Power 580
The fight against Riven of a Thousand Voices is the second-last encounter in the Last Wish raid, and one of the most mentally challenging experiences in any Destiny raid to date. Players will need to communicate clearly, react to stimulus immediately, and survive an extremely long fight. The main goal of the Riven boss fight is to cleanse symbols and shoot Riven’s correct eyes, all in an effort to destroy her weak points and then destroy her heart.
- Collect Taken Essence and call out the symbol
- Direct Taken Essence holder to correct symbol to cleanse it
- Deal damage to Riven’s mouth or tentacle
- Call out which of Riven’s eyes are glowing
- Deal damage to the Riven’s mouth and shoot correct eyes
- Go up the lift to the next floor and repeat
- Go up the lift in the center to the main floor
- Clear enemies and damage Riven, make note of glowing eyes
- Deal damage to Riven’s mouth and shoot correct eyes
- Stand on plates and shoot Riven’s weak points while descending
- Repeat until last 10% of health
- Find path to the top and touch light
- Deal damage to Riven’s mouth
- Run into Riven’s mouth and destroy her heart
If the steps above aren’t evidence enough, there is a lot going on during the boss fight with Riven. Each major point in the fight will have its own section, especially considering the first few moments require the team to split into two groups while maintaining clear callouts. However, players will almost certainly require a callout sheet for the entire Riven fight, so here is one below that can be used. Feel free to change the callouts to something that suits your Fireteam.

Two Room Split
The fight begins as soon as all six players stand on the plates, at which point they will descend down, past Riven, into a lower room. Before this happens, split the team into two groups, as three players will need to go to one room and three will go to another. After reaching the bottom of the lift, run either left or right to reach the blue room or yellow room.
At this point the teams will begin communicating different pieces of information depending on whether Riven appears in their room or an Eye of Riven appears. Both rooms will have both appear, but the order that it happens changes the actions that must be taken.
- Riven appears, glowing eyes are called out; Eye of Riven appears, symbol is cleansed
- Eye of Riven appears, symbol is cleansed; Riven appears, correct eyes are destroyed
Riven Appears
For the team that has Riven appear in their room first, they will need to either bait out her tentacle slam or shoot her in the mouth to deal damage. When enough damage is dealt, Riven will stagger and two eyes will glow. Tell the other team which of her two eyes glow.
The team will then need to deal with the Eye of Riven and cleanse the correct symbol using the method outlined below. Despite the Eye of Riven spawning after Riven, the method remains the same.
Eye of Riven Appears
For the team that has the Eye of Riven appear in their room, they will need to clear the enemies, kill the Eye of Riven, and pick up the Taken Essence. The player with the Taken Essence must look toward the bottom of the stairs to see a symbol appear five times up the wall and tell another player the symbol.
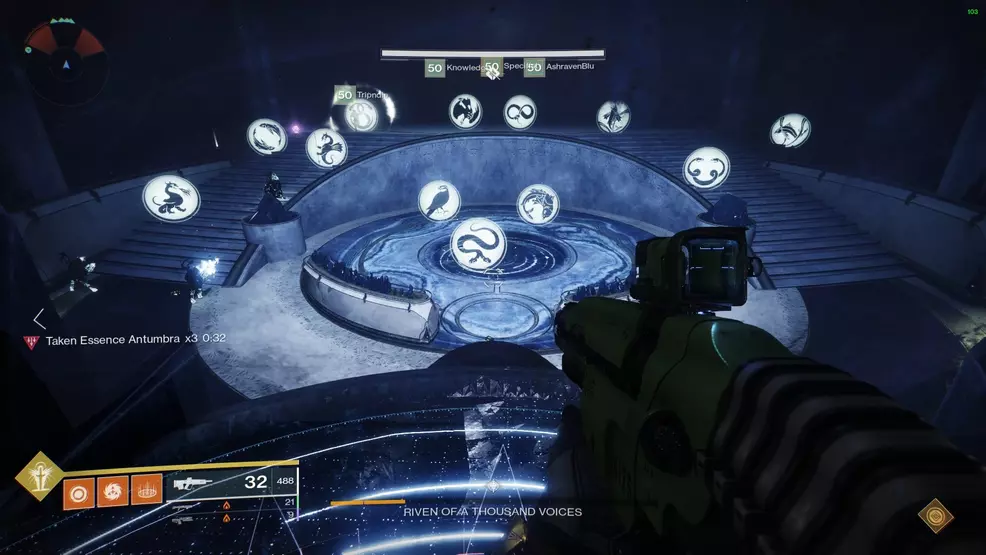
The other player must then stand behind the glass and tell the player with the Taken Essence where their symbol is located in the room. The player with the Taken Essence must use the grenade ability to cleanse the correct symbol.
Riven will then enter the room, at which point a damage phase will begin. Players can shoot the Taken orb in Riven’s mouth to deal critical damage until she shuts her mandibles. Once Riven’s mouth shuts, players have only a few seconds to destroy the eyes that were called out or the whole team will wipe.
If the correct eyes were destroyed, Riven will retreat and players can continue up the lift at the back of the room to the next level, where the above will repeat. Players must do the steps listed above a second time, though the team who gets Riven first might change. The important thing to remember is that the correct symbol must be cleansed and players must call out which of Riven’s eyes glow and destroy them in time.
Once the two levels are cleared, players can enter the lift in the center of the room to return to the starting level.
Fighting Riven, Top Level

When players arrive at the top level, they should head to the center of the room and group up with their allies. All six players must then work together to clear enemies (Goblins and Ogres) while dealing damage to Riven. During this phase, players will need to either bait out her tentacle attack or shoot her mouth to stagger her, at which point two eyes will glow. This is repeated three times for a total of six glowing eyes which must be destroyed during the damage phase.
The best strategy for this is to assign a player an eye as it appears. For example, after baiting out a tentacle slam and dealing enough damage to it to stagger Riven, two players will decide which eye they want. These two players will then remember what eye they need to destroy when it comes to the damage phase. This means that six players will only have to remember one eye, as opposed to everyone trying to remember six.
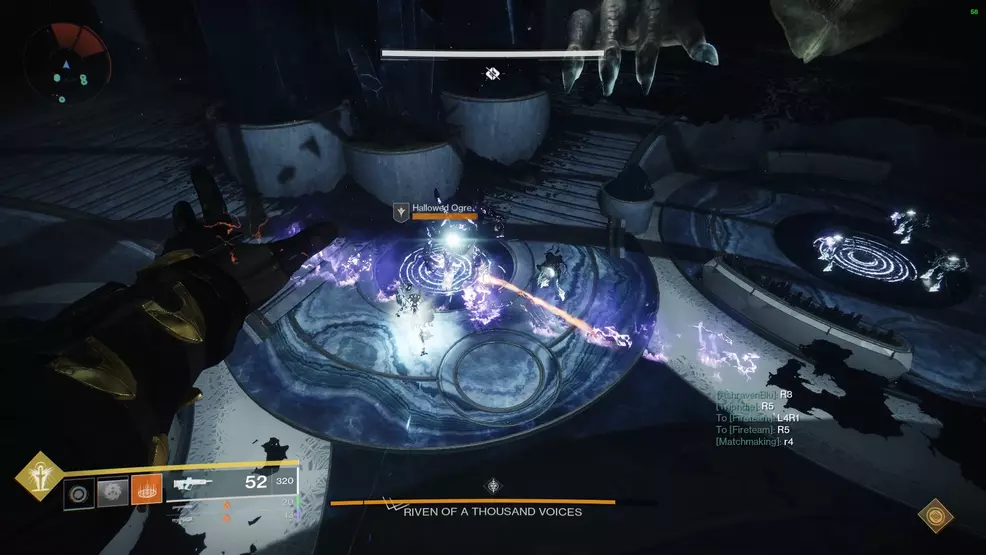
Riven will appear through one of the black gates, at which point all players must attack her mouth when able to or bait out a tentacle slam and attack it. The first two players should then remember the eyes and the process will be continued three times. During this phase, all players should focus on clearing enemies, as the Ogres can become problematic during the encounter.
Once six eyes have been shown and remembered, Riven will appear a fourth time, this time with a Taken orb in her mouth. Players should group up and deal as much damage as possible during this moment. Riven’s mouth will then close, and each player will need to destroy the eye they were responsible for, if done correctly, Riven will retreat.
At this point, players will need to clear the room and stand on the plates in preparation for destroying Riven’s weak points.
Destroying Riven’s Weak Points
With all six players on the plates, the lifts will open and players will slowly descend back down to the lower level, the difference this time is that Riven will be crawling around the center crystal. Players will need to take aim at Riven’s glowing weak points and shoot them. For every weak point destroyed, a large chunk of health will be removed from Riven of a Thousand Voices.

When players reach the bottom, they will need to split into the two groups and repeat the entire process until the final chunk of Riven’s health is reached. It does not matter where Riven is when this last chunk is reached, it can happen during any section. Once the final portion of health is reached, players will be teleported to an Ascendant plane.
Riven, Ascendant Plane
After being teleported to the Ascendant plane, players will have one goal: enter the beam of light at the top of the level. Players must use the floating debris to make their way around the crystal, to the very top of the level where Riven’s face is located. At the top will be a beam of light that will immediately teleport all players back to reality when one player touches it.
The difficult part of this section is that players will have a debuff called Ascendant Atrophy which prevents health regeneration and will remove a small portion of health every few seconds. This means players will have a limited amount of time to reach the top before succumbing to the health erosion. On top of this, there Taken Phalanx dotted around the jumping puzzle, making it add-clear critical.
As soon as one person touches the light, players will be teleported back to the main room to deal with Riven’s final stand.
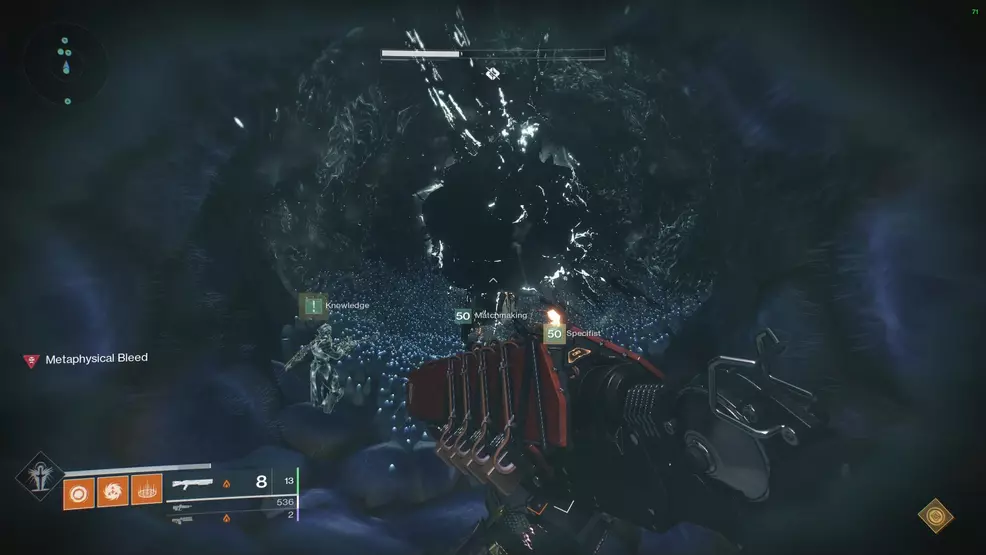
Riven, Final Stand
After being teleported back, players should group up and prepare for the final stand. Riven will open her mouth, revealing a Taken orb, at which point players should continue dealing damage until she’s out of health. Once Riven’s health reaches zero, she will explode and her mouth will open. Players must then run down her throat and destroy the Taken Blight. During this process, a debuff called Metaphysical Bleed will be slowly killing players, so speed is essential.
With Riven’s heart destroyed, players will have one last encounter to finish before the raid is considered complete.
Riven’s Heart
Though technically a part of the Riven encounter, fleeing with Riven’s heart has its own checkpoint, raid banner point, as well as its own complexities. The main goal of the Riven’s Heart encounter is to take Riven’s heart back to the room before the Vault, while standing in beams of light in another realm to keep the heart pumping.
- Chosen player picks up the heart while everyone else stays within the area-of-effect
- After 15 seconds, the player will die and be taken to another realm
- The next chosen player picks up the heart and continues
- Chosen player counts down the timer
- Player in the other realm collects the light when the timer gets low
- Chosen player continues until they die
- The next chosen player picks up the heart and continues
- This repeats until the heart reaches the offering plate
Players will begin the encounter in the chest cavity of Riven of a Thousand Voices with her heart sitting on the ground. One player at random will be chosen by Riven’s heart to carry it, that player must pick up her heart and begin moving out of her mouth, with the goal being to carry it back through the raid.

Players who are not chosen by Riven’s heart will receive a debuff called Creeping Darkness which will stack up to x10, at which point they will die. The only way to remove this debuff is to stay within the aura of the person carrying Riven’s heart.
The aura around the heart carrier will slowly shrink over time, until the last second, at which point the heart carrier will disappear, as will anyone who is too close. The first person selected by the heart will always disappear into the other realm and more mechanics will be introduced.
While in the realm, beams of light will appear, collecting all beams of light at the same time will reset the timer for whoever is holding Riven’s heart. This will happen once per heart carrier, meaning that whoever is carrying the heart can have the timer reset once, and then the timer will definitely count down to zero and they will be teleported away. The realm has it's own set of challenges, as waves of enemies continually spawn, including Mights of Riven, incredibly powerful Taken Knights.
Players must work together to backtrack through the raid, clearing a path for the person carrying Riven’s heart. The player with the heart can only walk and single-jump, so taking the shortest route is important. It’s a good idea to remain behind the person with the heart, so as to avoid being taken to the other realm when the timer hits zero.
All players should take note of whether they have been chosen, as wasting time could result in players dying from the Creeping Darkness debuff.

The route back through the raid is fairly straight forward. Upon exiting Riven’s mouth, players will head left through the open door, sticking to the left again to enter a crumbled room. Use the debris to cross the room, avoiding the poisonous floor. The main difficulty will be the Vault, as the way down will be blocked. Players must enter the available side room and then use the connecting tunnels to completely circle the vault to the hole in the ground and drop down. At the bottom of the lift, run up the center stairs lit with flares and to the basin below the statue of Riven. Riven’s heart will automatically be dunked in the bowl and the Last Wish raid will be completed.
All the players in the other realm will be teleported back to the statue of Riven and the two Techeuns, who will say a few words before disappearing. The players are then free to turn around and select a chest to open using the Ethereal Key.
The Last Wish raid is superbly challenging and immensely rewarding for those players looking for the ultimate raiding experience. With a well-honed team and the right setup, even the most casual of players will be able to complete Last Wish, so long as the effort is taken to reach the recommended Power. Swing over to the Shacknews Destiny 2 Complete Strategy Guide for other raid walkthroughs and helpful weapon breakdowns!

