
Deep Stone Crypt raid guide - Destiny 2
A complete Deep Stone Crypt raid guide, the raid added to Destiny 2 with Beyond Light and Season of the Hunt.
Destiny 2 players looking for a Deep Stone Crypt raid guide should look no further. Included with Beyond Light and Season of the Hunt, the Deep Stone Crypt challenges players to fight into an area below Europa and prevent the Fallen from enacting their plan.
This Deep Stone Crypt raid guide was lasted updated on November 25, 2020 at 9:10 p.m. PT / 12:10 a.m. ET.
- Pike & Sparrow
- Crypt Security
- Atraks-1, Fallen Exo
- Descent (Jumping puzzle)
- Taniks, Reborn (Nuclear Cores/Prevent Europa's destruction)
- Taniks, the Abomination
Deep Stone Crypt raid guide
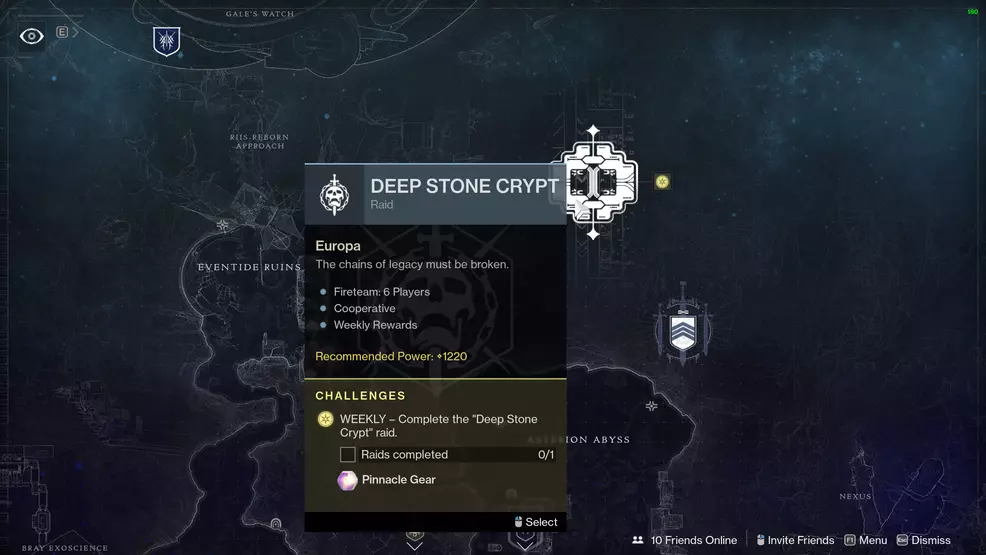
Taking place on Europa, the Deep Stone Crypt is Destiny 2’s eighth raid. Though it only has a handful of encounters, this raid has a few mechanics that will make first-attempts rather difficult. Before you head in, the recommended Power is 1220 with the final fight reaching 1250. The closer you are to max Power the easier it will be.
Recommended weapons – Deep Stone Crypt
With Beyond Light and Season of the Hunt, the weapon meta has shifted considerably. Fan-favorite weapons have been sunset and new Legendary guns are making a name for themselves. This has resulted in many weapons being both viable and unviable for raid encounters.
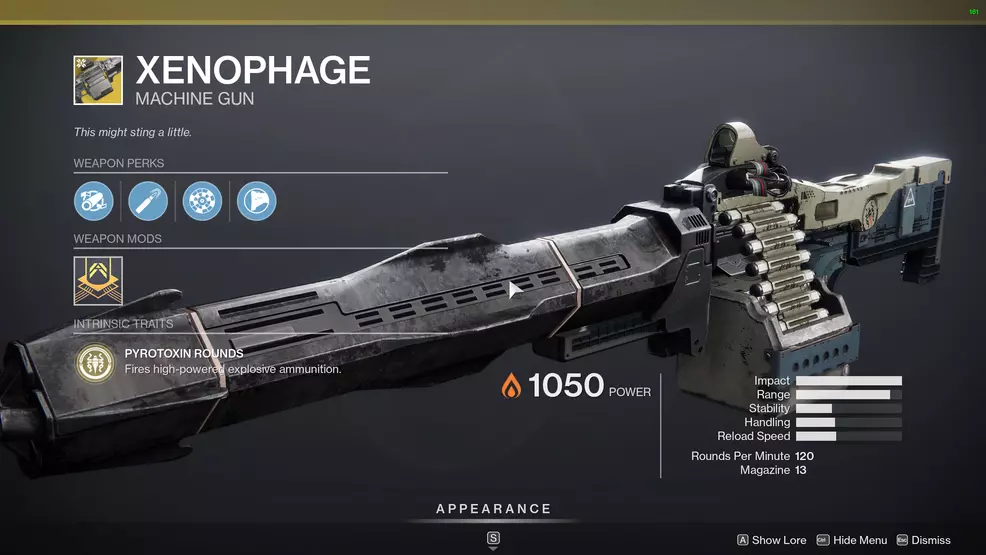
For the Deep Stone Crypt, there are a few standout weapons that make the raid a bit easier. For starters, Xenophage is an excellent option for damage in the Crypt Security stage as is Fourth Horseman. Meanwhile, Riskrunner makes the Atraks-1 fight easier, especially for those that are underpowered (this can be acquired from the New Light quest). As usual, Divinity and Tractor Cannon are a great options for Fireteams that need just a bit more damage output. Rounding out your build should be a slug-shot shotgun, maybe a Triple Tap Sniper Rifles, and even a Grenade Launchers with Spike Grenades.
The other types of weapons should be those that take advantage of the seasonal artifact’s Overload, Anti-Barrier, and Unstoppable mods. The Surge Eater and Thermal Overload mods are also fantastic for the guaranteed Champion-suppression and grenade regeneration.
Pike & Sparrow part – Desolation
The first encounter in the Deep Stone Crypt is a Pike section (though Sparrows can be used). For this section, the goal is to work from bubble to bubble to avoid the storm, working over icebergs to reach the end.
Each bubble offers a buff called Shelter from the Storm and while outside of a bubble the storm applies the Frostbite debuff. A player will die if the Frostbite debuff reaches 10 stacks.
These bubbles are defended by Fallen, including the powerful Dark Council Guard. The final bubble is defended by a couple of Fallen Brigs.
This encounter is also home to a secret chest that is tucked into the icebergs right before the drop down to the final bubble.
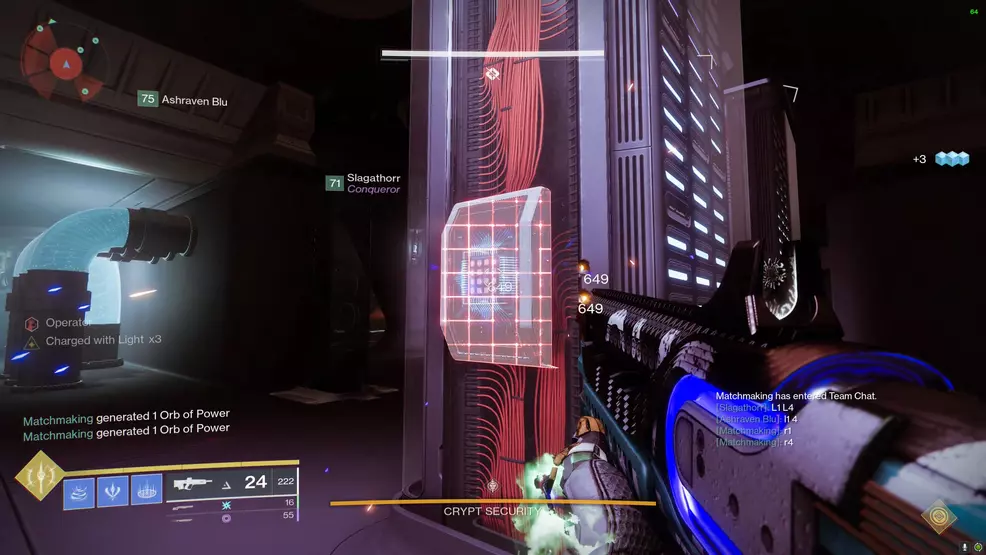
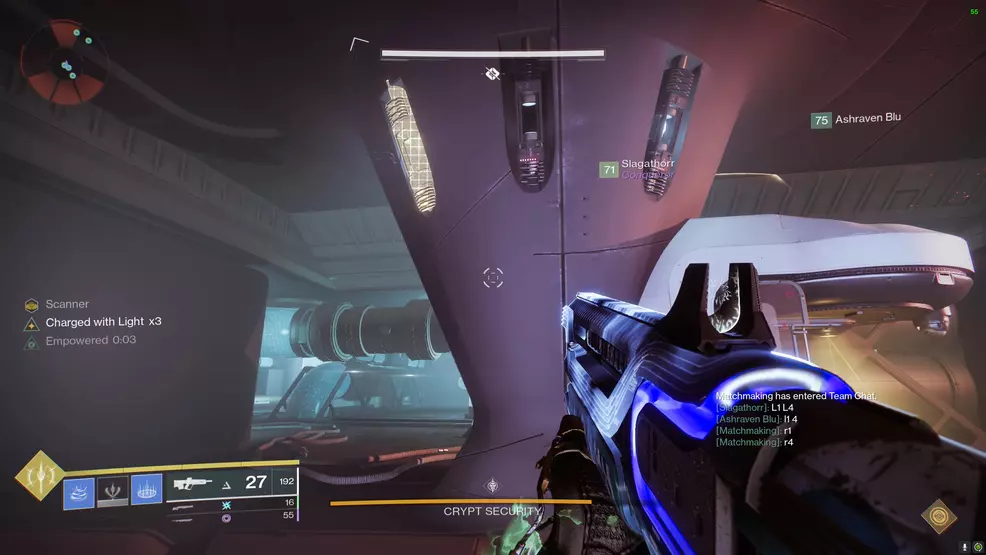
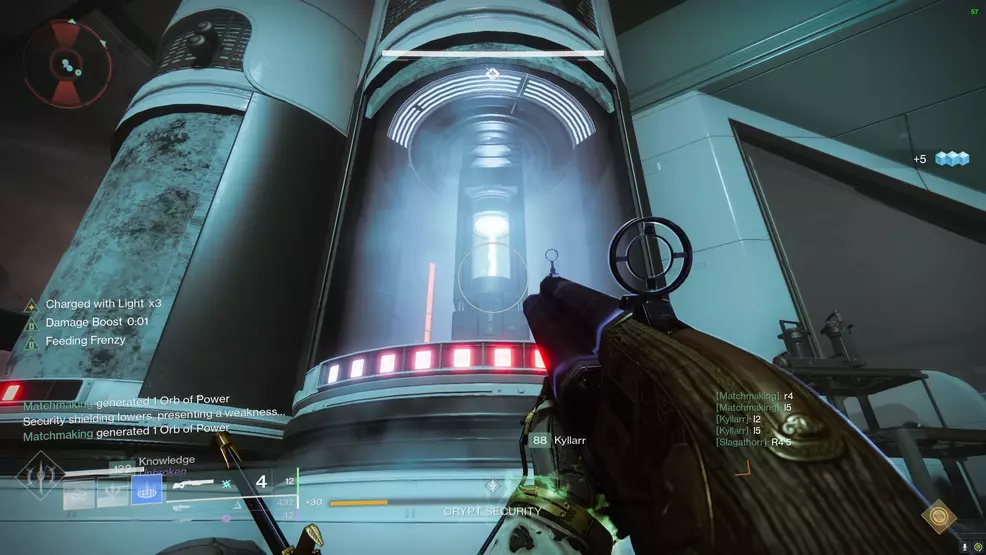
Disable Crypt Security – Restricted
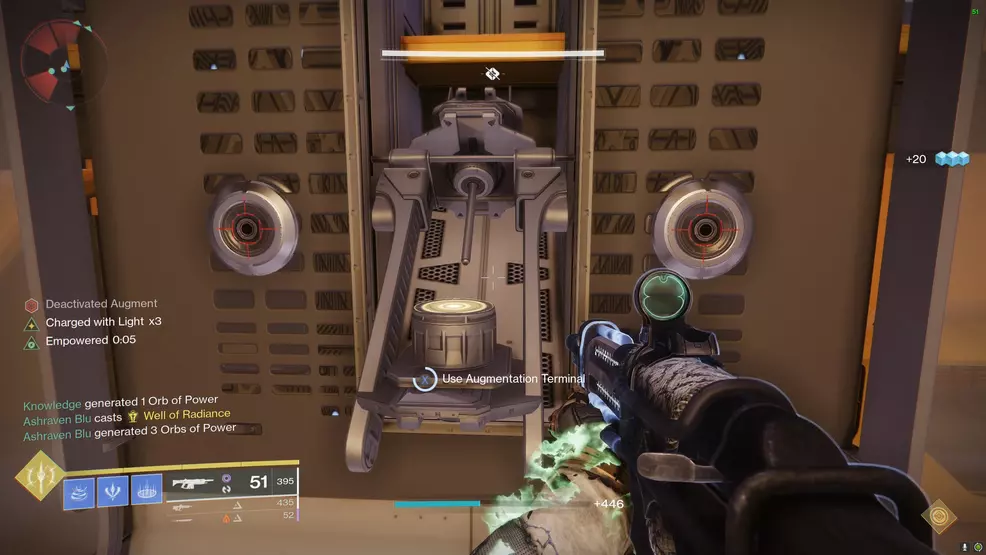
The first real encounter of Deep Stone Crypt is the Crypt Security. For this section, the goal is to use the Scanner and Operator buffs to lower the shielding of the central tube fuses, allowing damage to be dealt.
- Split into teams of three, one team on the light side and the other on the dark side
- One player takes the Operator buff from the Augmentation Terminal to start the fight
- Defeat the Vandal and pick up the Scanner buff, this player looks through the floor and calls out the correct keypads
- Pass the Scanner Augment to the other side of the room using the Augmentation Terminal
- The new Scanner looks through the floor and calls out the last two keypads
- The Operator goes below the floor and shoots the keypads
- Operator uses terminal to pass Augment above, player above takes it and puts Scanner into terminal for player below
- The new Scanner looks above the Augmentation Terminal and calls out which fuse is glowing and players above shoot the fuses that match
- Repeat until all fuses are destroyed. Upstairs Operator may need to free downstairs Scanner
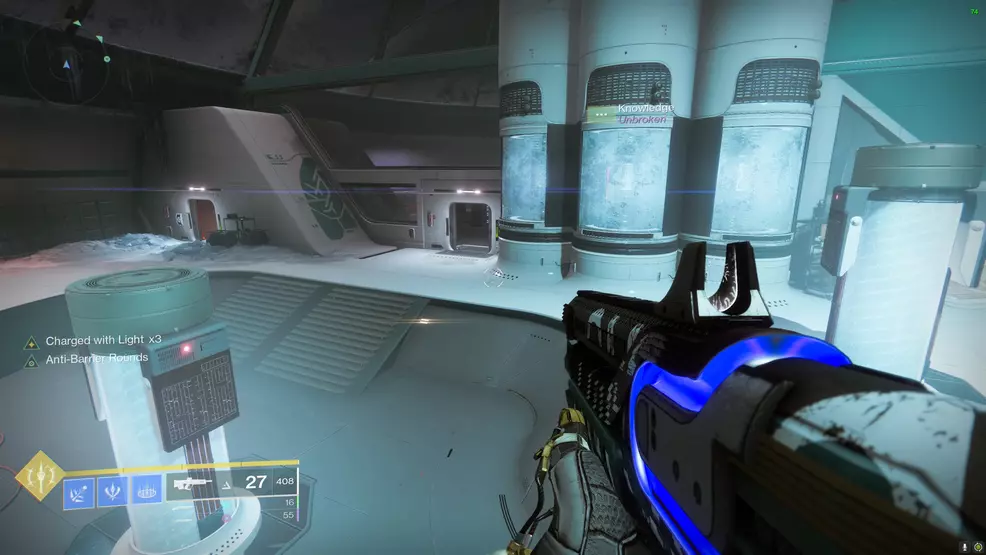
The arena is split into a light and dark side, with a basement. The basement is where 10 panels can be found, five on the left side and five on the right. These panels can be seen through the floor by anyone standing above. The basement is also where the fuses are called out. Look above the terminal to see the fuses, which are directly below their upstairs tube counterpart. Label these however you please: one through six, left-middle-right, or some other convention. The goal is to ensure the players upstairs know which side of the arena they must be on and which of the three fuses on that side is the correct one to destroy
Before starting the Crypt Security encounter, split the teams to ensure there are enough players on the light and dark side of the arena, with one player assigned the role of going down below by themselves.
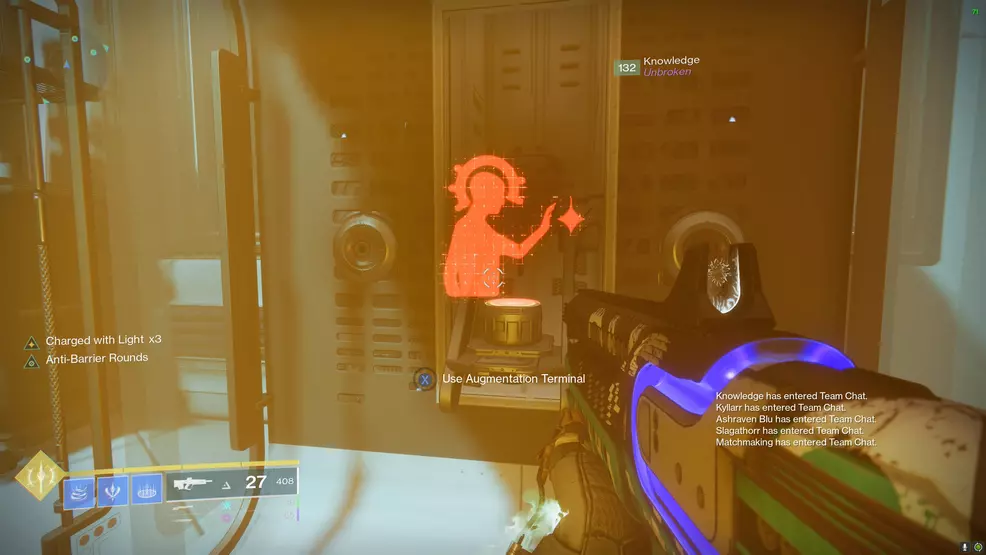
The player that will be going below to shoot the keypads and call out the correct fuses should use the Augmentation Terminal to start the fight. Doing this will give them the Operator Augment.
Players should begin defeating enemies, looking out for a Vandal. This Vandal drops the Scanner Augment, which must be used to find the correct keypads. To do this, look through the glass floor to the keypads below – the correct ones will be glowing. There are two correct panels per side.
When one side calls out their two panels, the Scanner Augment should be deposited into the Augmentation Terminal and retrieved by the opposite side. Now the two other keypads must be found.
As soon as all four keypads are called out, the Operator must go to the back of the room and gain access to the basement by shooting the panels on the wall. Once in the basement, they must locate each of the correct keypads and shoot them.
After all four are shot, the basement Operator must deposit the buff in the Augmentation Terminal. Someone above must grab it and then the Scanner buff should be deposited. The basement player should now get the Scanner Augment. From here, it’s the damage phase.
The Scanner player in the basement must look above the terminal to see six fuses. One fuse at a time will be glowing and must be called out. These fuses correspond with the giant tubes in the center of the area. The challenge for the Scanner will be to remember which side of the room they are standing on when looking at the fuses.
As soon as a fuse is called out, all players should damage it. Fourth Horseman makes light work of this encounter as does Xenophage. It may even be worth having players stay to a certain side to ensure there’s no time wasted running back and forth.
If all six fuses aren’t destroyed in the first rotation, the Scanner in the basement will need to be released by the upstairs Operator. A player can only stay in the basement for a few minutes before the basement is purged using fire. Repeat the steps as needed until all six fuses are destroyed.
During the fight, Overload Captains will be spawning, which is why correct mods and weaponry is critical. There will also be Sentinel Servitors that shut down the Augmentation Terminal. Destroy the Servitors to get the terminals back online. For the damage phase, Exploder Shanks will spawn, so be mindful of them when you’re dealing damage.
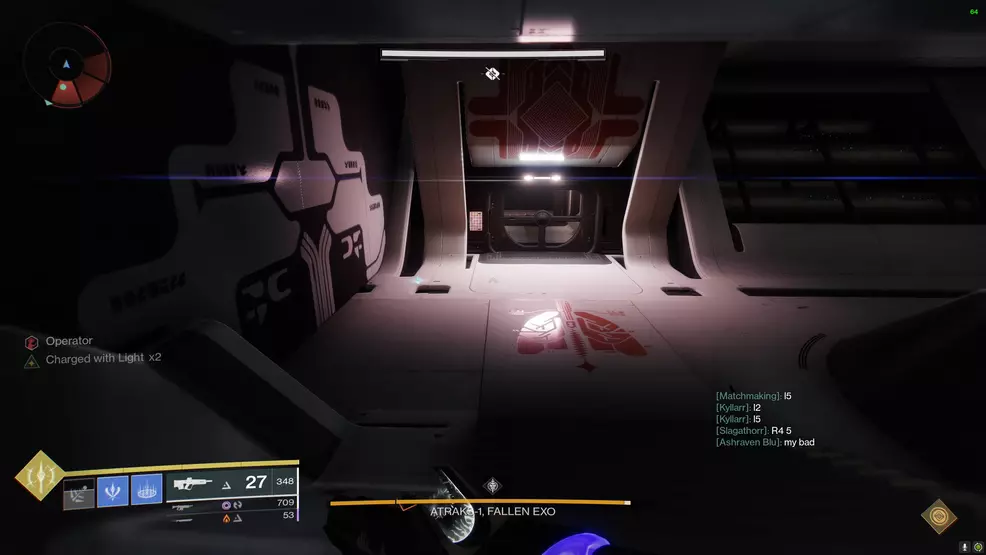
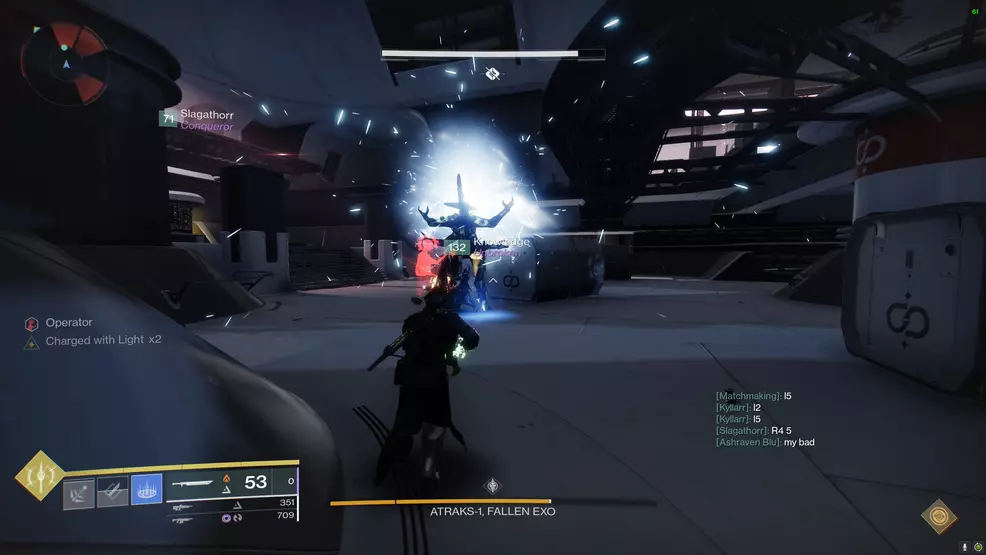
Atraks-1, Fallen Exo – Clarity Control
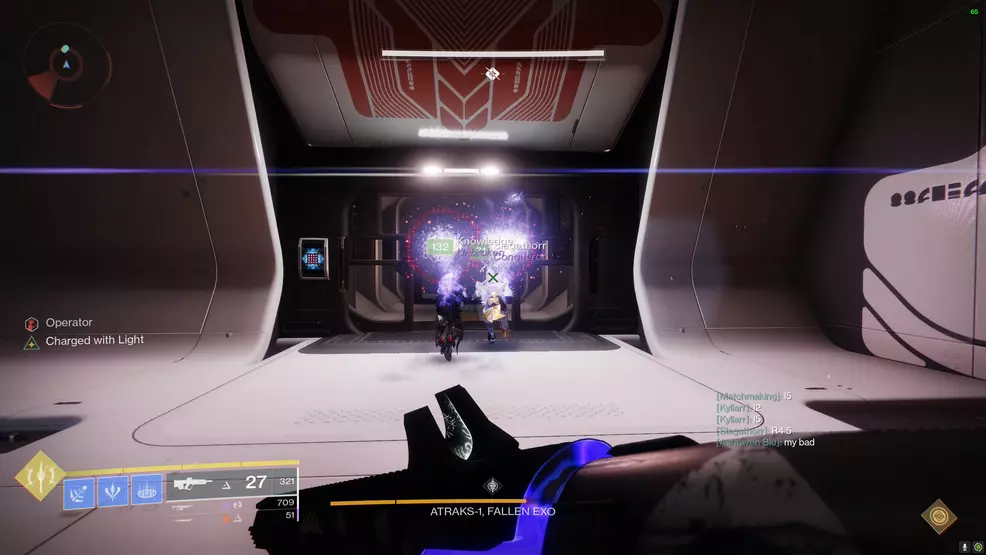
The next major encounter in the Deep Stone Crypt raid is against Atraks-1, Fallen Exo. This encounter focuses on dealing damage to Atraks-1 Replicants, ejecting debuffs into space, and utilizing the Scanner and Operator Augments
- Split the team into two and send three players into space and keep three players in the Crypt
- Crypt team defeats Vandal and claims Operator Augment and places it into terminal while space team defeats Vandal and collects Scanner
- Sentinel Servitors are destroyed and space-player collects the Operator buff
- Scanner finds glowing Atraks-1 Replicant, defeats it, and then collects the Atraks-1 Replication debuff and then passes Scanner to Crypt team
- Replication holder follows Operator to correct airlock (glowing panel), who shoots the panel to open the airlock
- Replication holder stands in airlock and Operator shoots player in the head to knock off Replication debuff
- Meanwhile, Crypt Scanner finds glowing Atraks-1 Replicant, defeats it, collects Replication debuff, and sends that player to space to have debuff ejected. Player returns to Crypt
- When four Replication debuffs are ejected, repeat the above steps
- When eight Replication debuffs are ejected, all players go to space
- Scanner calls out glowing Atraks-1 and defeats it, finds the next one, and so on until the fight ends
The fight against Atraks-1, Fallen Exo is the encounter that will make or break a team. This encounter has a lot of moving parts, with players needing to swap Augments between each area, eject debuffs, locate the correct boss, and manage enemies.
The first step will be to work out which player will be the Operator. Their purpose is to always be looking for which airlock to use next, as dictated by the glowing keypad beside the door. They will direct the Atraks-1 Replication debuff holder into the correct airlock and shoot them in the head to remove the debuff. They can also send pods up and down between space and the Crypt.
It can help if the Operator sends three pods down to the Crypt. This ensures there are always enough pods down there so all players can quickly get to space for the final stand.
The Scanner’s job is to search for the correct Atraks-1 to attack (there are four replicants in each area). The correct one will be highlighted by a huge, glowing lattice of yellow light. When the replicant is defeated, the Scanner Augment should be transferred to the other team using the Augmentation Terminal. The Scanner must also be prepared for the final stand, which requires them to locate the correct Atraks-1s in quick succession.
Start the fight by approaching the purple orb. Have three players by the pods ready to go up to space as soon as possible.
As the three players reach the space station, both teams will begin defeating enemies and grabbing the Augments. The Scanner spawns up top and the Operator spawns down in the Crypt. The Operator Augment should be sent up to the space team as soon as possible. Defeat the Sentinel Servitors to enable the terminals.
The Scanner should begin searching to see which of the Atraks-1 clones is the one to attack. This is done by finding the one that is glowing yellow. Meanwhile, the Operator should be looking for which airlock is active (look for the glowing keypad).
When the Atraks-1 clone is defeated, the Scanner Augment must be passed down to the Crypt team who finds the correct Atraks-1 to defeat in their area. The Scanner is passed back up to the space team to do this again, then finally back down to the Crypt team. This means a total of four Atraks-1s are defeated.
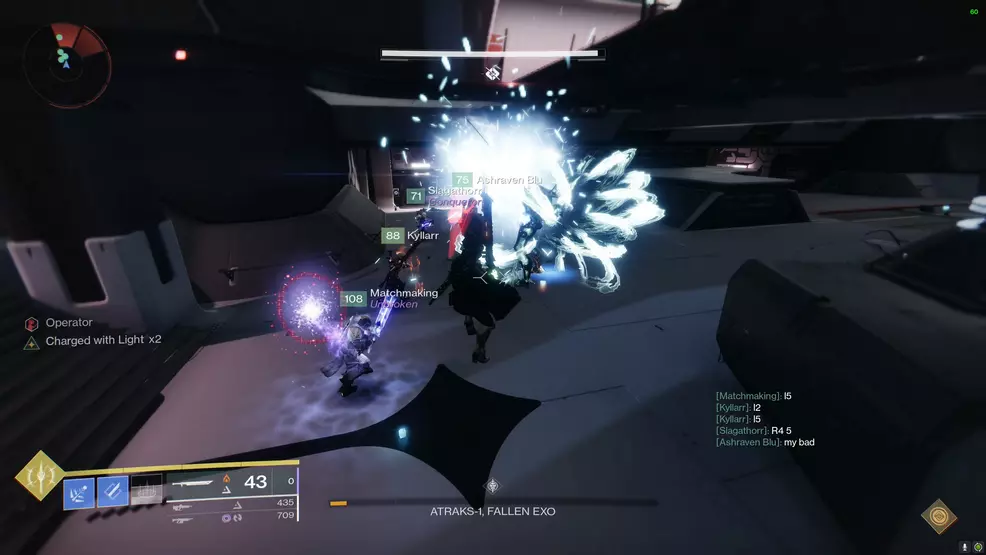
Every time an Atraks-1 is defeated, it will drop a debuff called Atraks-1 Replication. This must be picked up quickly or it will wipe the team. The player holding the debuff will have a 40 second timer, after which they will die. Only the Operator can shoot the debuff off the player’s head, allowing them to pick it up again for a refreshed timer.
The Atraks-1 Replication debuffs must be ejected into space via an active airlock. This can be done in whatever manner works best for your team. It can be done one at a time or you can do four debuffs at once. Doing four at once requires constant management of timers.
The Operator must shoot the airlock keypad (the glowing one) and all Replication holders must stand in the airlock. The Operator then shoots the debuff off their head. The airlock doors will be slowly shutting, so speed is of the essence.
When four Atraks-1 Replications are ejected, this phase will begin again. Ensure that three players are down in the Crypt and three players are up in space. When eight Replications are ejected, the last stand will start.
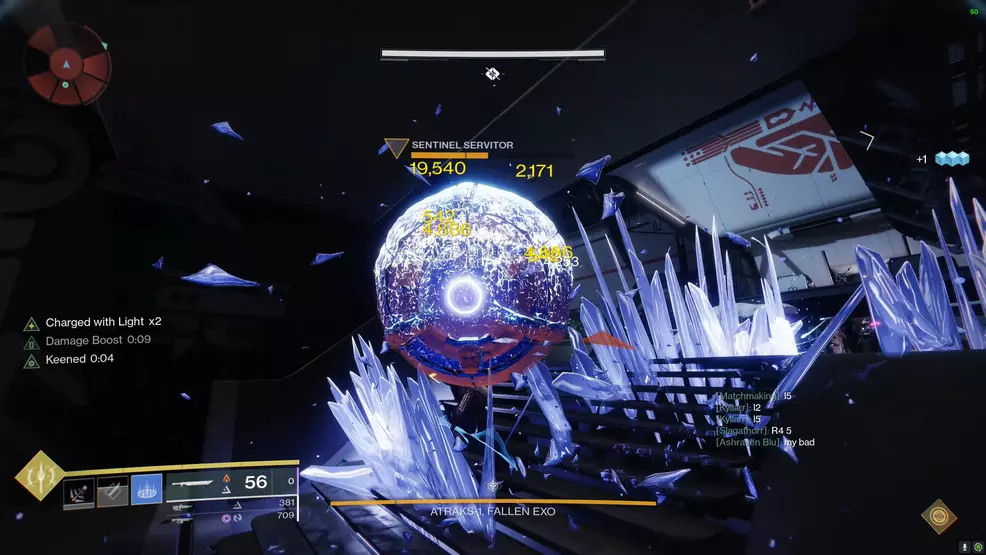
During the last stand, all players must be in the space station. At this point, all eight Atraks-1, Exo Fallen replicants will be in the station. The Scanner must look to see which one must be defeated and direct all players to attack it. Then, another one will be selected and it must be found. This continues until enough damage is dealt to defeat the boss.
In terms of actually dealing damage to Atraks-1 in all its forms, The Lament is by far the best option. The replicant disappears a few seconds after you deal damage, so the idea is to deal as much damage as quickly as possible. If you’ve got the Deep Stone Crypt raid, you’ve also got access to the Lament, so there’s really no excuse not to have it.
Descent
This is the jumping puzzle section of the Deep Stone Crypt raid. Work your way along the outside of the station and then get back inside. There is a chest on a platform along the left.
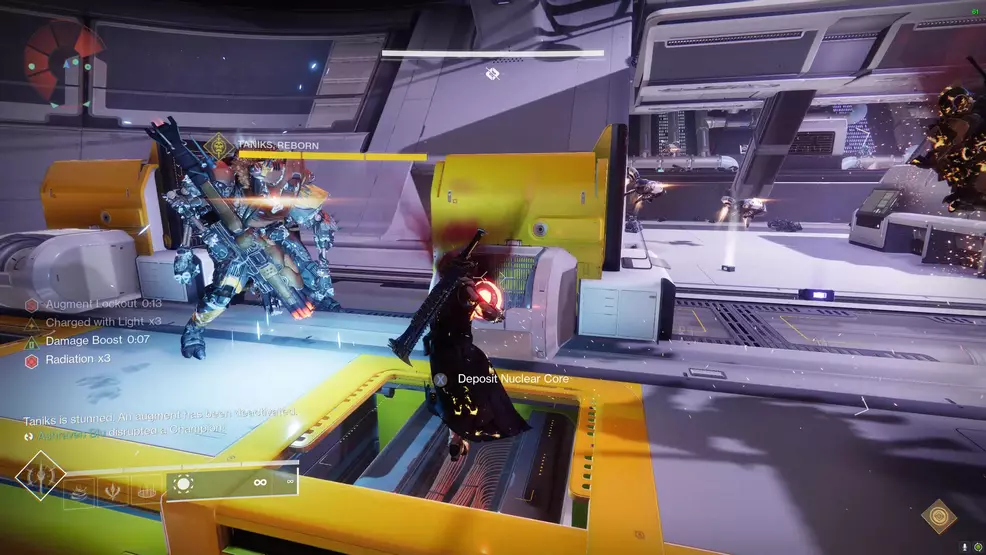
Taniks, Reborn – Rapture
The next encounter in the Deep Stone Crypt raid is in Rapture, against Taniks, Reborn. This encounter has no damage phase but is about depositing Nuclear Cores and suppressing Taniks.
- Collect Scanner, Operator, and Suppressor buffs from Vandals
- Scanner checks which bucket accepts Nuclear Cores, Operator shoots keypads to get Nuclear Cores, and Suppressor waits under drones
- Nuclear Cores are collected, swapped to other players as needed
- Suppressor shoots Taniks while standing under all three drones, then Nuclear Cores are deposited
- Player with the disabled Augment swaps it at an Augmentation Terminal
- Process is repeated until center hatch unlocks at which point all players drop down and run
The Taniks, Reborn encounter requires careful management of enemy spawns, Augment buffs, as well as a new debuff called Radiation. While carrying a Nuclear Core, a Radiation debuff will count up to 10, at which point the player carrying it dies. A Nuclear Core can be swapped between players to avoid this.
Firstly, work out which player is taking what role. These will change as the fight goes on and Augments are disabled. It's also important to label the buckets. Assign them numbers, positions, or whatever works. The goal is to ensure the Nuclear Core carriers know exactly which buckets need a core.
At the start of the encounter, players should acquire the Scanner, Operator, and Suppressor buffs by defeating the Vandals. The Scanner’s job is to call out which of the buckets are glowing – these are the ones that need Nuclear Cores. The Operator shoots the keypads near where the Nuclear Cores come out. The Suppressor is responsible for stunning Taniks, which is done by shooting him while standing under each of the three drones (move from one to the next).

After calling out which buckets are glowing, two players grab a Nuclear Core after the Operator shoots the keypad. When the Nuclear Cores are in hand, the Suppressor should immediately get to work stunning Taniks. Start at one drone, shoot Taniks, then move to the next drone. Do this three times. Once stunned, the Cores can be deposited.
When the Nuclear Cores are deposited, a random Augment will be disabled. The player that had this Augment should go to an Augment Terminal and swap it with another player. Doing this will change up the roles and prevent the original Augment holder from picking up another one for 45 seconds.
As soon as enough Nuclear Cores are deposited, the hatch in the center of the room will open. All players should jump down and run to the very end. Taniks will give chase and kill anyone he catches.
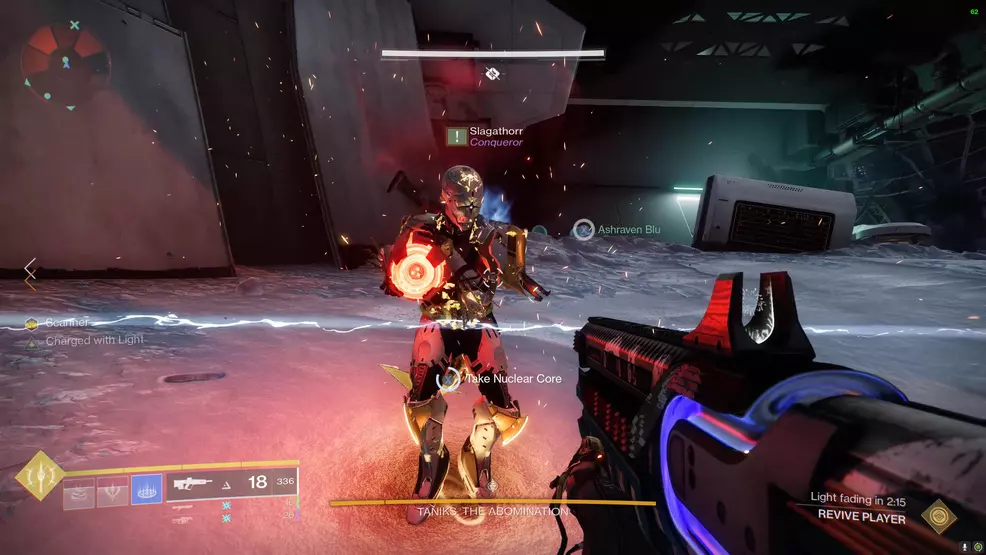
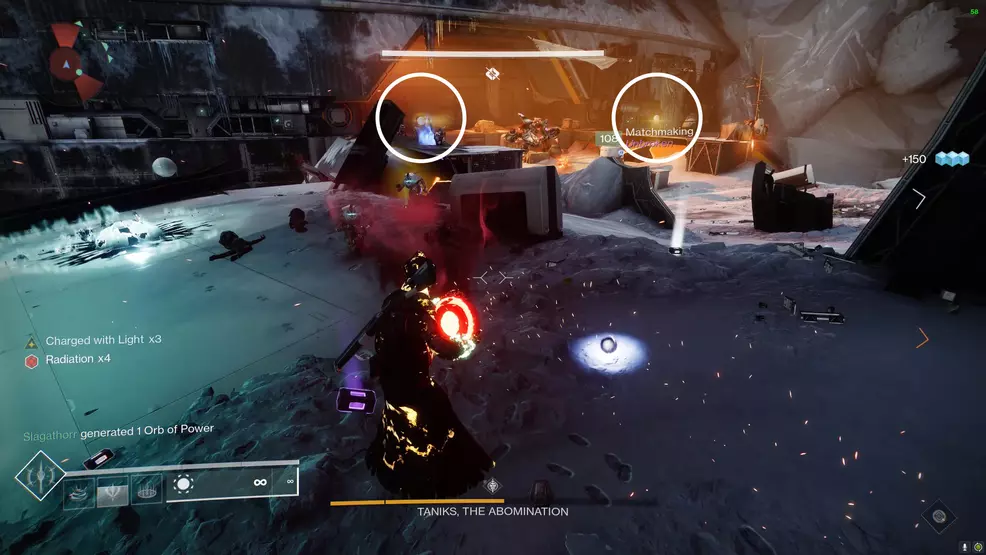
Taniks, the Abomination – Restricted Zone
The final encounter in the Deep Stone Crypt raid is against Taniks, the Abomination. This fight combines all the previous mechanics and introduces a couple of new things. The main goal is to suppress Taniks, deposit Nuclear Cores, and then perform a damage phase.
- Split into three teams of two, one team for each corner
- Acquire the Scanner, Operator, and Suppressor Augments from enemies
- Scanner calls out which 2 Nuclear Core buckets are active
- All players shoot 2 of Taniks’ wings to drop Nuclear Cores
- Two players grab the Nuclear Cores and carry them to the buckets (swapping with a buddy if Radiation approaches x10)
- Operator shoots any trapped Nuclear Core carriers (purple force field)
- Suppressor finds 3 drones to stand under and shoots Taniks from each one (Nuclear Core carriers can now deposit nukes)
- Repeat until 4 Nuclear Cores are deposited
- Taniks moves to middle, damage phase begins
- An Augment will be deactivated, use Augmentation Terminal to swap with another player
- Repeat the steps until the last notch of health
- Taniks will begin teleporting around the map. Deal damage to him until he’s defeated

Before you begin the fight against Taniks, the Abomination, it’s important to label the areas of the arena. Each of the three sides has two Nuclear Core buckets for a total of six in the arena. Assign a label for these areas and buckets. You can use the color of the area (Blue, Yellow, etc) and left or right for the buckets or you can number them in a clockwise fashion. Starting at spawn and going left, it would be 1 and 2, then under the blue light would be 3 and 4, and under the yellow light would be 5 and 6. Use a format that your fireteam agrees on.
The next step is to split into three teams of two and send each pair to a side. The main starting area will always spawn the Operator, the blue light will have the Scanner, and the yellow light will have the Suppressor Augment. The Operator is the easiest task, followed by Scanner, with the Suppressor being the most demanding.
Start the fight by approaching the junk in the middle of the arena or by shooting it. The fight will start and enemies will begin pouring into the area. Defeat the Dark Council Guards to spawn the Vandals that have the Augments. Kill the Vandals and grab the Augments.

The Scanner should begin looking around the map to find which two Nuclear Core buckets are glowing yellow. This information should be relayed to the team.
As each bucket is being called out, the team should collapse on Taniks and shoot two of his wings until a Nuclear Core drops out. Two players need to grab the core and carry it to a bucket. While carrying it, a Radiation debuff will count up to x10, at which point it will kill the carrier. Have a buddy grab the core before this happens and continue carrying it. Radiation takes a while to decay, so keep this in mind before picking up the next one. The cores can only be deposited when Taniks is stunned.
Stunning Taniks requires the Suppressor to find three drones, stand under each one in turn, and shoot Taniks. The drones will always be the ones on the section where Taniks is. This must be done while the Nuclear Cores are being carried to the buckets. Stand under one drone, shoot Taniks, move to the second drone and shoot Taniks, and then move to the last drone and do the same. Doing this stuns Taniks, allowing the cores to be deposited. When the third drone is used to stun Taniks, a random Augment will be disabled. The Suppressor should wait until the second detainment has happened, this gives players enough time to deposit the Nuclear Cores without becoming trapped and without the Operator Augment being disabled.
While this is happening, a Nuclear Core carrier might be detained in a purple force field. The player with the Operator Augment must shoot the barrier to destroy it. The core carrier will have roughly 20 seconds to be freed or they will die.
During the Nuclear Core bucket spotting and carrying phase, Taniks will go to the corner where the nukes do not need to be deposited. For example, if buckets 1 and 6 are active, Taniks will go to the corner where buckets 3 and 4 are located. Look where Taniks is going if you’re struggling to work out which buckets are active.
These steps need to be repeated a second time or until four Nuclear Cores are deposited. At this point, Taniks will move to the center of the map in preparation for the damage phase. Players will have roughly 15 seconds from the last core deposited until damage phase starts. At this point, a random Augment will be disabled. Swap it with another player using an Augmentation Terminal after the damage phase.
Using an Augmentation Terminal to remove a deactivated Augment means you cannot pick up another one for 45 seconds.
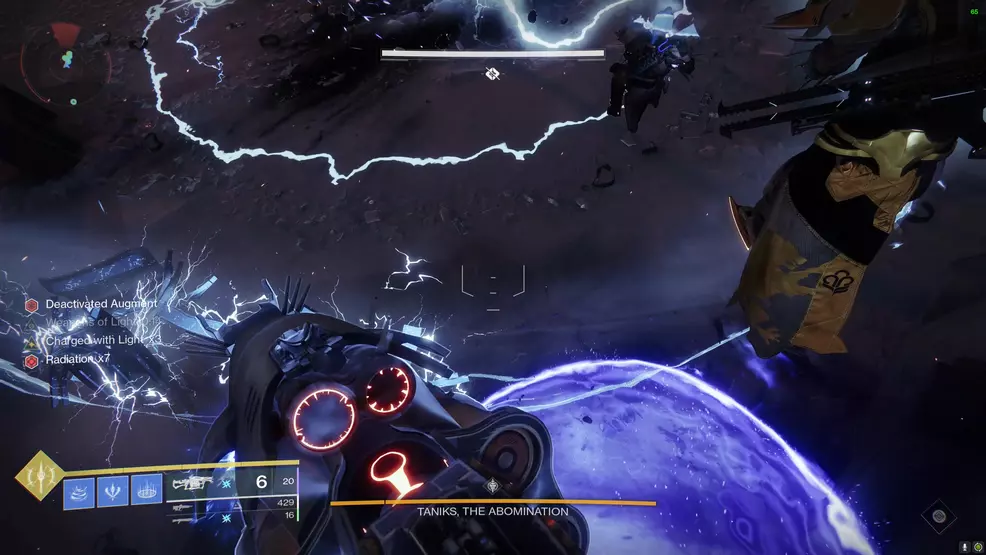
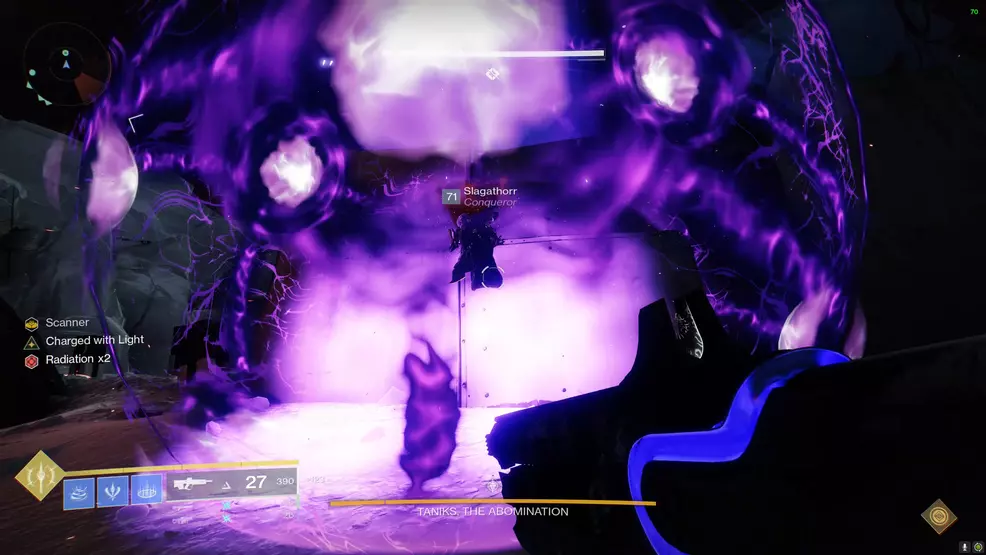
For the Taniks the Abomination damage phase, he will create two rings around him – an outer and an inner ring. In order to deal optimal damage to him, players need to jump over the outer debris ring but no further than the inner ring. Halfway through the damage phase, Taniks will push everyone back out and everyone should jump back into the ring to deal more damage. When this ends, the Nuclear Core section will need to be repeated until the final notch. For the final notch of health, Taniks will teleport around the map. Simply find him and deal damage until he is defeated. This is a pure damage check, if you do not destroy him now, you will wipe.
Now let’s talk strategies for actually damaging Taniks, the Abomination. A good idea is to place a Ward of Dawn on the outside of the rings for players to stand in for the Weapons of Light buff before jumping over. On the inside, a Well of Radiance would do well for extra survivability and to provide an overlap for when Weapons of Light stops.
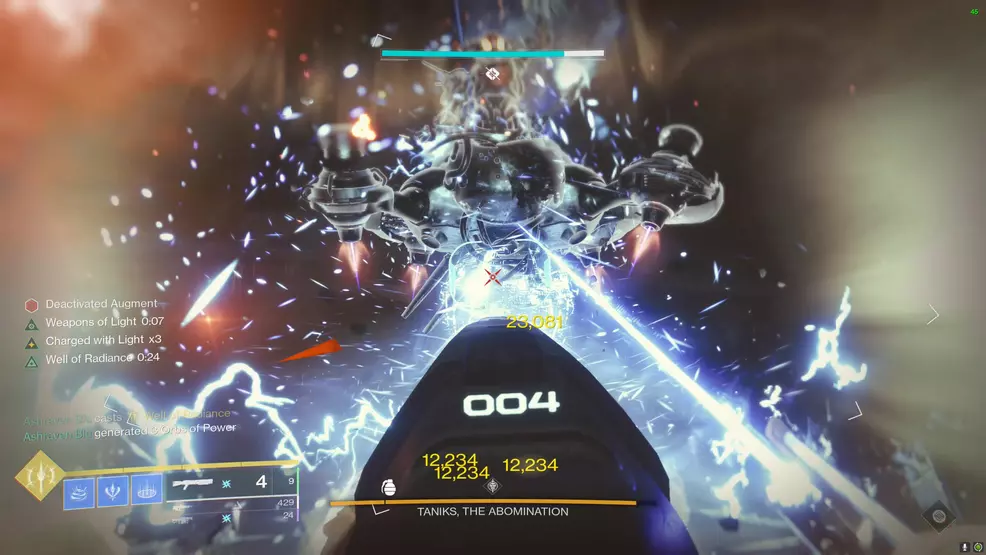
As for what weapons to use against Taniks, having one player using Divinity ensures everyone else can get critical hits (or Tractor Cannon for the pure damage boost). Pairing this with a shotgun that uses slug rounds is a viable strategy, something like First In, Last Outs or Bonechiller with Vorpal Weapon and a Boss Spec mod. For those that have it, starting off with two Anarchy rounds ensures there is passive damage being dealt.
Failing that, another option is to use snipers such as Adored (it has Triple Tap and Vorpal Weapon) or IKELOS_SR_v1.0.2, coupled with Izanagi’s Burden. This also helps to ensure you can nail Taniks as he’s teleporting around during his last stand phase.

Another Power weapon option would be a Grenade Launcher with Spike Grenades. The Blast Battue or Crowd Pleaser ‘launchers should do the trick.
After Taniks, the Abomination is defeated, you can claim your rewards from the chest between the blue and yellow sides of the map. This chest is also where you can spend Spoils of Conquest for a chance at other raid gear.
The Deep Stone Crypt raid is a demanding activity that requires a lot of teamwork and communication. By utilising this Deep Stone Crypt raid guide, you should have the tools necessary to complete each encounter, defeat Taniks, and discover what secrets lie below (and above) Europa. Make sure you check out the Shacknews Destiny 2 complete strategy guide for even more raid guides and other valuable resources.

-
Shacknews

 reply
replySam Chandler posted a new article, Deep Stone Crypt raid guide - Destiny 2
