
Garden of Salvation raid guide - Destiny 2
A complete Garden of Salvation raid guide, the raid included with Destiny 2: Shadowkeep and Season of the Undying.
Those looking for a Garden of Salvation raid guide should look no further. This latest raid, included with Destiny 2: Shadowkeep, tasks players with venturing back to the Black Garden to take down an ancient evil. Though it is a short raid, it is extremely challenging with encounters being a test of endurance.
- Evade the Consecrated Mind – Embrace
- Summon the Consecrated Mind – Undergrowth
- Defeat Consecrated Mind
- Defeat Sanctified Mind
Garden of Salvation raid guide
Set in the Black Garden on Mars (but accessed via the Moon), the Garden of Salvation is Destiny 2’s seventh raid. This raid is a similar length to Crown of Sorrow, with the challenge being slightly higher due to the endurance factor and the forced division of your team.
Garden of Salvation has a recommended Power of 940. Though the first encounter isn’t as high, it’s worth being at least 920 before attempting to take down the final boss. To do this, make sure you’re completing all the activities in Shadowkeep that reward Powerful drops.
Recommended weapons

After a slew of nerfs and changes to the meta, the weapons of previous seasons are no longer as reliable.
However, the most important tool in the Garden of Salvation is your Seasonal Artifact. This artifact contains two critical mods that are essential in taking down champion enemies: Overload Rounds and Anti-Barrier Rounds. These only work in the following weapons types: Hand Cannons, Auto Rifles, Submachine Guns.
Ideally, you would want to use a Void SMG to easily bust minotaur shields, which is why the Recluse is so good. The only other option that can be pulled from Collections is Resonance-42, a Year 1 SMG. Alternatively, use an Auto Rifle in your Kinetic or Energy slot. Null Calamity 9, Positive Outlook, and Solemn Hymn are all Void.
As for your Power weapon, One Thousand Voices will tear through tough enemies. If you’re not lucky enough to get one from the Last Wish raid, a grenade launcher like Wendigo-GL3 makes light work of enemies. Thanks to a recent rebalance, it’s now easier to acquire too.
Recommended Class
As with all Destiny 2 content, more often than not it’s best to use the Class you’re most comfortable using. The following subclasses are what my team found most beneficial, so it’s worth considering if you’re team is struggling.
Warlock’s have the choice of Voidwalker’s top tree for the slow-moving Nova Bomb. This is excellent at clearing Angelic enemies and the champions, as well as for general add-clear. Similarly, bottom tree Dawnblade offers some of the best add-clear in the game.
For Hunters, their best tool is going to be a Nightstalker’s Shadowshot. This tether neutralizes a lot of enemies and ensures your allies can refresh their own Supers.
Titans have a few options thanks to their sheer power. Sunbreakers utilizing the Shadowkeep Exotic armor, Phoenix Cradle, can give Sun Warrior to their allies, providing more power for your team. On top of this, the roaming power of Sunbreaker is an asset when it comes to managing enemies. Another option is Sentinel, specifically for the Ward of Dawn. This offers a safe haven which is especially useful during the second encounter.
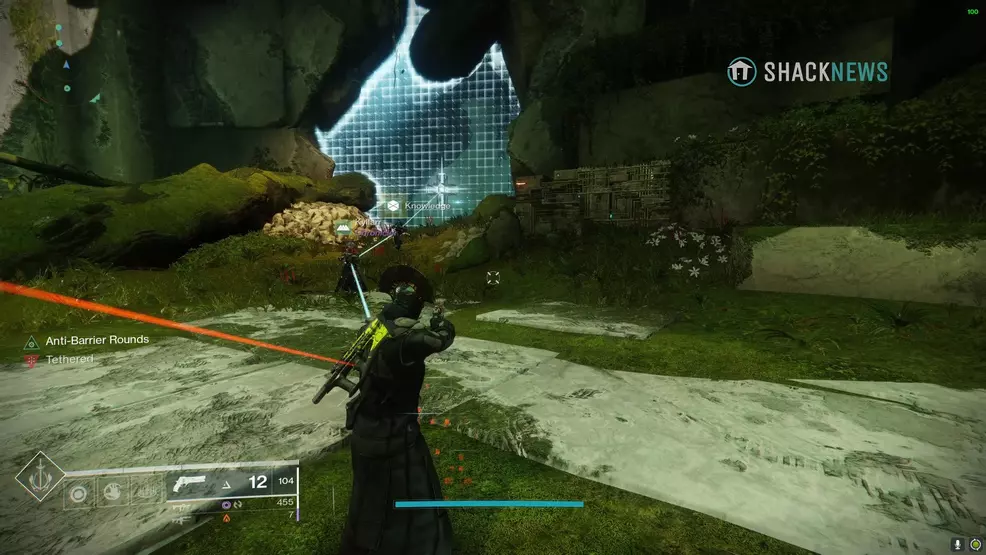
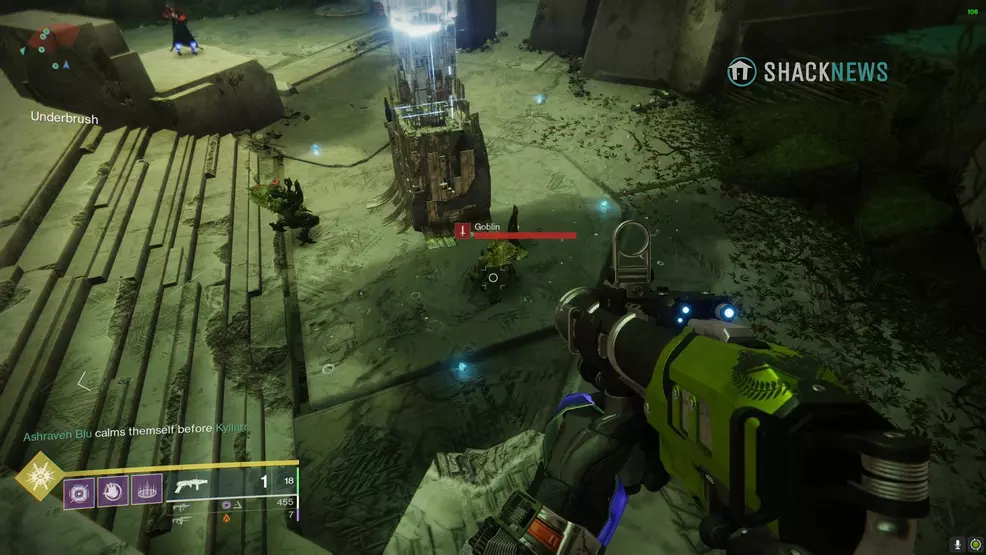
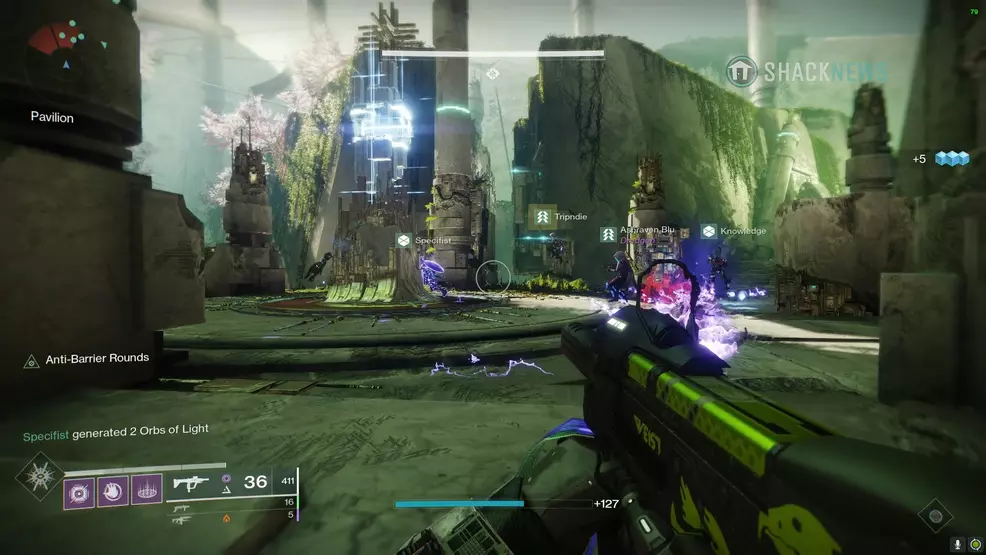
Evade the Consecrated Mind – Embrace
The first encounter in the Garden of Salvation has players evade the Consecrated Mind. To do this, teams split into two in order to open doors and collect Voltaic Overflow. The end of the section is a mad dash through an open field.
- Create a tether chain to the Vex barrier to start encounter
- One group pushes to next barrier, killing the Angelic and tethering the door open
- Other group stays near Consecrated Mind, collecting its Voltaic Overflow
- When Consecrated Mind moves, the back team leapfrogs over the forward team into the new area
- Continue leapfrogging, collecting Voltaic Overflow and tethering the Vex barrier open
- When in the open field, collect Voltaic Overflow and fight to the other side to end the encounter
Encounter Mechanics:
- Voltaic Overflow – Consecrated Mind will create a Voltaic Overflow every 60 seconds or so. Unless picked up, it will explode and kill the team. A player who picks it up will receive a 2 minute 30 second timer. Collecting another one while this timer is still going will kill the player.
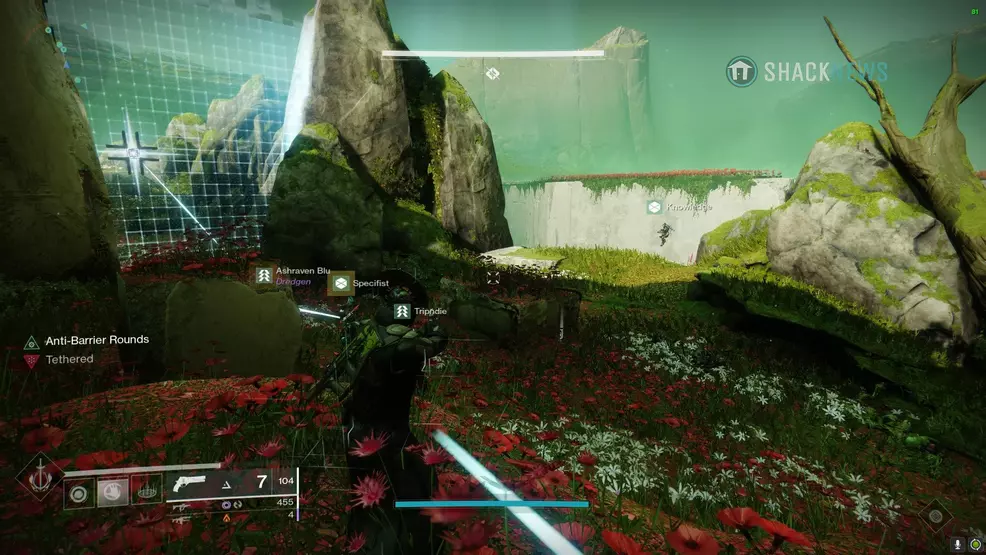
- Angelic – A special type of Hydra that must be killed to unlock the box, allowing players to use it to tether open a door.
- Tethering – Standing near an unlocked Vex box and shooting it creates a tether, which links between all nearby players. This is used to unlock the locks on the Vex barriers.
- Overload Minotaurs – Giant Minotaurs that can only be dealt significant damage when disrupted using Overload Bullets.
To start the fight, three or four players will need to create a human tether from the floating box to the door. Shoot the box to create a tether. When the door opens, the fight will begin.
Three players will need to stay in the first room to kill enemies and deal with the boss. They will need to collect the Voltaic Overflow that the boss creates.
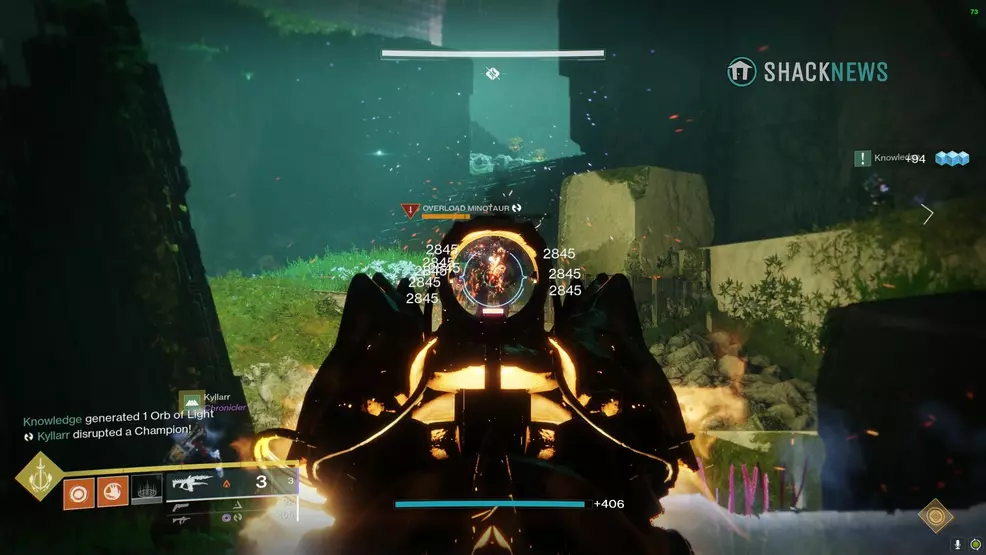
Three players will need to press forward, fighting to the Vex barrier. On the way to each barrier is an Overload Minotaur which can only be dealt significant damage after being staggered with Overload Rounds.
Defeat the Angelic and use the Vex box to create a tether to the barrier to unlock it. The Vex box can be in a few locations around the door – search for it on your approach.
Once a Vex barrier is opened, Consecrated Mind will move up to where the barrier was. When the boss moves, the team further back will need to move up, pushing past the boss to the next Vex barrier. They will need to deal with an Overload Minotaur and an Angelic as well.
This leapfrogging system is continued up to the final Vex barrier. This last barrier has three locks, and so three Vex boxes must be used to open it. Consecrated Mind will be waiting on the other side, so speed is of the essence.
When the final Vex barrier goes down, all players will need to press onwards into the open field. This field is full of Cyclops, Overload Minotaurs, and has the Consecrated Mind creating Voltaic Overlfows along the way.

The main goal of the final stretch is to reach the end. How you approach this is personal preference, but having a couple of players focus on killing the Cyclops can make it easier for others to press forwards. The same applies to the Overload Minotaurs. Keep them distracted so at least one player can make it to the end.
After Consecrated Mind disappears, the encounter is over and you can collect your loot from the chest.
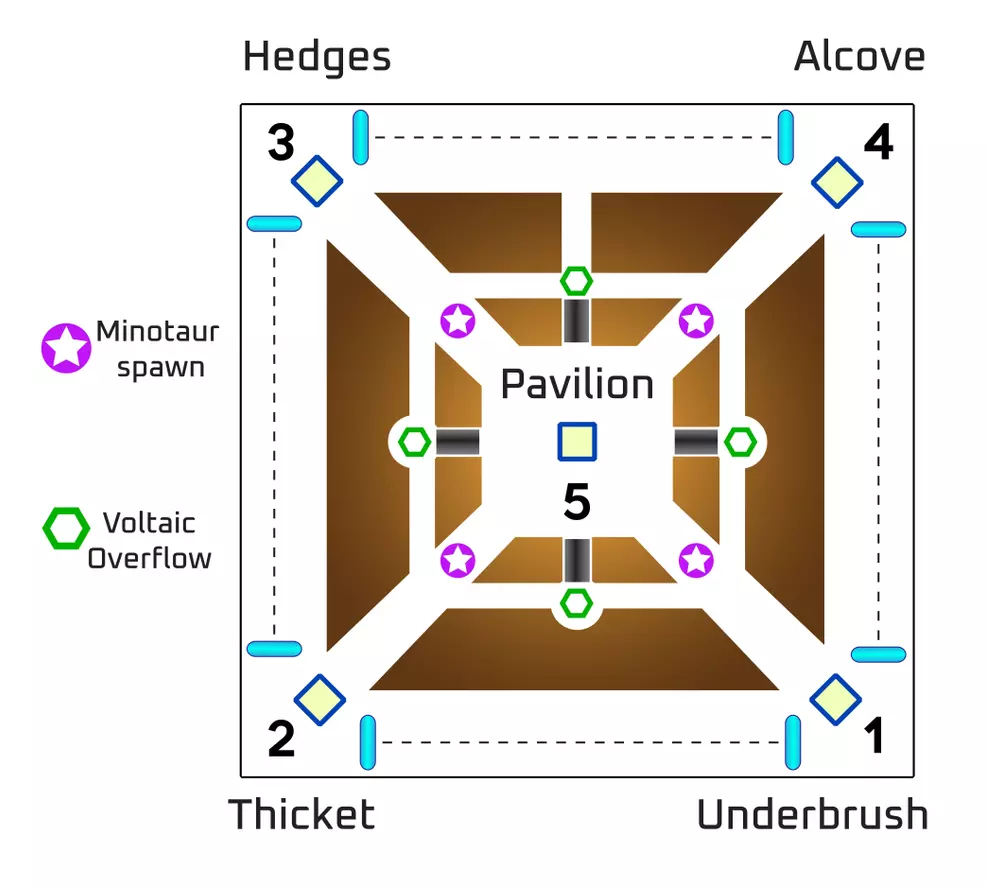
Summon the Consecrated Mind – Undergrowth
The second encounter in the Garden of Salvation tasks players with summoning the Consecrated Mind. This is accomplished by securing four relays at the four corners of the area and holding them until the center Vex barriers unlock.
- Kill the Goblins in the center to start the encounter
- Two players defend the first relay while four players rotate clockwise to the next relay
- Four players clear Relay 2 and leave one player there to defend it. The rest push on.
- Three players clear Relay 3 and leave one player there to defend it. The rest push on.
- Two players clear Relay 4 and leave one player there to defend it
- One player from Relay 1 and the last player float between each relay, helping clear enemies and refreshing the Enlightened buff
- Each relay will be assaulted by three Angelics. Once all 12 are defeated, the center Vex barrier will drop
- All players fight to the center and defend Relay 5 until the encounter ends
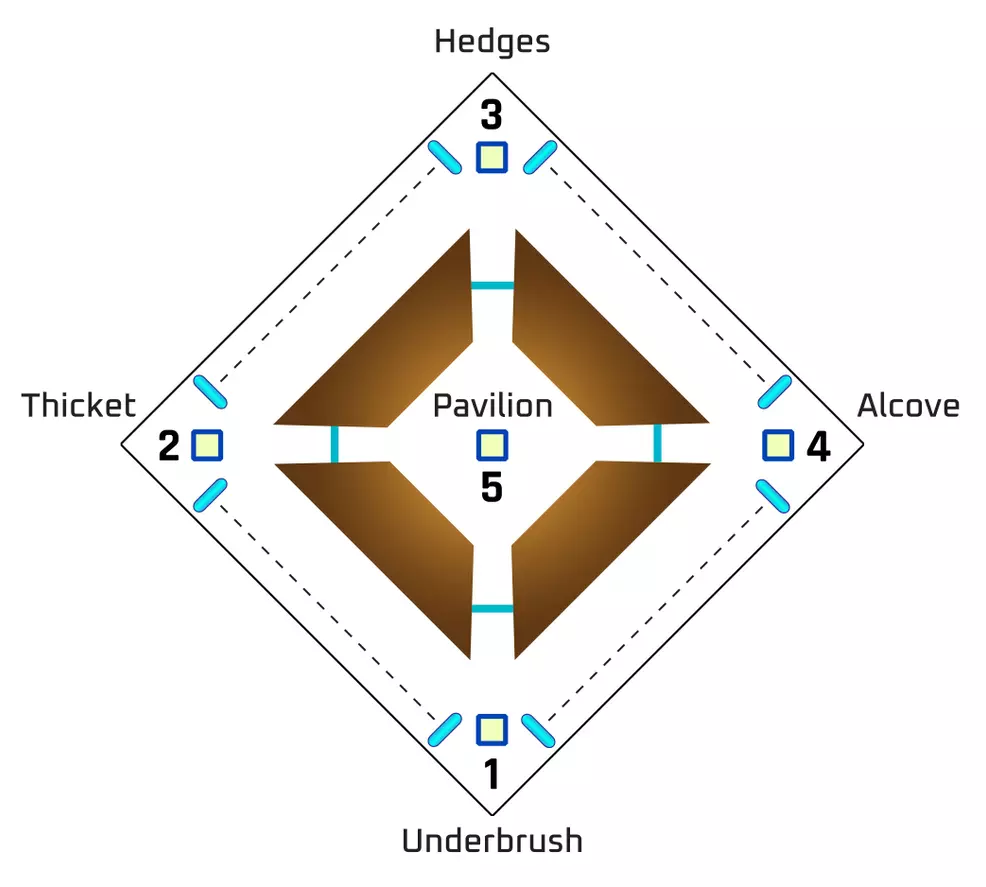
Credit to Ash Stevens for the Garden of Salvation Undergrowth map
Encounter mechanics:
- Barrier Hobgoblins – Giant Hobgoblins that generate a shield to heal themselves that can only be broken with Anti-Barrier Rounds.
- Relays – Must be defended from Vex and charged using Vex box and tether. There are five in the map, one in each corner and one in the very center for the final wave of enemies. Provides an Enlightened buff when tethered. Once activated, the portals at the back will activate allowing for quick access to each corner.
- Tether – Each area has a Vex box that must be used to create a tether to the relay, refreshing it if any Vex have uploaded. It also provides the Enlightened buff.
- Enlightened – A 44 second buff that allows players to break the white shields of enemies.
- Angelics – Hydras that must be killed to unlock the Vex boxes. These assault the relays in groups of three once all four relays are active.
This fight in the Garden of Salvation raid is all about endurance. There are no puzzles to figure out, there’s just managing buffs and trying to survive an onslaught of enemies. It’s worth noting that there are a lot of ways you can approach this fight, this is just the method that was most reliable for my team.
To start the encounter, defeat the three Goblins before they can upload. At this point, four players should begin rushing clockwise toward Relay 2. The two players at Relay 1 should take down the Angelic and use the Vex box to charge the relay to get the Enlightened buff when needed.
Meanwhile, the four players need to defeat the Barrier Hobgoblins and kill the Angelic. Use the Vex box to get the Enlightened buff and then leave one player behind to defend Relay 2. This lone player should work with the two players at Relay 1 to get a buff refresh.
Three players will now need to attack Relay 3, clearing the Barrier Hobgoblins and the Angelic, and getting the Enlightened buff. Leave one player there to defend the relay while the last two players push to Relay 4. At this point, if you're able to, send one player from Relay 1 to Relay 4 to help secure it. This relieves a lot of the pressure from the two players pushing to this location.
Again, clear the Barrier Hobgoblins and Angelic, clear the enemies and get the Enlightened buff – which will activate the final relay.
At this point, it’s about defending each relay as enemies assault it. There will be normal enemies, white-shield enemies, and Angelics. The white shield can be easily removed with a single bullet while Enlightened.
Look out for the on-screen prompt that reads “Undergrowth defenses deployed”, this signals that three Angelics are attacking a relay. Work together to clear these Angelics before they overrun a relay. Remember to use the Vex portals to quickly jump between each corner.
After each relay has been assaulted, the center Vex barrier will fall, granting each corner access to the center. All players should carefully fight through to the center where the final relay awaits.
The fight is exactly the same as before, but this time it’s one location. Defeat the Angelic and then group up to tether the relay. Hold out against the onslaught of enemies. Any time all of the Angelics are defeated, make sure you use the Vex block to refresh the relay. Defend this relay until three waves of enemies are killed, at which point the encounter will end and a loot chest will spawn.
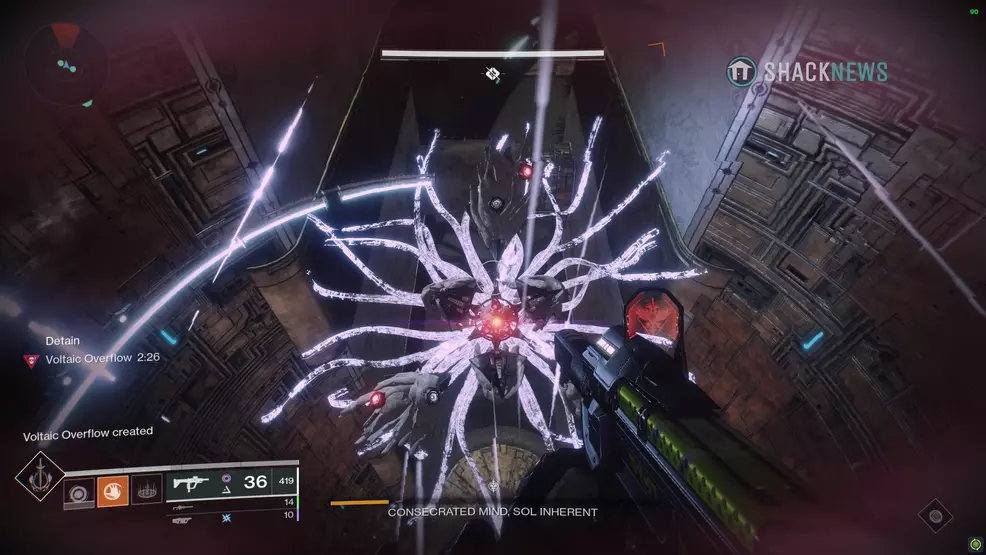
Defeat Consecrated Mind – Undergrowth
The third encounter in the Garden of Salvation raid tasks players with defeating the Consecrated Mind. This takes place in the inner area of the Undergrowth and involves depositing motes and shooting the Consecrated Mind’s eyes.
- Create a tether from the Vex box to the center relay to start the encounter
- Three players locate the bank and start killing minotaurs and collecting motes. Player that collects motes deposits them and uses the Enlightened buff to pop the white shields.
- Other three players follow the Consecrated Mind. One player collects the Voltaic Overflow and calls out which eyes are red, the inside or outside.
- Switch player roles if all three players have Voltaic Overflow counters.
- When 30 motes are collected, everyone follows the boss to the bank and the damage phase begins.
- Shoot all of the red eyes to stun the boss, opening its weak point. Shoot the center of the boss as it retreats. Repeat the steps until the boss is defeated.
Credit to Ash Stevens for the Consecrated Mind fight map.
Encounter mechanics:
- Motes – Minotaurs will spawn down the lanes and drop motes when killed. Collect motes and deposit them in the relays. Bank 30 motes to activate a damage phase. After collecting a mote, the player will receive a 60 second counter, if the counter reaches zero before the motes are banked, the player will lose all the motes. Players can hold a max or 10 motes at a time.
- Relays – Every round, one of the four relays in the corners will become the bank. This will be shown by it glowing brightly. Thirty motes must be banked to activate a damage phase.
- Enlightened – Whenever a player banks motes, they will receive the Enlightened buff. They must then defend the relay from white-shield enemies.
- Voltaic Overflow – The boss will fire out a Voltaic Overflow that must be collected or it wipes the team. A player who picks it up will receive a 2 minute 30 second timer. Collecting another one while this timer is still going will kill the player. The player that picks up the Voltaic will be locked in place and will need to provide information on the eye mechanic.
- Boss Eyes – When a player collects the Voltaic Overflow, they will become trapped. The boss will spread out its fins, shining its eyes. The player that got the charge will need to call out which eyes are red: in or out. Assisting players will need to shoot the correct eye to free the player that’s trapped. If the three correct eyes are not destroyed, the trapped player will die.

To start the fight against the Consecrated Mind, create a tether chain from the Vex box to the relay. Once the boss spawns, players will need to quickly start performing their roles.
Three players should locate the Minotaur and kill it, ensuring one person collects the motes. The idea is to have one player collect 10 and then the next player starts collecting. Deposit the motes once you have 10 or before the timer runs out.
The other three players will need to follow the Consecrated Mind. Have one player collect the Voltaic Overflow while the other two flank them. The trapped player should look at the boss, and as soon as they see which eyes are red, call it out, either “in” or “out”.
The two other players should shoot the eye that corresponds to in or out. The player that is trapped should always shoot the top fin, while the two players flanking should shoot the left and right fin. This way all the eyes get destroyed and there is no doubling up.
At some point, all three players are likely to have the Voltaic Overflow debuff, meaning they’re unable to collect another charge. When this happens, you will need to sub in one of the mote collectors to take the Voltaic Overflow.

When 30 motes are banked, a message will appear on screen stating, “The Consecrated Mind is drawn to the overloaded relay”. Follow the boss to the bank and prepare for the damage phase.
As Consecrated Mind arrives, all of its eyes will glow red. Destroy all the eyes to force it to open its weak point. Shoot the very center of the boss to deal damage as it retreats back to the center. Repeat this process until it dies.
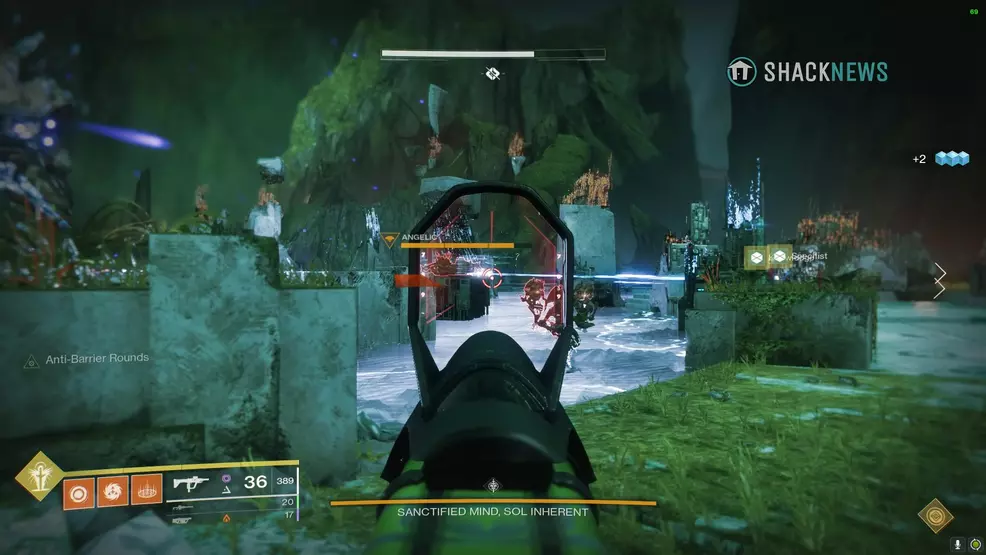
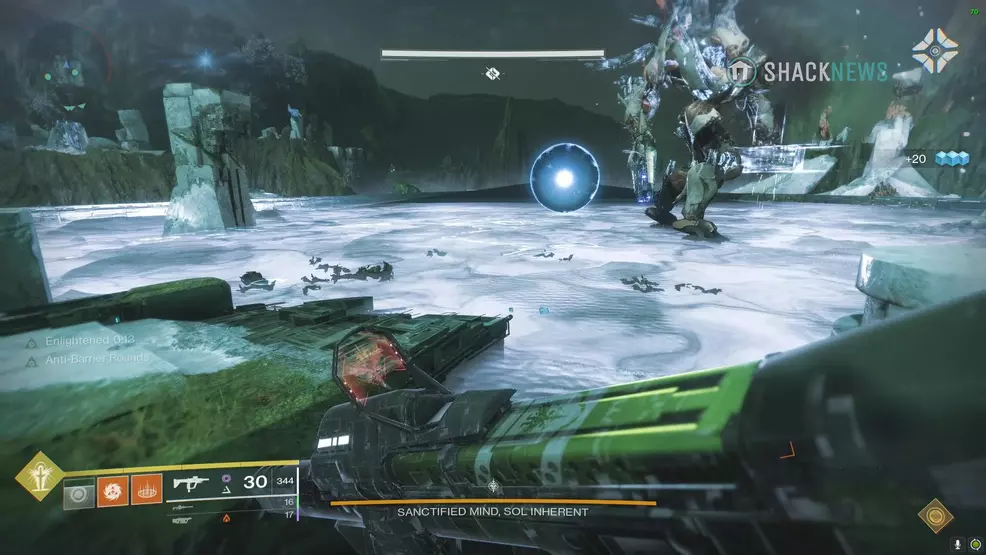
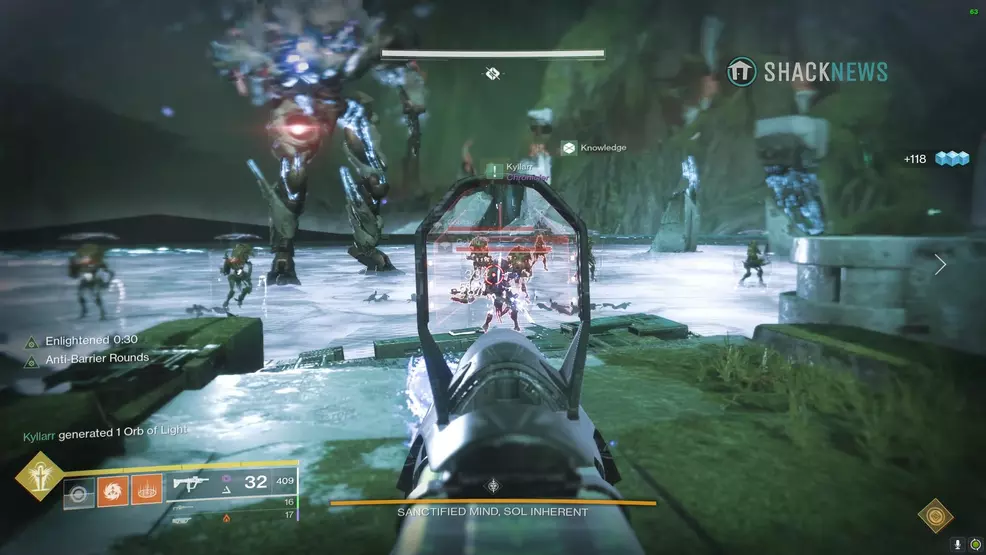
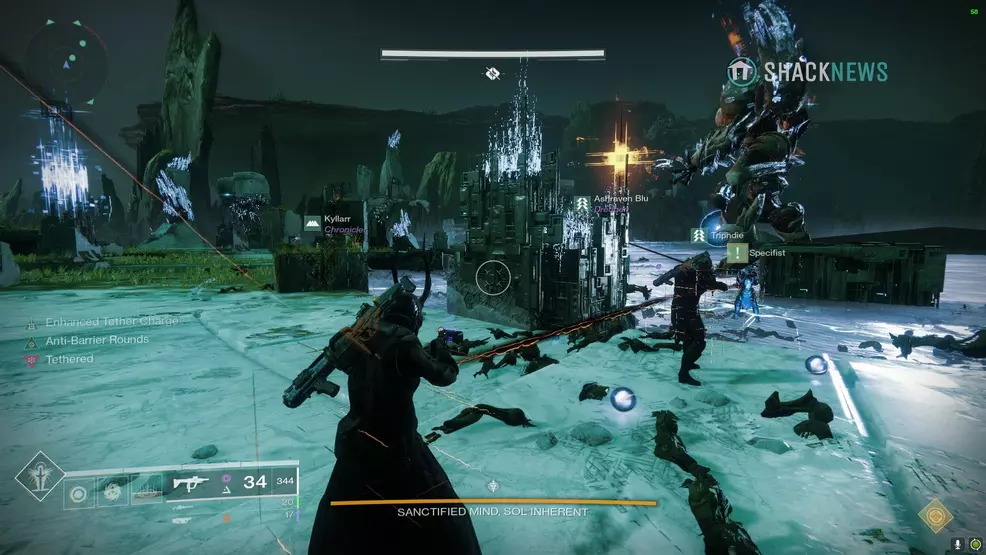
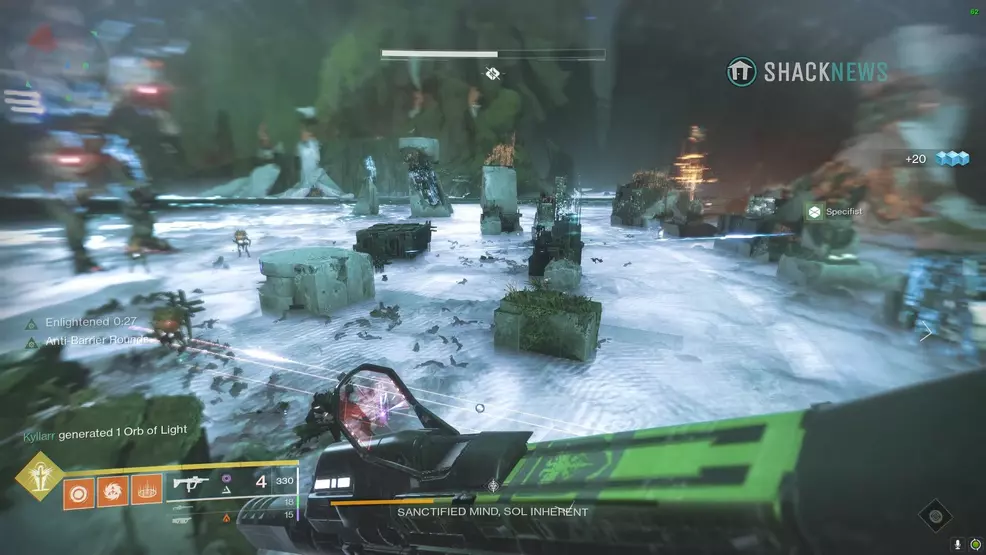
Defeat Sanctified Mind
The last encounter in the Garden of Salvation is against the Sanctified Mind. The goal of this encounter is to create a tether from the relay to the boss. To do this, 30 motes must be deposited in each relay.
- Begin the encounter by shooting the boss, defeat the enemies, kill the Angelic
- Destroy the boss' shoulder or knee, or both, and send player(s) through to collect motes. When they’ve collected 10, destroy the shoulder/knee to bring them back. Repeat until 30 motes are in each relay.
- Defeat the enemies that spawn, including the Angelic
- Boss will show a blue or orange plus sign. Use the appropriate relay to create a tether to the plus sign. Once it is broken, immediately make a tether to the boss using the opposite relay.
- Deal damage to Sanctified Mind and repeat the above steps
Encounter mechanics:
- Relays – There are multiple relays in the boss arena, but only two are activated at a time. Deposit 30 motes in both active relays to fully charge them. Relays are used to tether to the boss' sign, stunning him for a damage phase. The relay’s tether can also be used to bring back platforms the boss destroys. The left relays are always blue and the right relays are always orange. Relays also provide an Enlightened buff after depositing motes.
- Motes – The islands on the left and right have enemies that drop motes when defeated. Collect these motes and deposit them into the relays. Depositing motes grants the Enlightened buff, allowing players to destroy the white shields. The motes are also color coded. Orange motes can only be deposited into the orange relay and blue motes can only be deposited in the blue relay. Motes expire after 60 seconds, so players cannot hold onto them indefinitely.
- Boss shoulder/knee – Destroying the boss’ knee or shoulder creates a portal that grants access to the side islands allowing players to collect motes. When a player is on the island and a shoulder/knee is destroyed, they will be pulled back to the main arena. Each time the shoulder/knee is destroyed, a Cyclops will spawn.
- Platforms – Whenever a shoulder or knee is destroyed, the boss will destroy a platform at random. If you’re on a platform when it breaks, you will die. These platforms can be rebuilt using the tether from the relay.
- White Shields – These shields can only be destroyed by someone with the Enlightened buff. The shields break after a single bullet, so the Enlightened player(s) should just focus on breaking shields.
The strategy my team found most effective was to charge one relay at a time. When one relay is charged, focus on charging the second relay. Though it does increase how long it takes to defeat the boss, it increases the number of players left defending the main arena.
Divide your fireteam into three pairs: Mote Team 1, Mote Team 2, and Platform Team. The mote teams are responsible for collecting motes and depositing them, while the platform team needs to defend the relays and rebuild platforms.
Start the Sanctified Mind encounter by shooting the boss. Defeat the enemies that spawn, paying attention to the Angelic. Once the Angelic is defeated, the relays will be unlocked and you can start damaging the boss’ shoulder or knee.
Destroy the shoulder and send through Mote Team 1 to collect motes. The goal is for each Mote Team to collect at least 15 motes before coming back. When Mote Team 1 has 15 motes, destroy the shoulder (bringing Mote Team 1 home) and immediately send through Mote Team 2.
When Mote Team 2 has 15 motes, destroy the shoulder to bring them home. At the same time, destroy the knee and send Mote Team 1 to the other side to collect 15 motes. When Mote Team 1 has 15 motes, destroy the knee to bring them home and send Mote Team 2 over to collect the final 15. Destroy the knee to bring Mote Team 2 home when they’re ready.
Whenever a Mote Team comes back, have one player immediately deposit the motes while the other holds onto their motes until the last possible moment. This ensures that there is a good overlap with the Enlightened buff. Mote Team players should pop the white shields and help defend the relays.
While all of this is happening, the Platform Team will need to be defending the relays, destroying the Cyclops when they spawn, and rebuilding the platforms. To rebuild a platform, pick one that has been destroyed and then use the relay’s tether to chain to the plus symbol, after a few seconds the platform will reappear.
Once each relay has 30 motes, Sanctified Mind will enter a pre-damage phase. The boss will march forward and display a plus symbol. The color it shows is the first relay you must use to stun the boss. Get to the correct relay and clear the enemies.
When the Angelic dies, the relay will unlock. Tether to the plus symbol (minimum of 3 players required, recommended 4) using the relay that matches the color of the symbol. As the symbol shatters, shift immediately to the other relay and create a tether to the boss to break the second symbol. The second symbol will always be the opposite color of the first.
After breaking the two symbols using the tether, group up and deal damage to Sanctified Mind. The boss will stand on the ground for a few seconds before hovering in mid-air. The critical spot is its stomach. Repeat the process until the boss is defeated.
Sanctified Mind tips
There are a few points in the Sanctified Mind fight where players might struggle. There’s a lot going on, the arena will be breaking apart, enemies will be constantly spawning, and various mechanics will be demanding attention. On top of all this, dealing damage to the boss is a challenge in itself.
When recreating platforms, try to pick platforms that are critical to the fight. Platforms on the outskirts are less important than those in the middle or those around the relays. Figure out who is the first person in the tether and who is standing near the plus, that way there’s no confusion.
As for tethering to the boss’ symbol, set an order of who will be at what point in the chain. If you’re not in the chain, get as far away from the relay and tether-players as possible so you don’t get accidentally tethered.
While there is a small window to damage the boss during the two symbols, it’s more important to get the second tether than it is to damage. Have the players who aren’t in the tether chain deal additional damage.
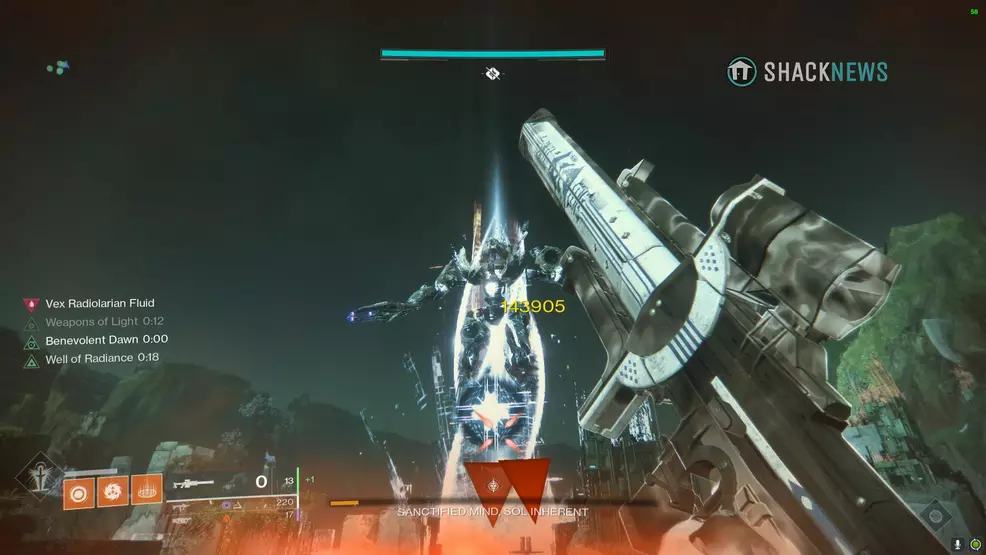
In terms of actually damaging Sanctified Mind, a Ward of Dawn with Weapons of Light is exceptionally valuable. While the damage doesn’t stack, a Well of Radiance provides bonus health, which allows players to ignore the radiolarian fluid damage.
For weapons, Izanagi’s Burden is going to be the highest damage-output available to players. As for Power weapons, using one of the best Grenade Launchers in Destiny 2 is a good idea. Ideally, a rapid-fire launcher with Spike Grenades makes for a good option and provides valuable add-clear in a pinch.
The Garden of Salvation raid offers an intense series of challenges that will push a Fireteam to its limits. By using this Garden of Salvation guide, you should have a good grasp on the mechanics of the raid and some strategies to help you complete encounters. For guides on the previous raids, check out the Shacknews Destiny 2 complete strategy guide.

-
Shacknews

 reply
replySam Chandler posted a new article, Garden of Salvation raid guide - Destiny 2
