
Imbaru Engine guide - Destiny 2
How to solve the gifts of Cunning, Strength, Navigation and the final puzzle in the Imbaru Engine for the May You Never Cease Triumph in Destiny 2.
The Imbaru Engine is a perplexing area in Destiny 2’s Season of the Witch. This location has players completing a Gift of Cunning, Gift of Strength, and Gift of Navigation in order to gain rewards and learn more about Savathun. These light puzzles must be completed for the May You Never Cease Triumph, an objective required for the Haruspex Title.
Imbaru Engine

Source: Shacknews
The Imbaru Engine is an enigmatic area that Savathun built for her own secretive purposes. This contraption is in the Altars of Summoning area but can only be launched via the H.E.L.M. As part of the Triumph, May You Never Cease, players must complete two gifts: A Gift of Cunning and A Gift of Strength. These both reward gear from Season of the Witch.
Gift of Cunning
The first available gift was the Gift of Cunning and is available during Week 5 of the Season of the Witch campaign (Step 35). This one is rather simple and requires not much explanation: simply open up the chests that have the X-shaped Hive rune pointing at them. Each plate will be circular with a pointy side that lines up with a chest. If you open a chest that has the wrong symbol pointing at it, you will die and the chests will reset. Slap on one of the chest tracker mods on your Ghost to make it easier to find the chests.
Gift of Strength
The second one is the Gift of Strength and requires a little more cunning than it does brawn. This test is only available after you find the hidden Minor Arcana card in Savathun’s Spire and then it requires you to defeat specific enemies in a set pattern.
Source: Shacknews
The Minor Arcana card is found at the end of Savathun’s Spire. After passing through the doorway portals, enter the room with the final three doors and find the card beside the portal on the right. After you grab the card, go to the Lectern of Divination and activate it to unlock a new area in the Imbaru Engine.
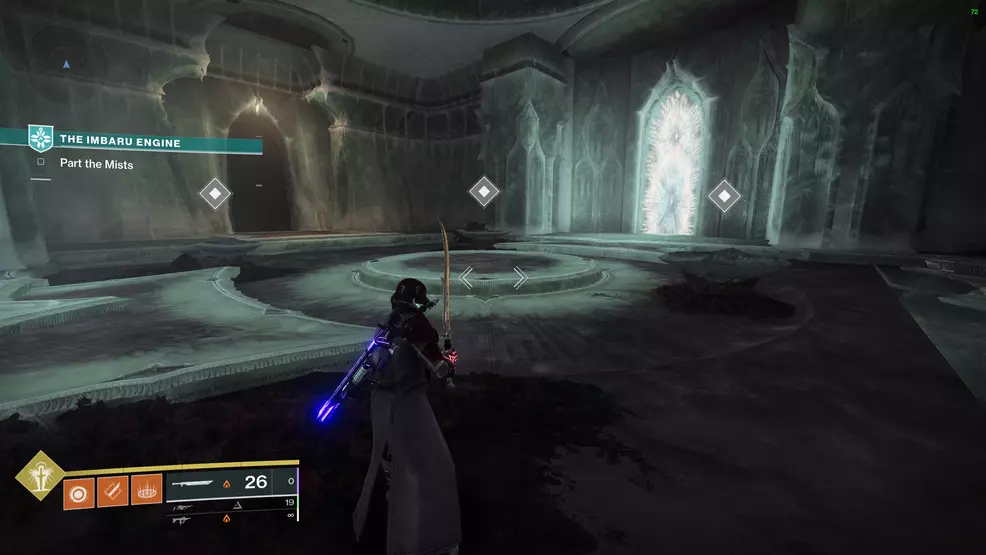
Launch the Imbaru Engine and travel up the two elevators and into the abstract room but do not start the chest encounter. Instead, approach the door to get an interact prompt that reads: Proceed through the Imbaru Engine. Open the door and continue through the hallways, being careful not to get killed by the traps.
When you reach a room with the invocation point, activate it to see a series of Knights and Cursed Thrall kneeling on the plates. The goal is to kill specific enemies by following the plate they stand on. There is a Deepsight Resonance node to interact with that will reveal the first enemy you must defeat.
Source: Shacknews
In the first room, kill only the Knights that the plate points to. There will be three in total. Doing this will partially fill the bar on the side of the screen. Follow the plates into the next room.
Source: Shacknews
When you jump up and into the second room, defeat only Cursed Thrall being sure to skip one enemy each time. There are three to kill, and again, completing this will fill the bar a bit more. The plates will direct you to jump up and over the wall and return to the first room where you can enter the cave.
Source: Shacknews
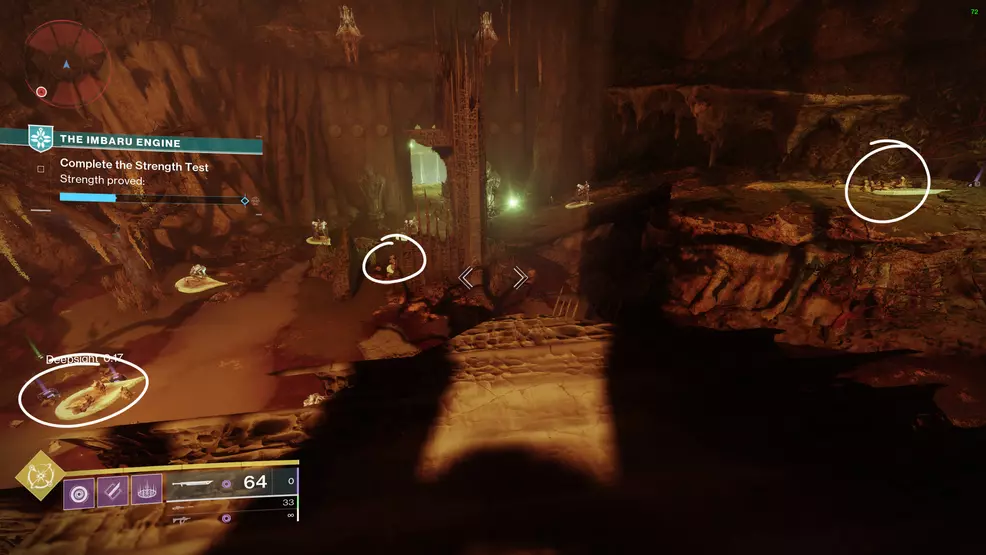
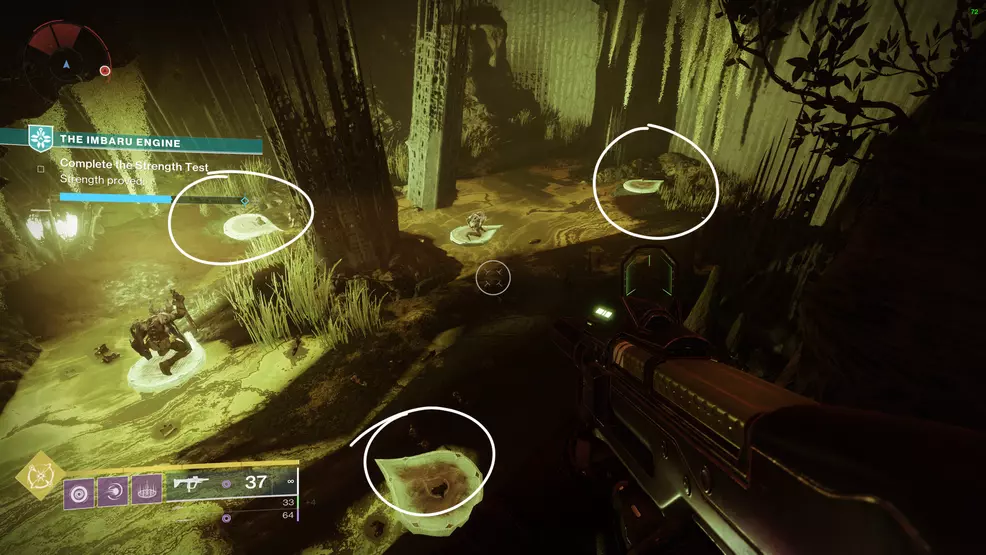
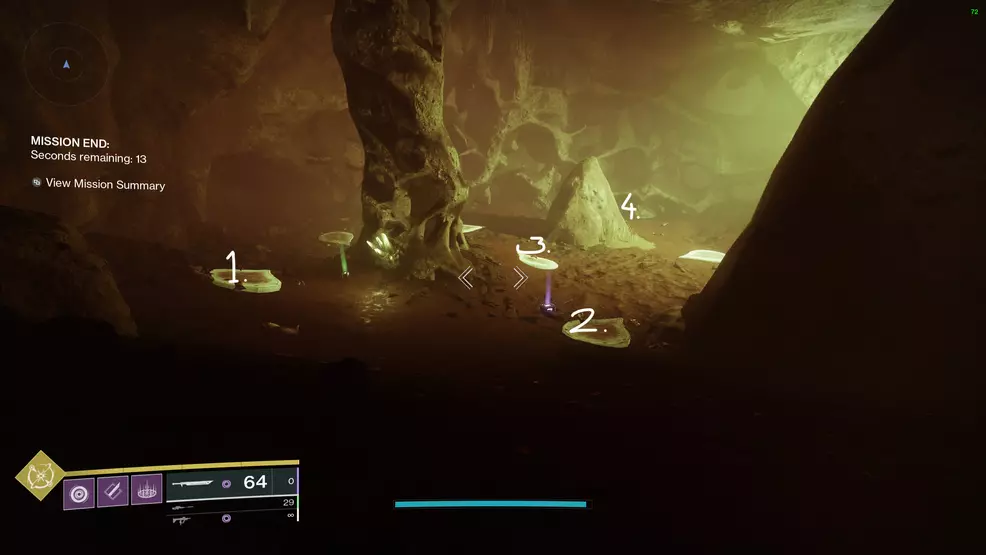
From the first room, enter the cave to find it full of Cursed Thralls. As before, you must skip one enemy each time. Begin by taking out the Cursed Thrall closest to the wall on the left (which is what the previous plate was pointing at) and then following the pattern. The last enemy will be behind the rock.
Failing to kill the correct enemy will cause Shriekers to instantly kill you and resets the rooms. You’ll need to go through each room again until you get it right.
Gift of Navigation
Source: Shacknews
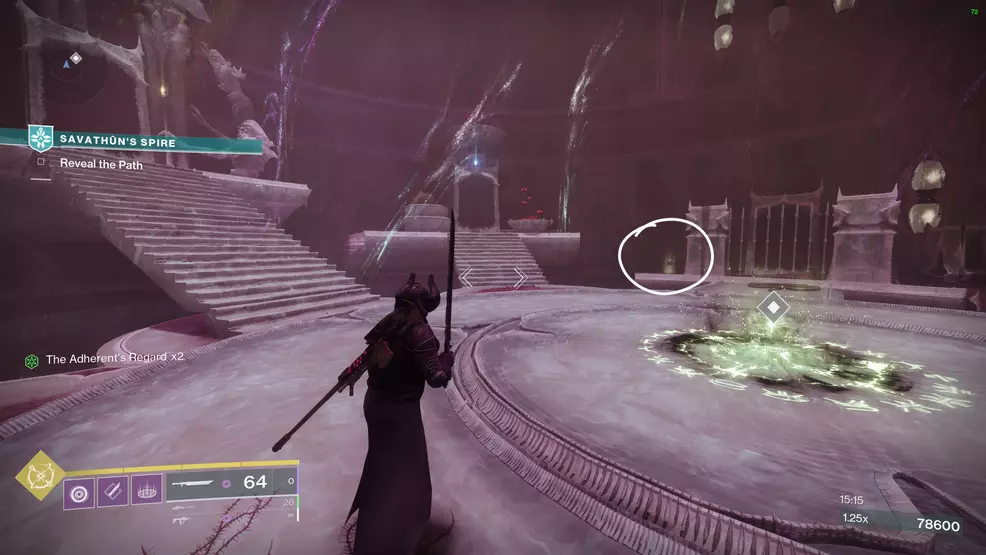
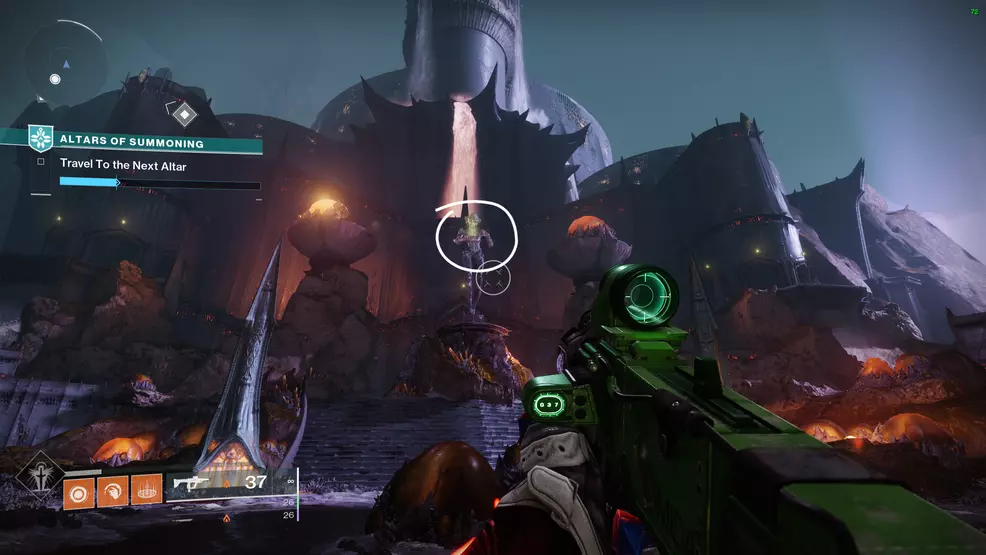
The final test, the Gift of Navigation, is unlocked once you acquire another Minor Arcana card in the Altars of Summoning. Enter the activity and locate the arena with the statue of Savathun holding the crystal. Destroy the crystal to reveal the card. Jump up and grab it and then head to the Athenaeum. Activate it at the Lectern of Divination and then launch the Imbaru Engine. Bring Hard Light with you, as you'll need to shoot several elemental runes.
Source: Shacknews
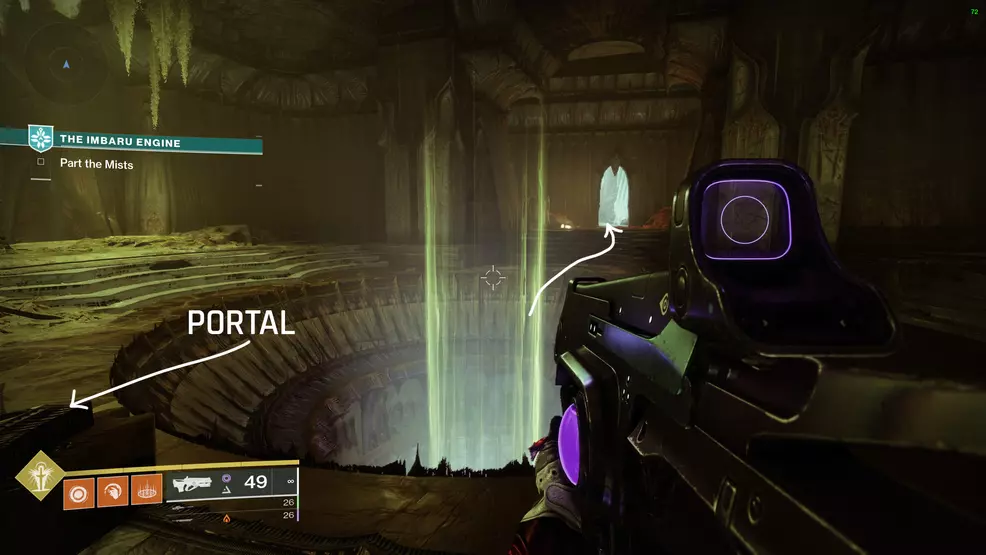
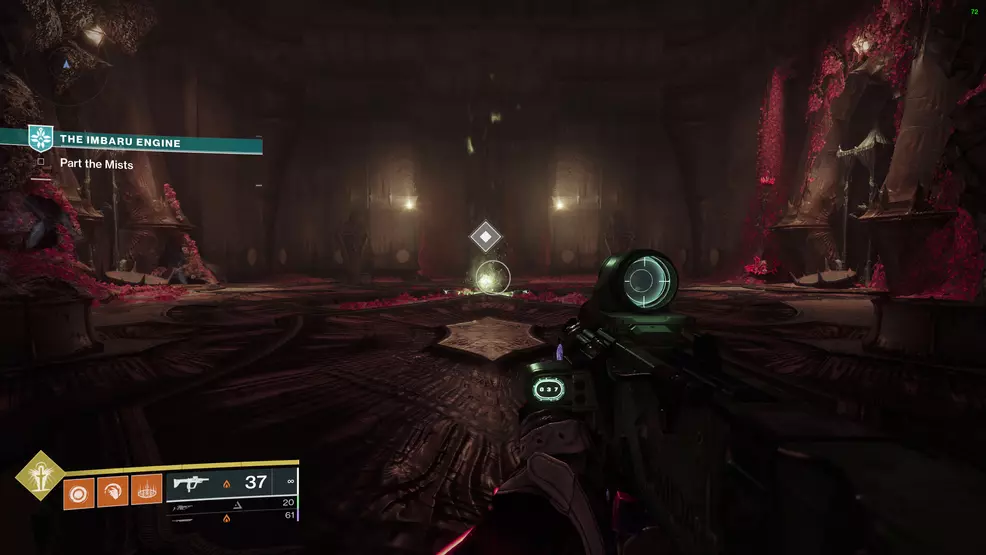
Once inside the Imbaru Engine, activate the Hive ritual, travel up the lift, enter the room where you hunted for the chests and pass through the door. Continue along the path as if you were going to the second test room. When you go up the lift to where the portal is, go through the doorway opposite the portal to enter the last room.
This puzzle requires you to go through the correct door after activating the correct rune. Look at the door you entered through and note the rune and the energy type. Look for the same rune in the same position on another door, shoot the rune, and then pass through the portal.
Source: Shacknews
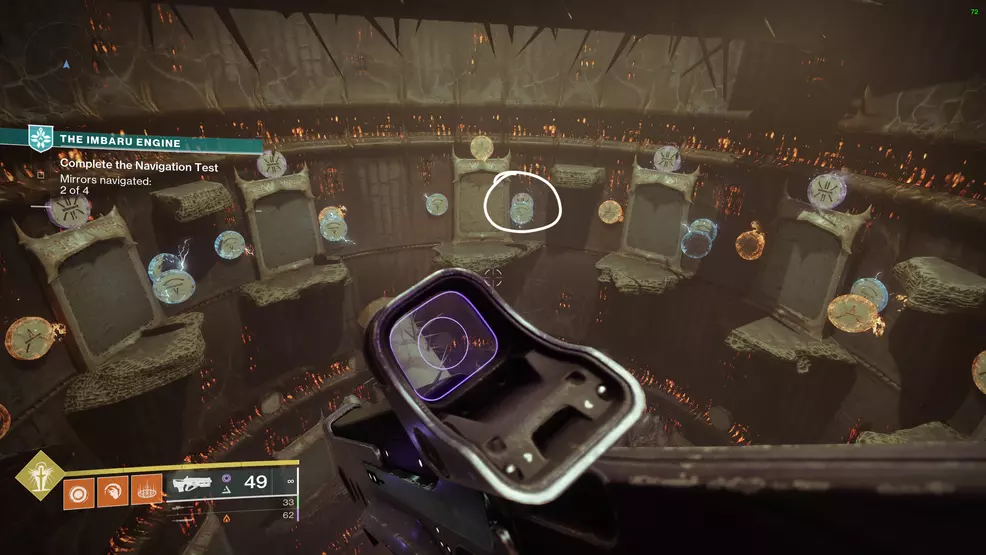
The third symbol will be a tricky one, as there will be runes floating in front of the correct rune. You’ll need to jump around to see the hidden runes. On the fourth floor, the runes will be floating all over the room. Stand on the ledges to find a rune that lines up, it should be a ledge to your left. The correct door will be to the right of where you entered.
A Parting Gift
Source: Shacknews
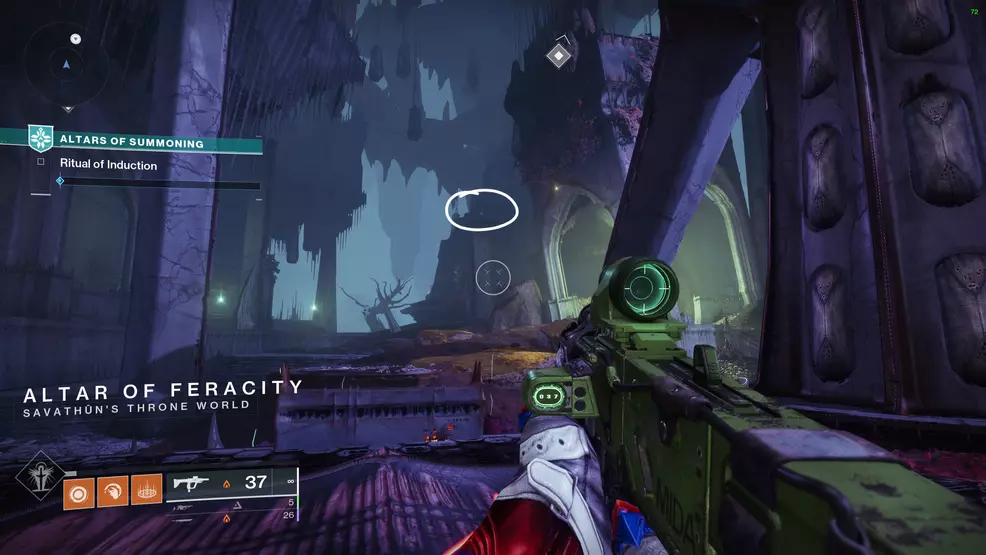
The final test, A Parting Gift, is unlocked once you acquire the Minor Arcana Whisper Card in the Altars of Summoning. Enter the activity and then go to the arena that is to the right of the stairs. The card is floating on top of the tall pillar. Claim the card and go to the Athenaeum. Activate the card at the Lectern of Divination and then launch the Imbaru Engine.
Source: Shacknews
Travel up and into the Imbaru Engine and then through the rooms. You’ll want to go up a couple of elevators and through the hallways with the spinning cylinders. There will be a new portal door beside the stairs that lead to the circular room with all the portal doors. Go through and activate the ritual. You will now need to find three flames and place them in the bowls. The bowls offer the following clues:
- This flame burns within the mist below…
- This flame burns within the halls of the Spire…
- This flame burns within the Altars of Summoning…
Mist below flame
Source: Shacknews
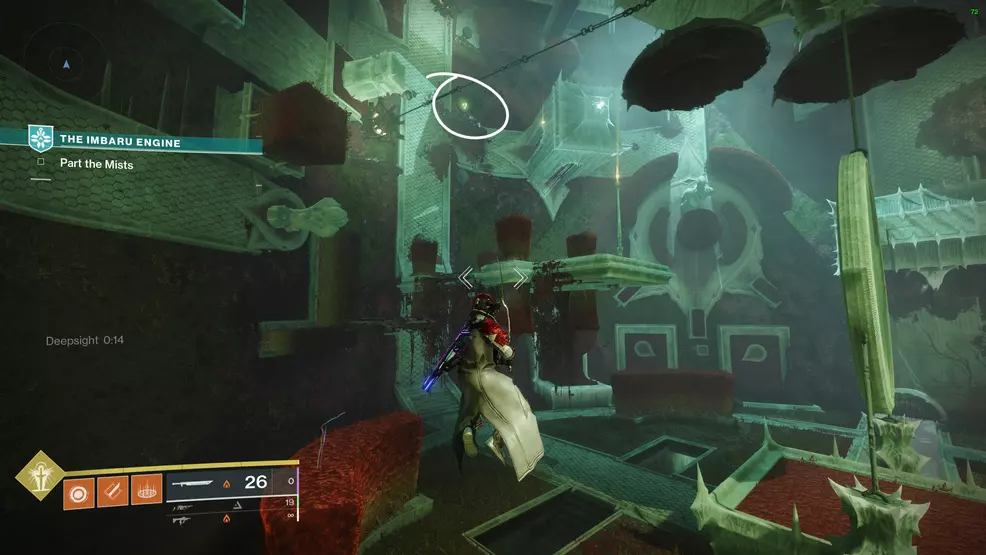
The mist below flame is in the Imbaru Engine, in the first room (the one that looks like an M.C. Escher drawing). Activate the Deepsight Resonance near the stairs and climb up to the flame.
Halls of the Spire flame
Source: Shacknews
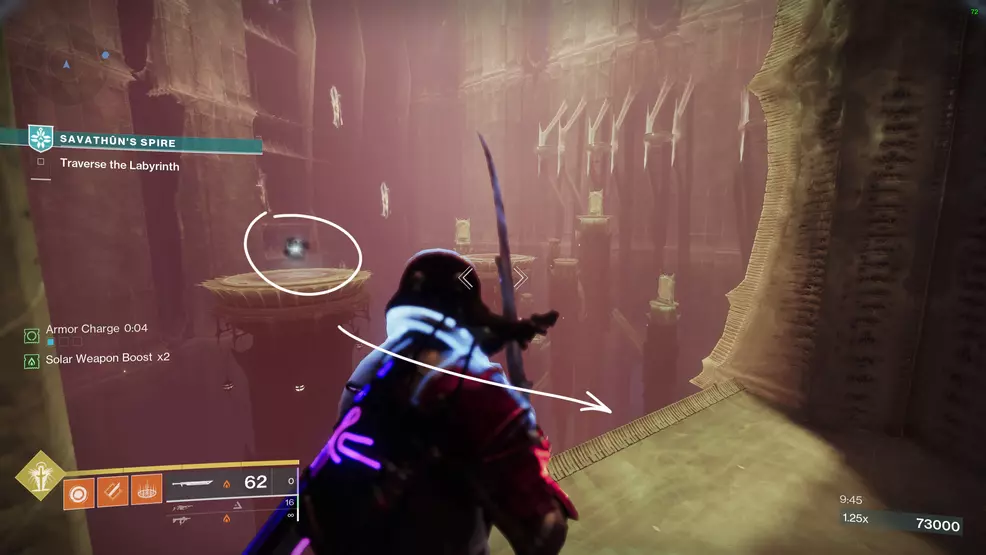
The halls of the Spire flame refers to Savathun’s Spire. Progress through the activity until you reach the portal door section. You’ll find a Deepsight Resonance node on a platform near the portals on the pillars. The platforms will take you under the bridge.
Altars of Summoning flame
Source: Shacknews
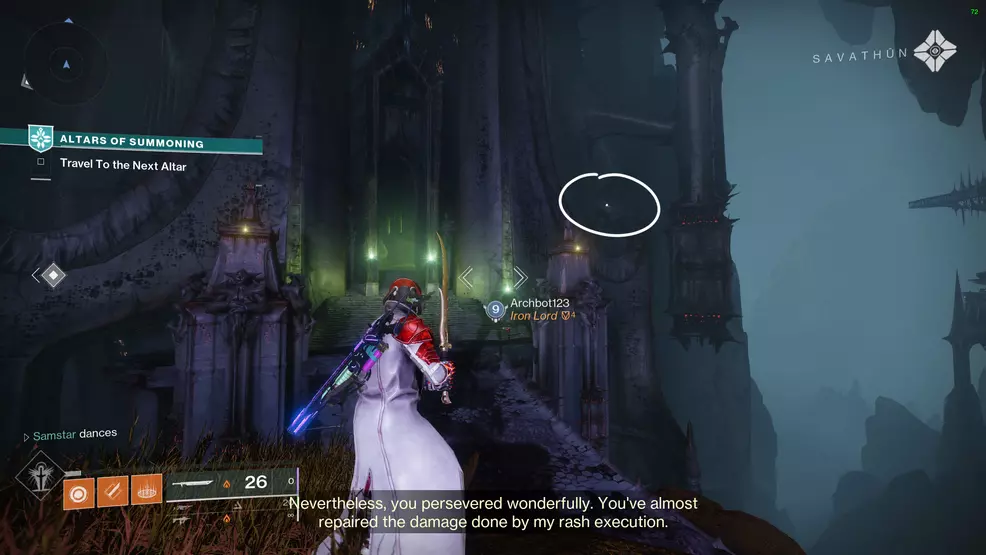
The Altars of Summoning flame is found by going up the stairs to the center building and activating a Deepsight Resonance. Climb across the revealed platforms to the flame.
Once you collect all three, return to the Imbaru Engine and approach the bowls. You will be able to rekindle the flame and a door will open. This will grant you access to the main puzzle room. There will be four symbols in each corner (16 total), four statues, two plates on the ground, and a center pedestal with a triangle.
Source: Shacknews
The goal is to work out which of the 16 symbols on the walls should be triangles and which ones should be circles. To do this, you gather the buffs from the plates which will give you Lies x2 and Truth (a reference to two lies and a truth). You can now activate the statues, which in turn spawns 16 symbols and four statues in each of the main puzzle rooms below you.
Travel to those rooms and activate a statue and record the symbols and the shapes that they have. Do this for each statue, on every room. What you’ll wind up with is a collection of symbols with different labels. You must figure out which labels are right (the truth) and which ones are wrong (the lies). For example, if the burger rune is shown as a circle on all the levels, there’s a high chance one of these is a lie – which means burger is a triangle.
This is a rather complex puzzle to explain, so I would recommend you check out Skarrow9’s video below for a thorough demonstration of the solution. This is a logic puzzle, so if that’s not your forte then check out the solution below.
Stand in the center of the top room and face the pedestal. Treat the burger symbol as number 1. Walk up and activate the following runes (activating it will cause it to light on fire): 1, 4, 5, 7, 9, 12 and 13. Once complete, activate the pedestal to submit your final answer. If correct, the door in front of you will open and you can claim Savathun’s heirloom.
Completing both the Gift of Cunning, the Gift of Strength, and the Gift of Navigation, will reward you with items from Season of the Witch. More importantly, completing these tests will unlock the Triumph, May You Never Cease, which is required to unlock the Haruspex Title. Be sure to read through our Destiny 2 Strategy Guide for more coverage from this season, previous seasons, and all upcoming releases.

-
Shacknews

 reply
replySam Chandler posted a new article, Imbaru Engine guide - Destiny 2
