
Vow of the Disciple raid guide - Destiny 2
A complete walkthrough and guide for the Vow of the Disciple raid from The Witch Queen expansion in Destiny 2.
Vow of the Disciple is the raid that came with Destiny 2: The Witch Queen. This guide will cover the raid from every angle, including Power requirements, loadout recommendations, essential classes and subclasses, secret chests, and more. This guide will be built from the ground up at the launch of Vow of the Disciple on March 5, 2022, and will be updated frequently until it’s complete and covers every inch of the experience.
Last updated: March 10, 2022 at 3:26 a.m. EST.
- Payload encounter (Approach, Children)
- Acquisition / Obelisks (Acquisition: Truth. Symbolize. Is. Materialize. Everywhere.)
- The Caretaker (Collection: Do Not Disrupt the Caretaker)
- The Upended / Artifacts (Exhibition: Nothing More Than Meaningless Trinkets)
- Rhulk, Disciple of the Witness (Dominion: DrownDrownDrown)
STOP! Make sure you know how to spawn an extra chest at the final boss fight.
Vow of the Disciple Contest Mode / World First
Contest mode in Vow of the Disciple will last from 10 a.m. PST / 1 p.m. EST on Saturday, March 5, 2022, until 10 a.m. PST / 1 p.m. EST on Sunday, March 6, 2022. This is a period of 24 hours where normal rules of the Destiny 2 raid will not apply. Players will see their Power limits capped at 20 points below the recommended Power for each encounter. This means if an encounter carries a recommended Power of 1350, players will be capped at 1330. This is done to ensure that everyone is on a level playing field, and that those with additional time to play can’t increase their Power leading up to the raid to give themselves an advantage.
World First applies to the six-person team that completes the Vow of the Disciple, loots the final chest, and returns to Orbit. Bungie detailed some of the unique parameters around Vow of the Disciple and World First completion, so check it out in the March 3, 2022, TWAB.
Vow of the Disciple raid preparation
Guardians should consider the following preparations if they want to attempt Vow of the Disciple during Contest Mode:
- Reach at least 1350 Power prior to starting
- Ensure you have ample Upgrade Modules for infusion
- Ensure you have ample infusion materials
- Have DIM ready to quickly move gear back and forth
- Have a six-person team ready to go, and backup player
- Food and water at the ready in case you decide to go the full 24 hours
- Study the list of disabled Mods and gear from TWAB
Defeat Projection of Savathun
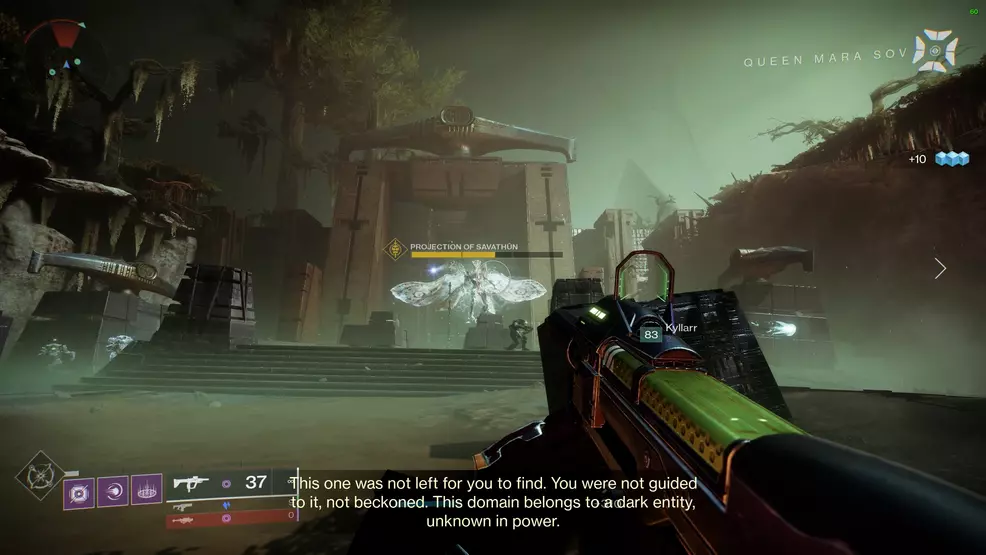
Before you can actually get to the first encounter, you must defeat a Projection of Savathun at the entrance. There will be a bunch of other enemies here too. When everything is defeated, the doors will open and you can progress forwards, preferably on your Sparrow.
In terms of damaging the Projection of Savathun, anything goes. Heavy weapons will knock her away quickly, with things like Gjallarhorn, Deathbringer, and other Linear Fusion Rifles doing great damage.
Payload encounter (Approach, Children)
The first encounter in the Vow of the Disciple raid is a payload escort mission that is not too dissimilar to the public event found on the Throne Room. Note that the first checkpoint comes after this encounter is finished – so if you go to Orbit you’ll need to defeat the Projection of Savathun again.
- Defeat Knowledge Bearers
- Collect Knowledge
- Deliver to payload
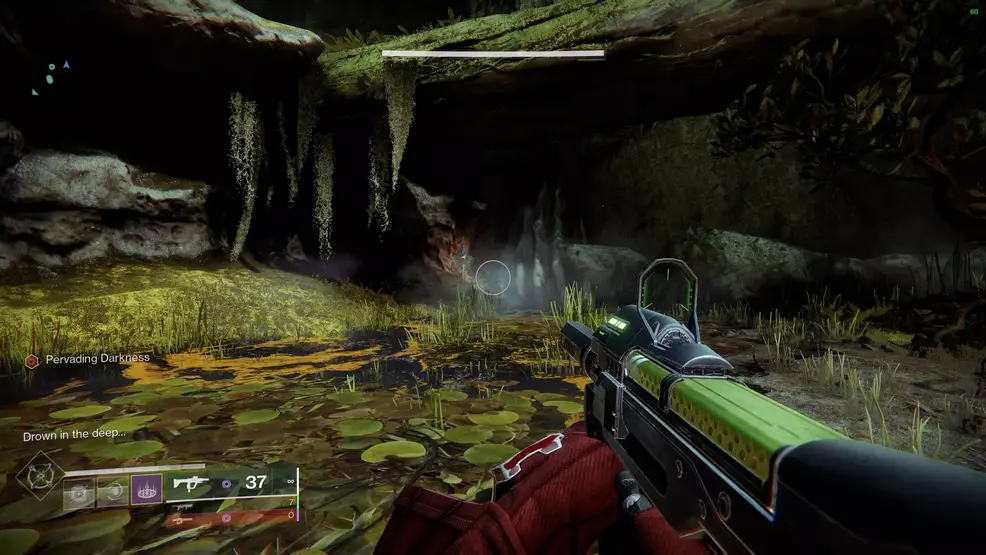
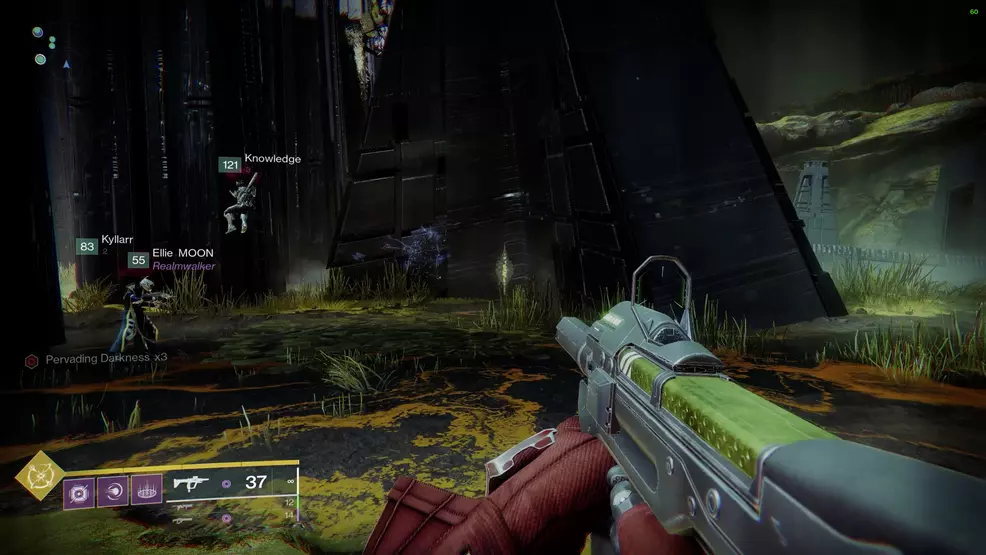
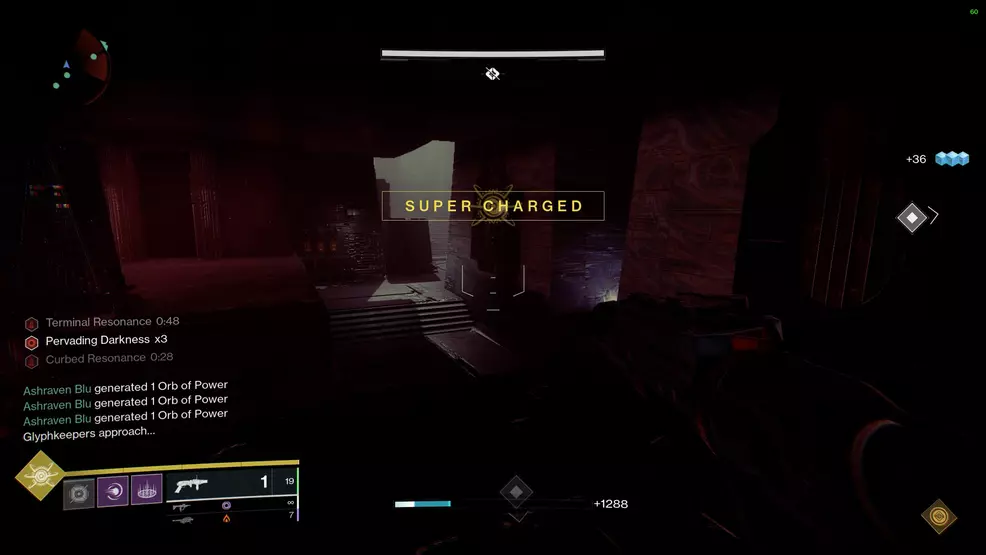
Pervading Darkness is a debuff introduced during this encounter and will remain throughout the entire raid. This debuff counts up to Pervading Darkness x10, at which point you will die. As it is increasing, your screen will get progressively darker, obscuring your vision. During the payload encounter, stand near the barge to remove the Pervading Darkness debuff.
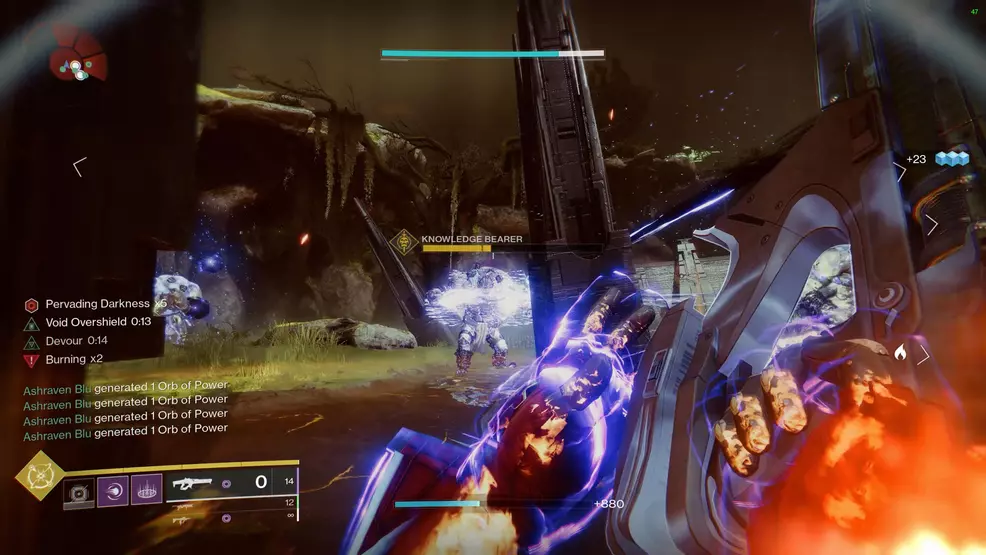
You're going to be moving the payload by depositing a Knowledge buff that drops from Knowledge Bearer Abominations. The Pervading Darkness debuff is still in play here, as is this new Knowledge buff. This buff stacks, moving from Heightened Knowledge to Brimming Knowledge and then Overflowing Knowledge depending on how many stacks of it you collect from the ground when you kill Knowledge Bearer Abominations. Collect the Knowledge buff and deposit it into the barge to move it forward, all while you manage the Pervading Darkness debuff and clear Scorn enemies.
Hidden Chest: During this encounter you must find and shoot three hidden Cruxes. The Cruxes can be hard to miss if you don’t know where to look. Here’s the location of each Crux:
When the payload reaches the first stop, go under the fallen tree to the left.
The second time the payload stops in the long hall, go to the end of the hall and turn left to find it in the corner.
After the third stop when the payload goes up and over a bridge, look under the bridge to find a hole, inside is the Crux.
You Search and Search and Search
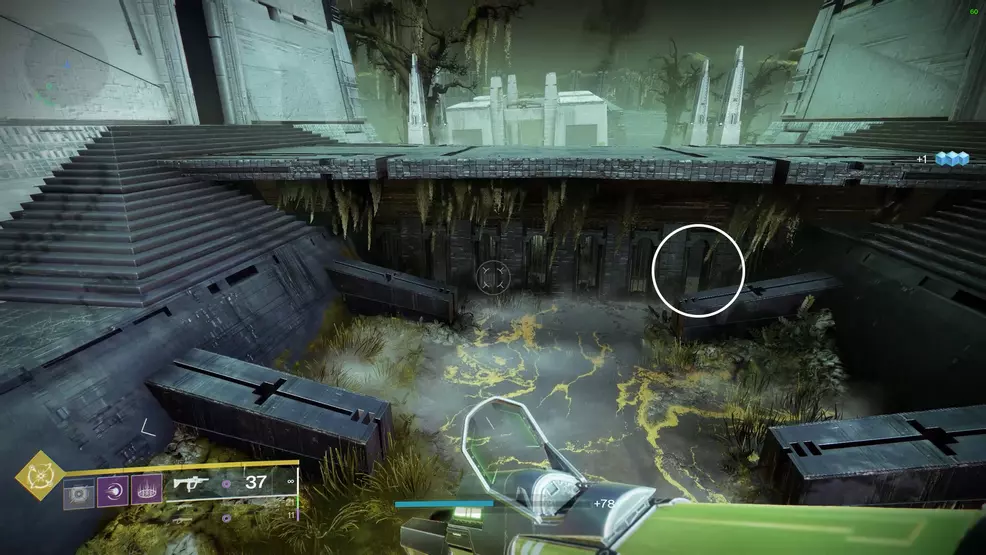
This isn't so much an encounter as a quick transition to the actual second encounter. Make your way through the pyramid until you reach the next area.
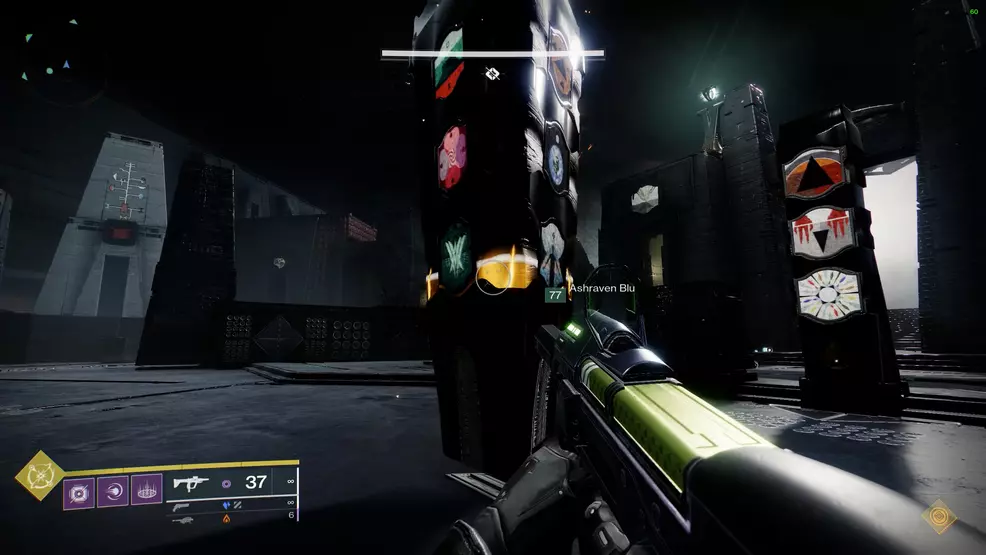
Obelisk encounter (Acquisition: Truth. Symbolize. Is. Materialize. Everywhere.)
The obelisk encounter is the first major encounter in the Vow of the Disciple raid, meaning you get a checkpoint, a rally banner, as well as loot if you complete it. This encounter requires you to deduce which three symbols on each obelisk must be shot. Unstoppable Abominations spawn during this encounter.
- Defeat Disciple’s Compasses as they spawn
- Check reference pillar for which side of the arena and which room to enter
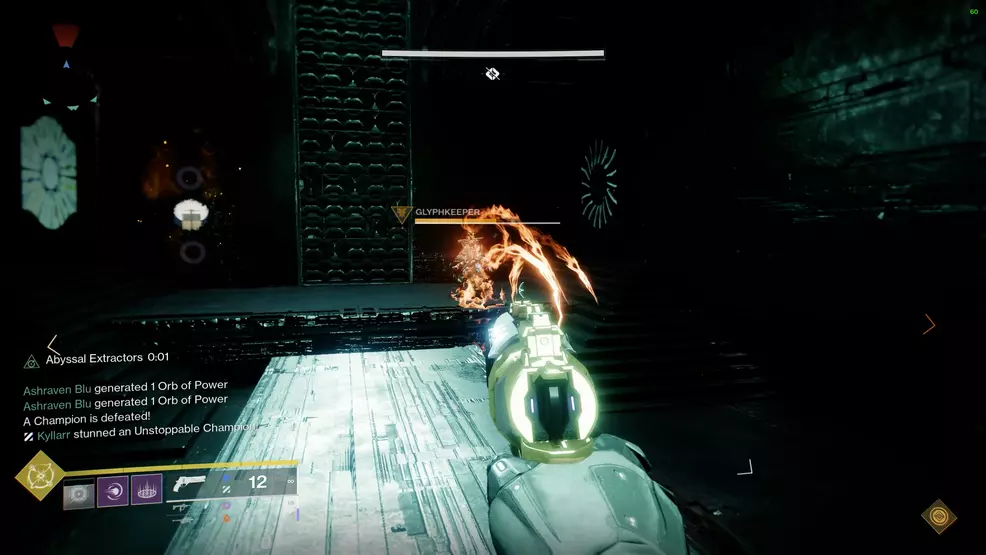
- Defeat Glyphkeepers
- Read out correct symbol on the wall
- Repeat until three symbols are found
- Locate obelisk that has all three symbols on it and shoot the symbols quickly
- Repeat the whole process three times
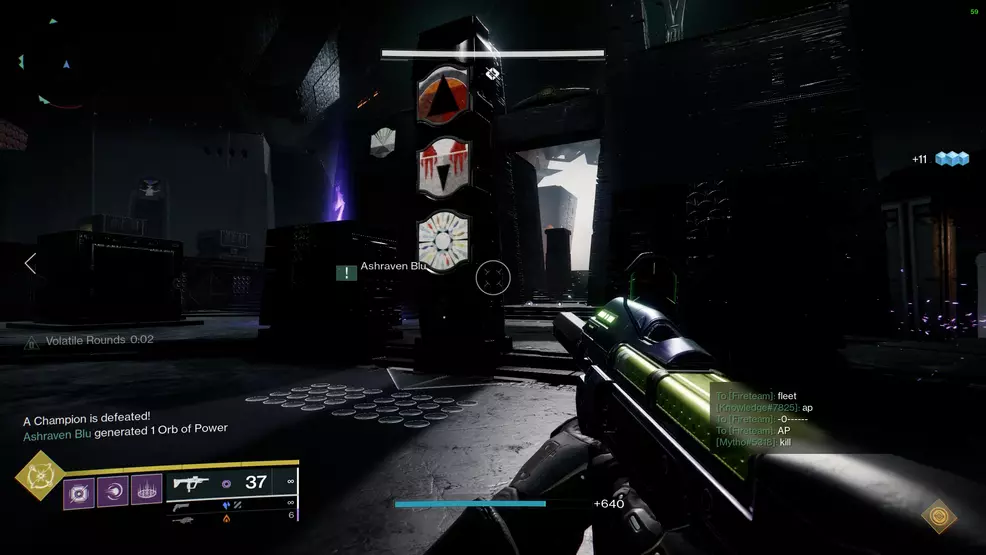
To begin the encounter, shoot the crystal in the middle of the arena. This is what you must shoot in order to open and close doors around the room. These doors are marked by symbols, which will be a mechanic used throughout the entire raid. You can use this helpful image which contains suggested callouts for the symbols.

Split the team into pairs and send each pair to an obelisk. The goal will be to clear enemies as they spawn while checking the reference pillar. The top symbol will light up, indicating which side of the room the Disciple’s Compass spawns on (Traveler or Pyramid). Defeat the Compass to make the second symbol appear – this corresponds to a door.
Whoever is closest to the room with that symbol should go inside. Screeb and two Glyphkeepers will spawn in this room. Defeat the Glyphkeepers to make two symbols appear. On the reference pillar that has the room’s symbol will now appear a third symbol: light or dark. Have another player call out which it is, this will tell you which of the two symbols inside the room must be recorded.
Exit the room and repeat the process two more times until three symbols are recorded. At this point, players should check their obelisk for the three symbols. Shoot the three symbols within a few seconds of each other – they might not all be on the same side of the obelisk.
When the symbols have been shot correctly, the obelisk will accept the offering and the whole process will repeat twice more – once for each other obelisk. This means that if your obelisk received the first offering, it will not be the one with the symbols for the next rotations.
To really simplify the reference pillar, here is what each spot in the traffic light setup means:
- Top symbol: Which side of the room the Disciple’s Compass spawns
- Middle symbol: Which room to go into to defeat Glyphkeepers
- Bottom symbol: Which symbol to record
During this whole encounter, the obelisk will be charging up. If it fills entirely, your whole team will be wiped. Any time you shoot the correct symbols, it will drain, giving you more time to continue. The obelisk will fill faster if you shoot the incorrect symbols or if Abated Adherent Scorn shoot it.
In terms of weapon loadouts for this fight, consider using a Grenade Launcher with Blinding Grenades to supress enemies, preventing them from overwhelming you. This will also stop the Abated Adherents from rushing the obelisk. It’s also worth using Heavy weapons (like Gjallarhorn or Deathbringer) or Supers to kill the Glyphkeepers quickly. It's also important you have Unstoppable mods as there are Unstoppable Abominations that spawn.
The Caretaker (Collection: Do Not Disrupt the Caretaker)
The Caretaker encounter in the Vow of the Disciple raid is the first real damage check. Your team will need to have tight communication and be able to deal a whole lot of damage. Consider using Well of Radiance and Ward of Dawn for buffs.
- Stun the Caretaker by shooting him in the face and back
- Clear enemies that spawn along the paths
- Collect symbols from the dark rooms and shoot them on the obelisk
- Use the three plates to deal damage to the Caretaker
- Repeat on all three floors and then complete the last stand
Before you start the encounter, assign two players to take the Caretaker’s attention, two players to clear enemies, and two players to go into the rooms to collect symbols. These will be the key roles during the non-damage phases.
The two players taking the Caretaker’s gaze should position themselves on the lower platform, ready for him to spawn. These two players should trade his attention back and forth, taking turns to shoot him in the face and in the back. This will stun the Caretaker, preventing him from walking up the stairs to the obelisk. While this is happening, he will shoot out homing projectiles that can be destroyed.
To make the Caretaker's face become vulnerable, one player should get quite close to him. The Caretaker will attempt to slam the ground, at which point shoot his face to stun him. If you're quick, you can do it before he slams. The moment the Caretaker is stunned, it's backpack will open and projectiles will come out. The other player should shoot its back to close the backpack. There will be a few seconds after this where it cannont be stunned again.
Meanwhile, the two players clearing enemies should position themselves on the sides where they can assist with shooting the Caretaker’s projectiles, opening the doors by shooting the crystals, and defeating the enemies that spawn.
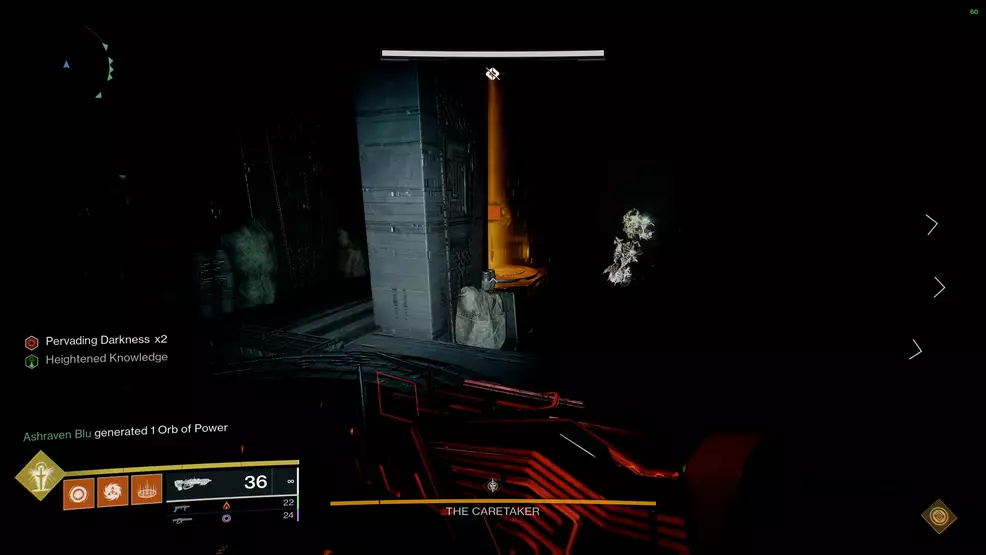
The two players that go inside the dark room should take turns, sending one player in while the other waits outside. When one player goes inside, they need to collect any three symbols, exit the room, and shoot those symbols on the obelisk. As they exit, the other player should go in. To open the door, shoot the Crux. The goal is to collect all nine symbols in the room – this starts the damage phase. Be careful, as the room contains Shadow Thrall and two Wizards with an unimaginable amount of health. Do not try to kill them. While you are in the room you will also receive Pervading Darkness, which kills you at 10 stacks.
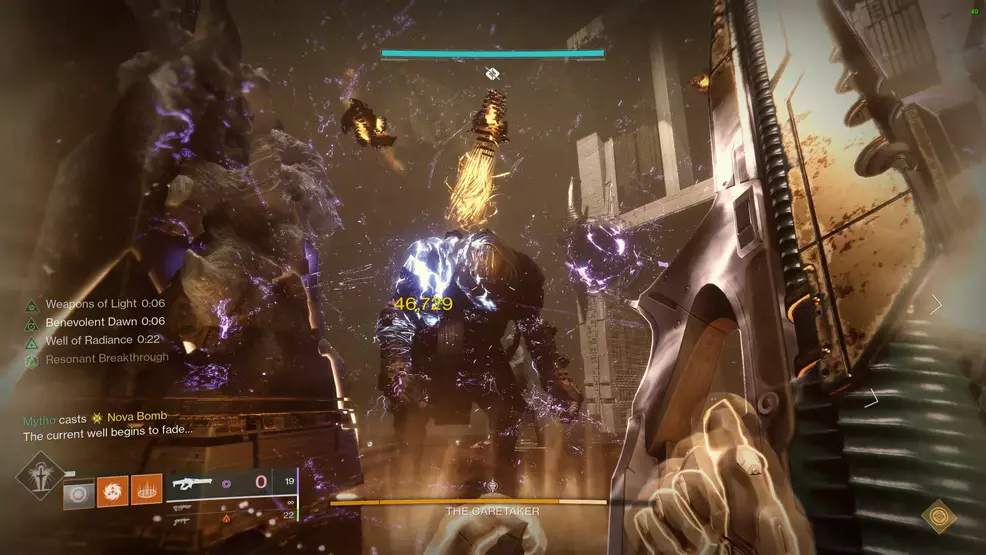
When all nine symbols are collected and the obelisk has received its offering, the damage phase will begin. There are three circles on the ground that act as damage plates, the only places from where you can damage the Caretaker. They activate one at a time and only last for 10 seconds. The first damage plate will always be from the direction that the Caretaker approached the obelisk.
Wait for the plate to activate, stand on it and start dealing damage. When the plate deactivates, rotate to the next one, and then the last one. You will be aiming to deal a full chunk of health on each floor of the museum.
As the damage phase ends, the Caretaker will disappear and you must climb the stairs to the next floor. These floors are all similar, with the only difference being that the dark rooms get larger and the distance between the damage plates is bigger.

When all three floors are cleared, a staircase will descend from the center, climb it to enter a corridor with three damage plates – this is the final stand. Move toward the Caretaker, being sure to use each damage plate for as long as possible. If you do not defeat the Caretaker before the last plate disables, you will wipe.
Now the big thing everyone wants to know: the best way to damage or DPS the Caretaker. My raid team found that Linear Fusion Rifles (like Threaded Needle) are ideal and should be coupled with everyone using Outbreak Perfected. Each damage plate should receive a buff, whether it’s a Well of Radiance, Ward of Dawn or Banner Shield. Assign three players who are responsible for providing a buff on each plate.
If you run out of ammo for your LFR, switch to Outbreak Perfected and remember to throw grenades at the Caretaker’s feet. Basically, the assumption is that Heavy ammo will be the limiting factor, so using something like Outbreak Perfected (especially with the Catalyst), allows your team to deal consistently high damage, even with no Power weapons.
When you reach the final stand hallway, use the same strategy: damage boosts on each plate, Power weapons if you have ammo or Outbreak Perfected if you’ve got none. Lunafaction Boots can help to increase the reload speed of your weapons, which could help.
The Upended / Artifacts (Exhibition: Nothing More Than Meaningless Trinkets)
The Upended / Artifacts encounter requires players to carry artifacts through hallways packed with enemies, while recording symbols, and extending the time limit. If the timer reaches zero, you wipe and start again. Roaming Supers are essential.
- Pick up the artifact(s)
- Clear out the Scorn, Taken, and Glyphkeepers
- Call out the symbols, work out the one(s) that match, and shoot them on the doorframe
- Deposit the artifact(s) and have new players pick them back up
- Repeat these steps for each room
The main goal for each room in this encounter is to find and kill the Glyphkeepers, note the symbols that appear, and work out which ones match. Remember these matching symbols and then shoot them on the door at the exit. This will open the door to a room where you can deposit the artifacts. Furthermore, some of the symbols can only be seen if you are holding the artifact.
Now that you understand the main goal, it’s worth knowing the various mechanics at play. Firstly, there is a timer called Terminal Resonance and when it reaches zero your team will wipe. To extend this timer, defeat Disciple’s Hourglass to add 40 seconds and deposit each artifact in the exit room to add another 40 seconds. The Disciple’s Hourglass spawns after each set of Glyphkeepers are defeated.
The other elements at play are Pervading Darkness, which you will remember from the opening (at 10 stacks you die) and Curbed Resonance, which prevents you from holding an artifact if you’ve already picked one up. Pervading Darkness is removed by using the Relic’s cleanse (which you might remember from Vault of Glass). Curbed Resonance disappears after 30 seconds.
As for the artifacts, there will be the Seed, Relic, and Eye of Riven. The Seed is used to remove the shield from the Disciple’s Hourglass allowing it to be killed, the Relic is for cleansing Pervading Darkness, and the Eye of Riven is used to destroy the Taken tethers using the artifact’s grenade ability.

Your team should split into two groups of three, sending three players left and three players right in each room. This allows you to cover enough ground to quickly defeat everything. You will join back up at certain areas in each room. Check out the above map by Reddit user GhostInThePocket for a great look at an ideal route.
In the last two rooms, the Taken tether can spawn either left or right. This means the player using the Eye of Riven in those rooms will need to work out the optimal route depending on the starting location.
In terms of builds and weapons, it is extremely helpful to use roaming Supers like Arcstrider, Striker, and Voidwalker using Nova Warp, or whatever roaming Super in your class is your favorite. The idea is you want to be able to clear out groups of enemies. Additionally, Grenade Launchers with Blinding Grenades allows you to blind Taken enemies that are gathered around Taken tethers even though they are immune. This ensures the Eye of Riven player can safely get to the tether and destroy it without getting shot to pieces.
On top of all of this, Overload Taken Hobgoblins spawn. Ensure a few players in your Fireteam have the ability to stun these using Overload mods. You might also consider something like Gjallarhorn for long-range damage that doesn’t require great accuracy.
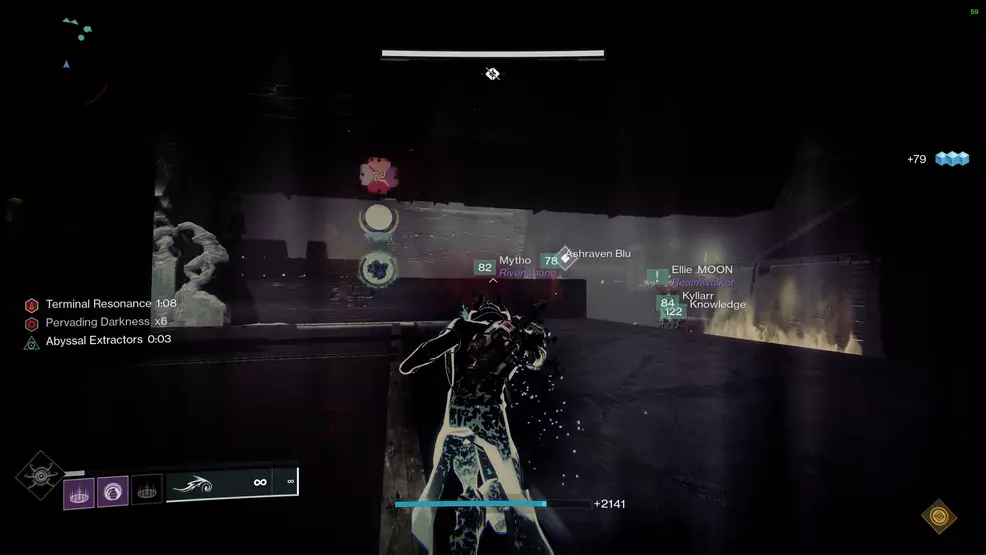
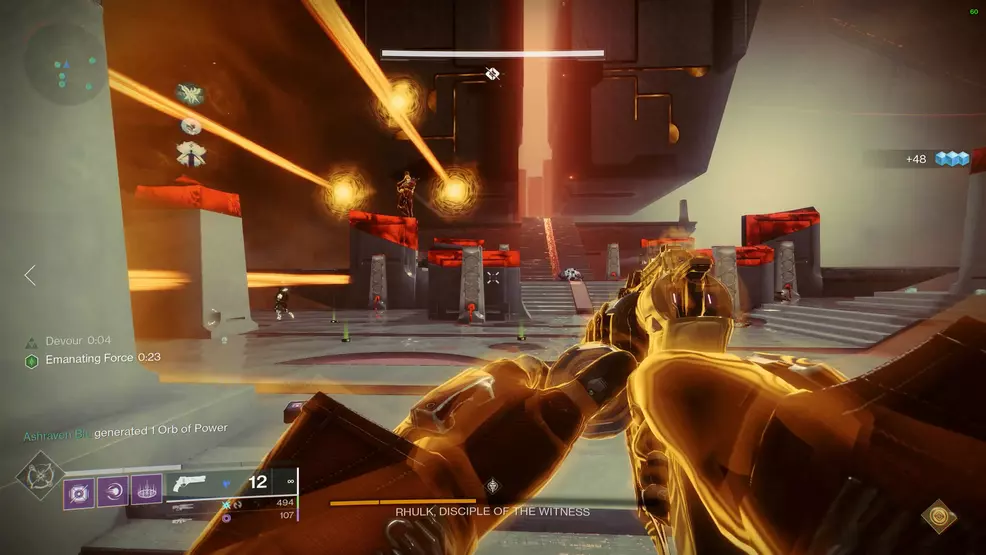
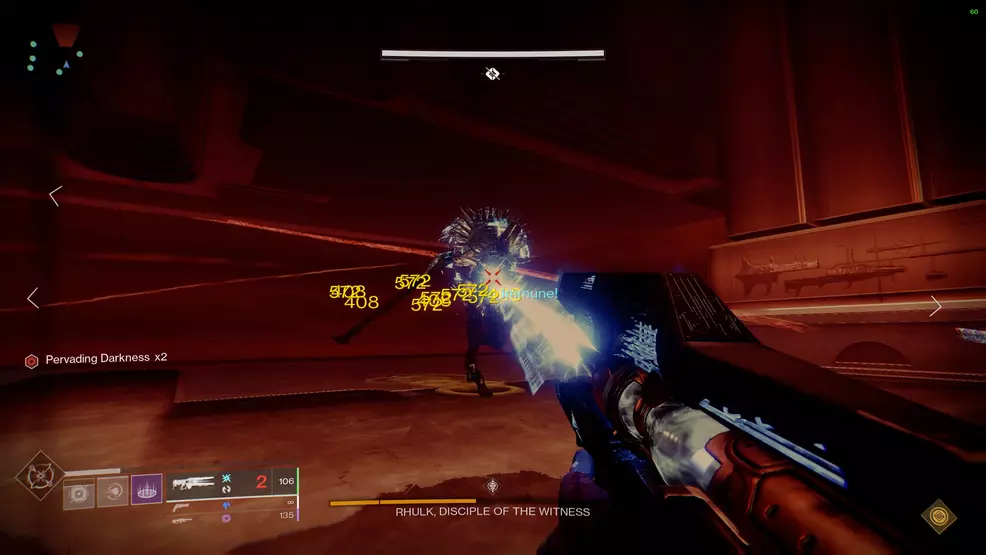
Rhulk, Disciple of the Witness (Dominion: DrownDrownDrown)
The final encounter in the Vow of the Disciple is the Rhulk, Disciple of the Witness boss fight. This fight has a few mechanics including cycling buffs/debuffs, calling out symbols, and weakening the boss before damage phases. There is a final stand section, so be prepared for that.
- Approach the force field/shoot the crystal to start the fight
- Split the Leeching Force between players who will then gain Emanating Force
- Defeat Glyphkeepers, call out symbols, and work out which ones match
- Find and call out the obelisks with the correct symbol
- Emanating Force players deposit the debuff at the obelisks
- Repeat this until the force field recedes to the back stairs (six debuffs deposited)
- Enter the fight arena and shoot Rhulk’s glaive to gain Leeching Force
- Call out the symbol, get Emanating force, deposit at the correct corner and repeat three times
- Deal damage to Rhulk and then repeat all previous steps, then defeat him during the final stand
This encounter introduces two new debuffs called Leeching Force and Emanating Force. Leeching Force is acquired by shooting the central crystal that’s in the air and Rhulk’s glaive during the damage phase. Emanating Force is acquired by standing in one of Rhulk’s darkness blasts while you have Leeching Force (Leeching Force turns into Emanating Force).
At the start of the fight, Glyphkeepers will spawn on the left and right. Defeat them to make symbols appear in the air. One set of symbols can only be seen by a player with Leeching Force. Have two players call these out and work out which one is the matching symbol.
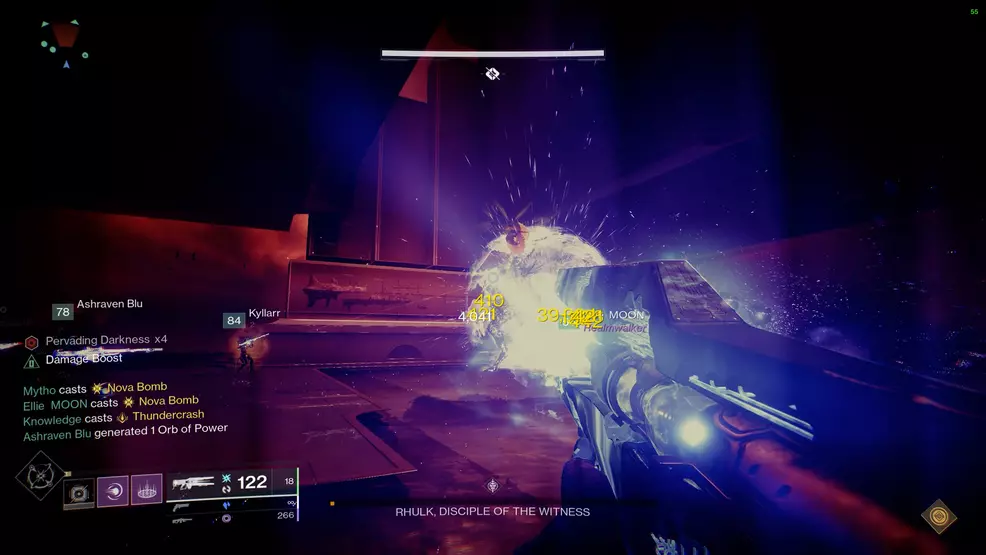
Now you will need to do the most complicated part of this encounter: splitting and cycling the Leeching Force. After shooting the center crystal and getting Leeching Force, two smaller crystals will spawn in the air on the left and right. When the player with Leeching Force stands on the middle plate and two players shoot the smaller crystals, the Leeching Force will be passed to those two new players.
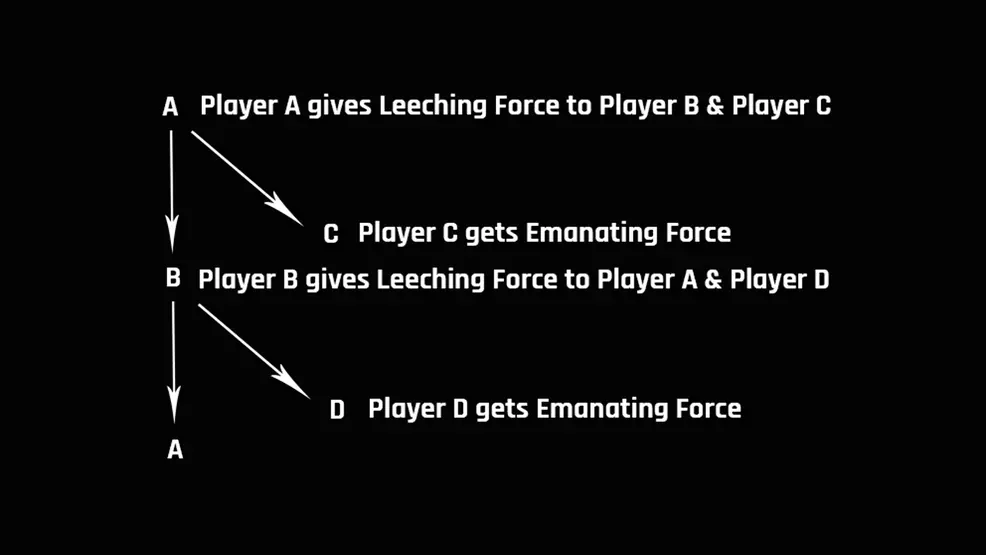
The ideal setup is that you will have two players dedicated to swapping Leeching Force between them and two players dedicated to getting Leeching Force and turning it into Emanating Force. For example, Player A would give Leeching Force to Player B and Player C. Player B would give Leeching Force to Player A and Player D. Player C and D would always take Leeching Force and turn it into Emanating Force by standing in Rhulk’s darkness beams that blast out in one section of the arena. Use the above image to help visuals the cycling/splitting process.

While all that is happening, the aforementioned symbols should be called out and the matching symbol deduced. One player should then shout out where this symbol is located on the obelisks. Two obelisks will always have the symbol. Use whatever callout works for your team, but my raid team labelled them L1, L2, L3 and R1, R2, R3.
The players with Emanating Force must deposit the debuff at the correct obelisk. This is repeated until six debuffs have been deposited or until the force field recedes to the stairs. If at any time no one has Leeching Force, then you must defeat a pair of Glyphkeepers again.
Once you reach the stairs, Rhulk will go up into the arena. Head on up and prepare to weaken the boss. During this phase, Rhulk will move around the arena, trying to kick players, slide into a glaive attack, or send out a darkness blast. The goal is to shoot Rhulk’s glaive, gain the Leeching Force debuff, turn it into Emanating Force, and deposit it in the correct corner of the room.
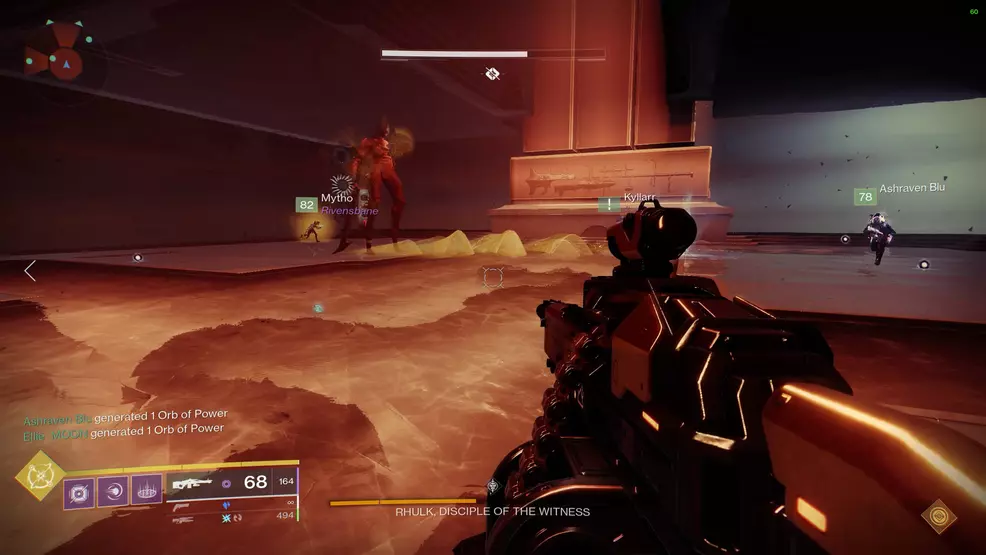
Whenever Rhulk’s glaive is shot (when it’s stabbed into the ground behind him) a symbol will appear in the arena near where Rhulk is located. Call this out to the player with Leeching Force. The player will then need to stand in the darkness blast to get Emanating Force and deposit the debuff in the corner that the players called out.
When Emanating Force is depositing, Rhulk will stagger and a weak point will be revealed. Destroy the weak point to get another glaive to shoot at. Repeat this four times to enter the damage phase. Deal damage to Rhulk and then retreat back down the stairs to the starting area when he goes immune. More information on optimal DPS is down below.
After each damage phase, you will need to repeat the process of getting Leeching Force, turning it into Emanating Force, and depositing it at the obelisks. This can be attempted three times before Rhulk enrages. When you get Rhulk’s health down to the last chunk, he will enter his final stand. During this time, he will constantly move around, sending out darkness blasts. Meanwhile, Pervading Darkness will start stacking up. Defeat Rhulk before the team wipes at Pervading Darkness x10.
In terms of dealing damage to Rhulk, it is highly recommended that one player uses Divinity while the others use Sleeper Simulant or Linear Fusion Rifles. At least, this was the case during Contest Mode during Season of the Risen. Divinity offers a 30% increase to all outgoing damage. If you have neither of those, something like Grand Overture may be a good option.
When you are about to enter the arena for the last time – right before the final stand – save your Supers. You will want to use your Supers during Rhulk’s final stand to deal more burst damage to him. For this reason, one-and-done Supers are ideal. Consider using Thundercrash, Nova Bomb, and Golden Gun. During our Day 1 raid, I was using Divinity with Nova Bomb (the slow one). By throwing Nova Bomb and then switching to Divinity, I was able to proc the Divinity debuff before the Super hit him, significantly increasing my damage.
The Vow of the Disciple raid in Destiny 2 is one of the best endgame experiences for players. There are plenty of great weapons to earn and all of them are craftable. Just remember to spawn the Rhulk bonus chest. Be sure to check out our Destiny 2 strategy guide for everything else you need to accomplish as a Guardian.

-
Shacknews

 reply
replyBill Lavoy posted a new article, Vow of the Disciple raid guide - Destiny 2
