
Destiny 2: Season of the Risen campaign walkthrough
A complete walkthrough for the Season of the Risen campaign in Destiny 2, from the Rising Tension quest to the full Operation Elbrus questline.
Destiny 2: Season of the Risen launched alongside The Witch Queen, and also includes its own story to experience. The difference with the Season of the Risen campaign is that is unfolds on a weekly basis, with new content for players to dive into at each reset. Below you’ll find a complete walkthrough for the campaign, including the starter mission Rising Tensions and the weekly missions, Operation Elbrus.
Last updated: March 16, 2022 at 11:40 p.m. EST.
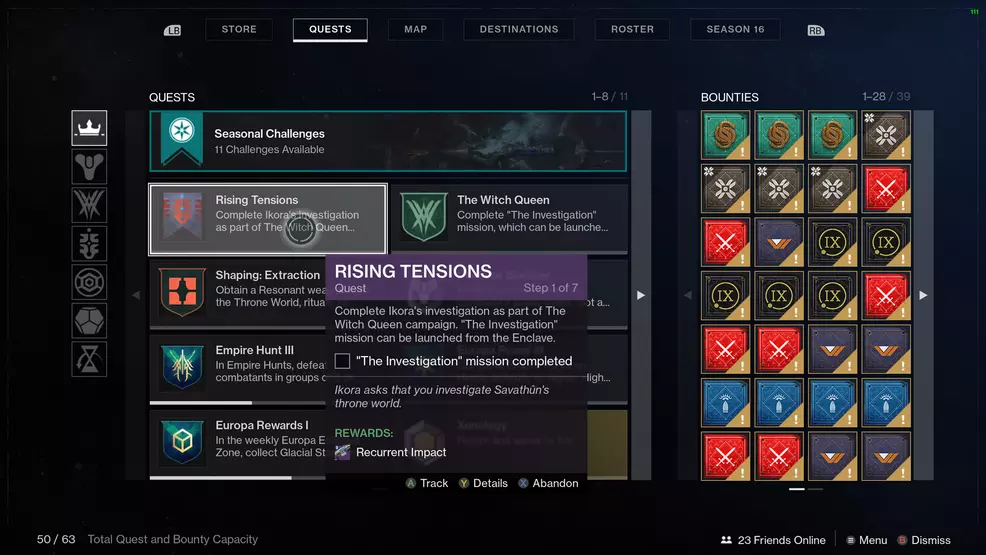
Rising Tensions
The Season of the Risen campaign begins with the main quest, Rising Tensions. In order to get this quest, you must start the Witch Queen campaign and complete the first few missions. The following guide will be updated on a weekly basis as each new entry in the campaign is released.
Step 1: The Investigation
The first step is to complete the Witch Queen campaign mission, The Investigation.
Step 2: Hard Evidence
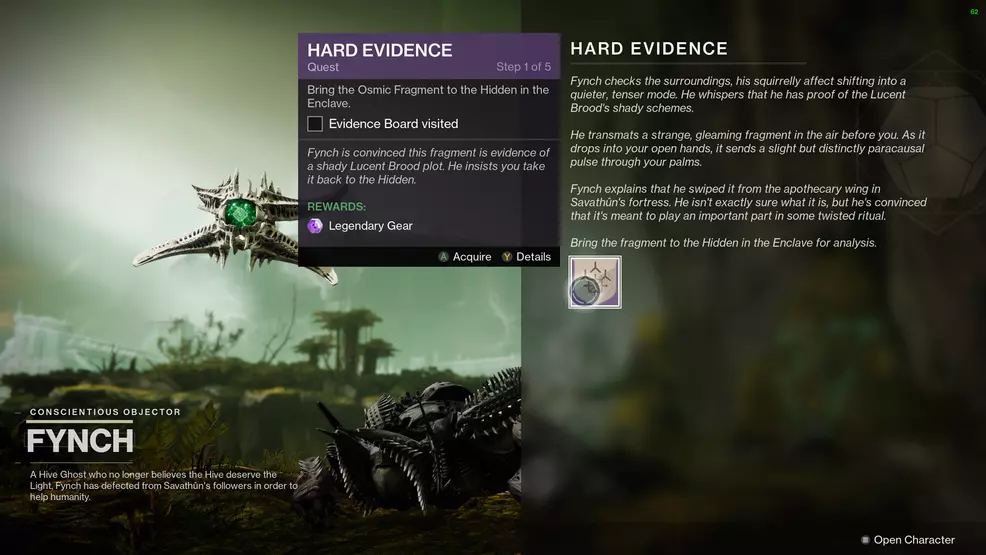
Continue through the Witch Queen campaign as you learn more about the Throne World from your contact. You will also need to complete the Evidence Board introductory mission, Hard Evidence. Here is a summary of the steps involved:
- Take the Osmic Fragment to the Evidence Board at the Enclave
- Search Quagmire for a sample
- Defeat Lucent Brood ambush
- Go back to the Evidence Board
- Review the case at the Evidence Board
Step 3: Go the Hangar
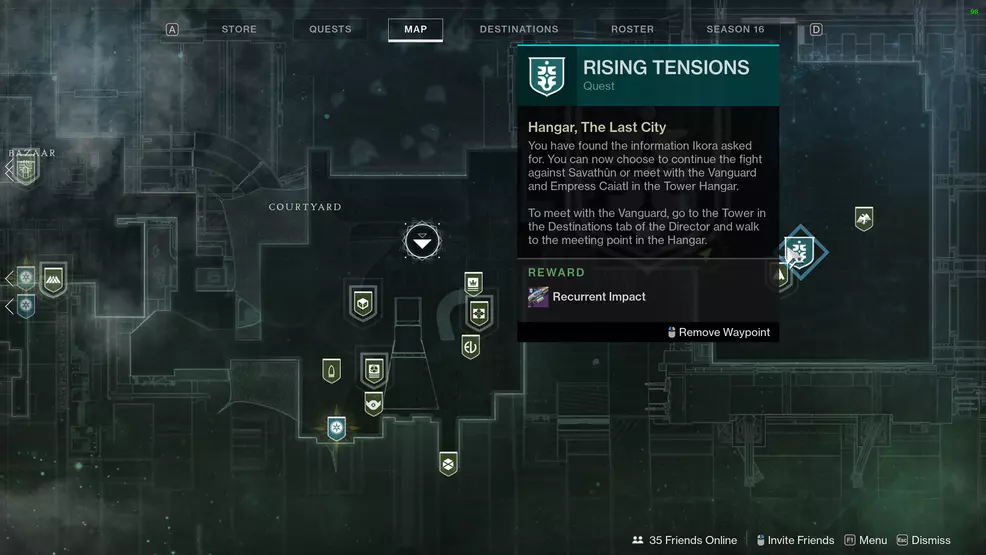
This is where you may have split off and continued on with the Witch Queen campaign. To continue along the Season of the Risen campaign you must now go to the Hangar in the Tower. Interact with the blue banner near Saint-14 to meet with Caiatl.
Step 4: Speak with Caiatl and Saladin
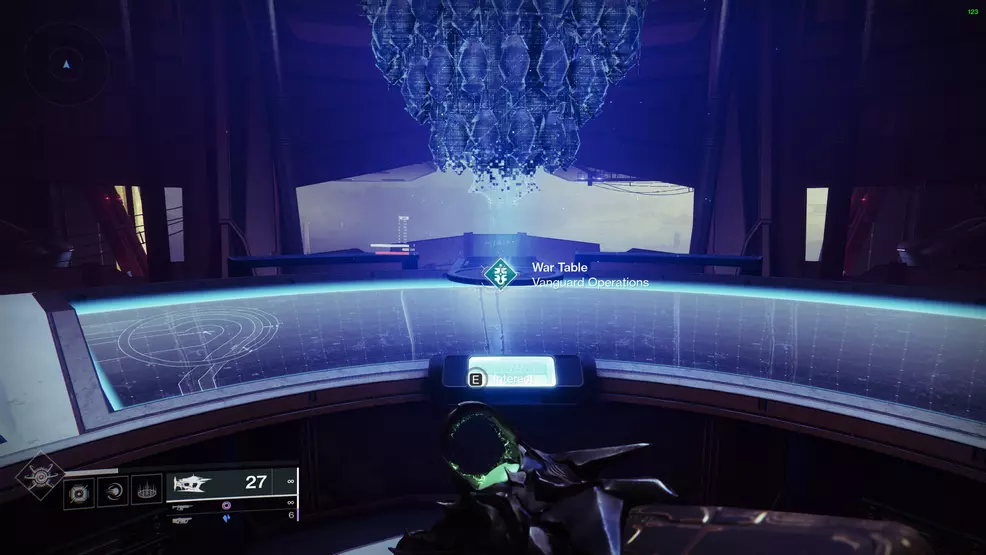
After the cutscene you’ll be transported to the H.E.L.M. Speak with Empress Caiatl and Lord Saladin to progress. To do this, go to the other side of the room and interact with the War Table.
Step 5: Speak with Lord Saladin
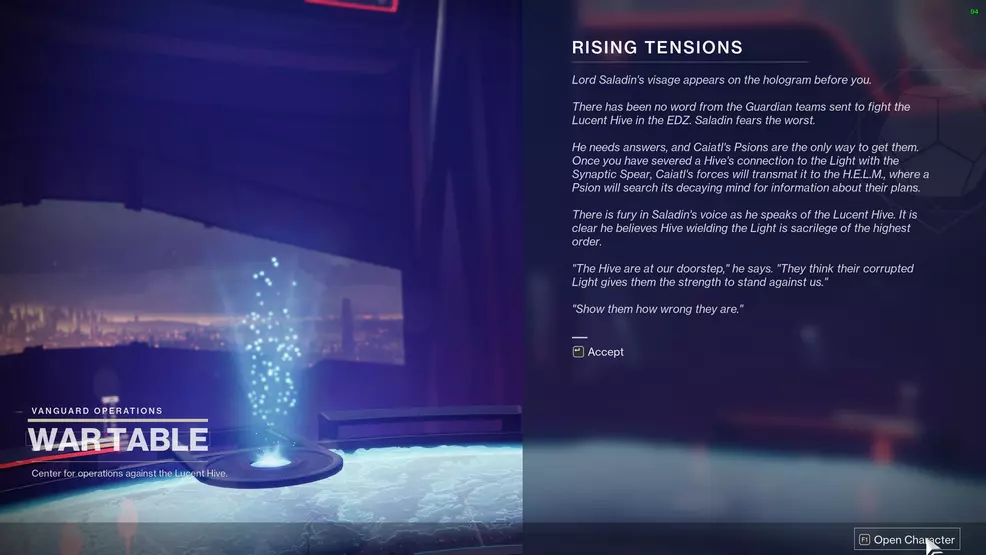
Stay at the War Table, as Lord Saladin will want to speak with you.
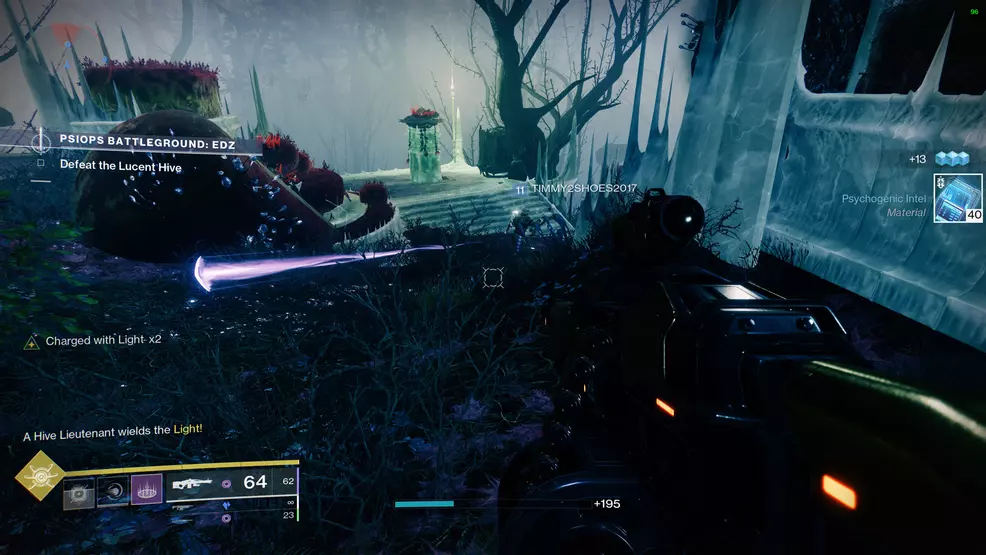
Step 6: Complete PsiOps Battleground: EDZ
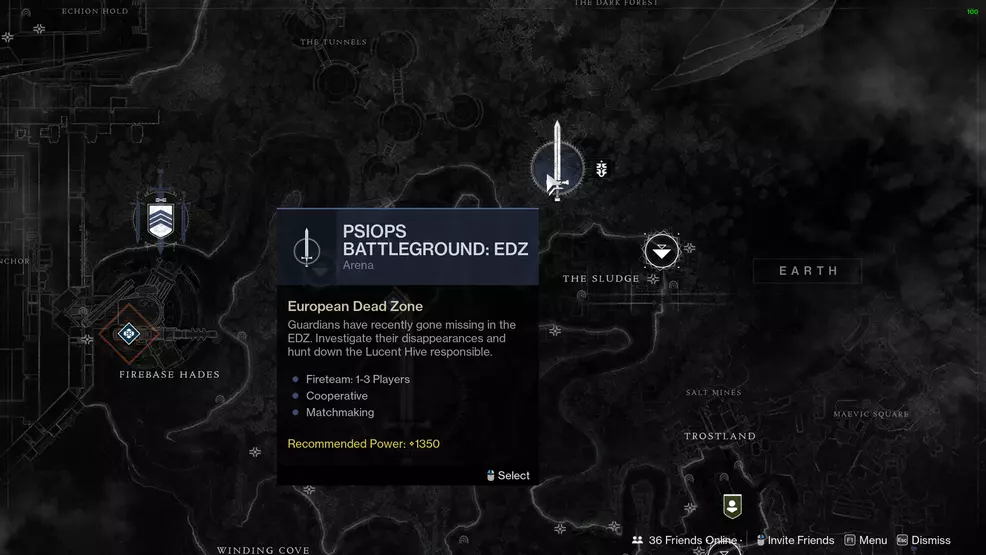
The next step is to complete the PsiOps Battleground: EDZ. This is a new activity that can be launched directly from the map of the EDZ. Look for the icon of the sword with a circle.
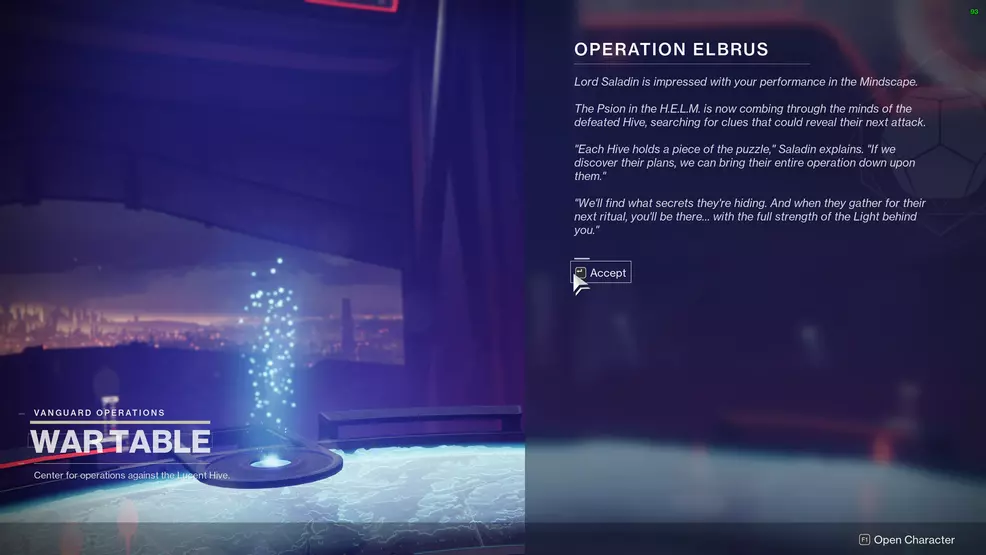
Step 7: Speak with Saladin
Go to the War Table in the HELM and speak with Saladin to finish Rising Tensions. You will receive a new weapon and the next questline, Operation Elbrus.
Operation Elbrus Part 1
After completing Rising Tensions, you will be on to the weekly series of quests called Operation Elbrus.
Step 1: Collect 500 intel
You will need to collect Psychogenic Intel by playing the Witch Queen campaign missions. You can also get intel from public events, strikes, Crucible, Gambit, and other activities. You can even earn it while you're playing the PsiOps Battlegrounds.
Step 2: Open a Runic Chest
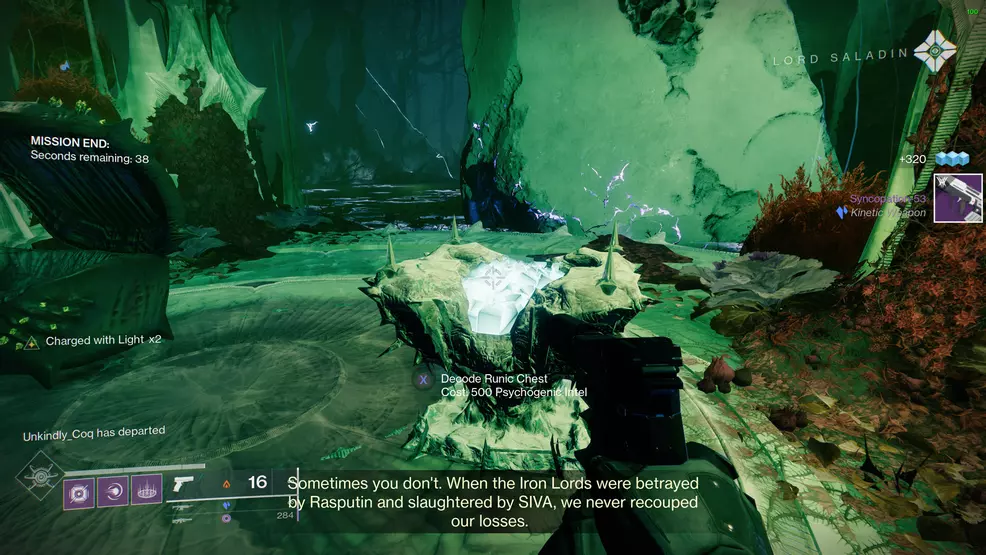
The Runic Chests can now be acquired via the PsiOps Battlegrounds playlist. This activity is launched via the H.E.L.M. map. Open the H.E.L.M. and select the PsiOps Battlegrounds playlist sword icon at the top. Complete the entire activity and at the end there will be an additional chest that you can open using 500 Psychogenic Intel.
Step 3: Claim the Week 1 Challenge
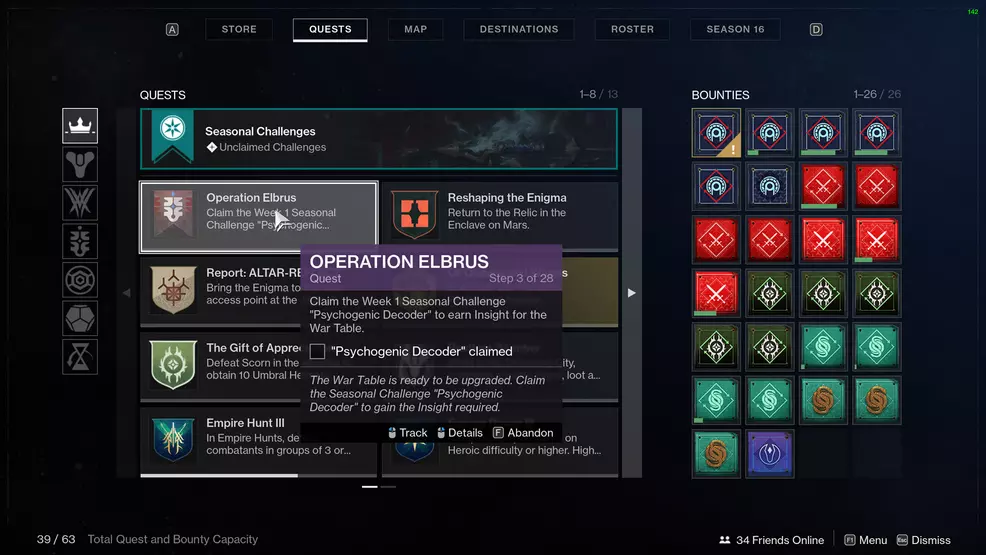
After completing the PsiOps Battlegrounds and opening a Runic Chest, you will be able to claim the Week 1 Seasonal Challenge, Psychogenic Decoder. This is the top-left challenge that rewards Insight and Challenger XP.
Step 4: Upgrade the War Table
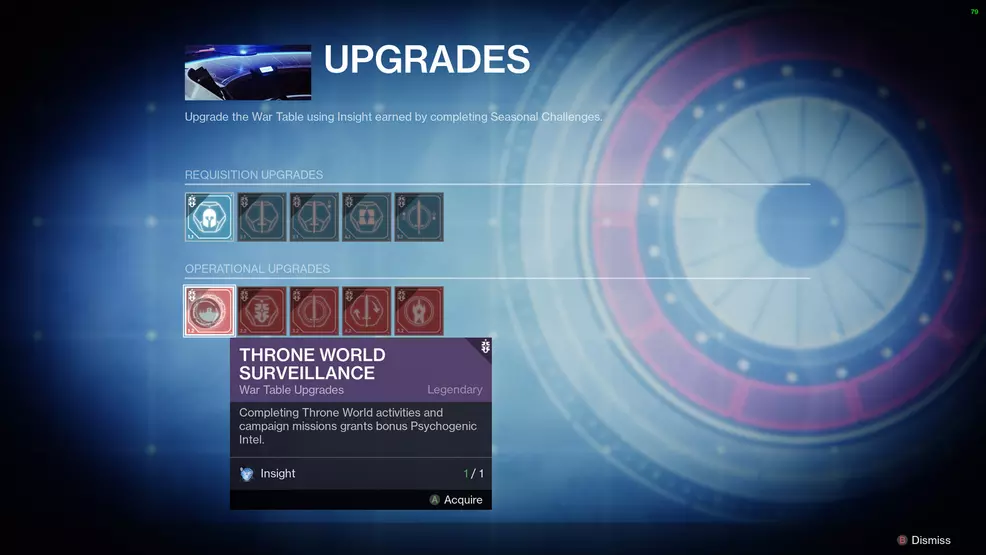
Once you claim the Insight from the Challenge, go to the H.E.L.M. and use it to upgrade the War Table.
Step 5: Go to the War Table
Since you should still be at the War Table, accept the transmission and listen to the message.
Step 6: Hear Saladin’s message
Listen to Lord Saladin’s message and then hit confirm to complete this part.
Step 7: Wait until next week
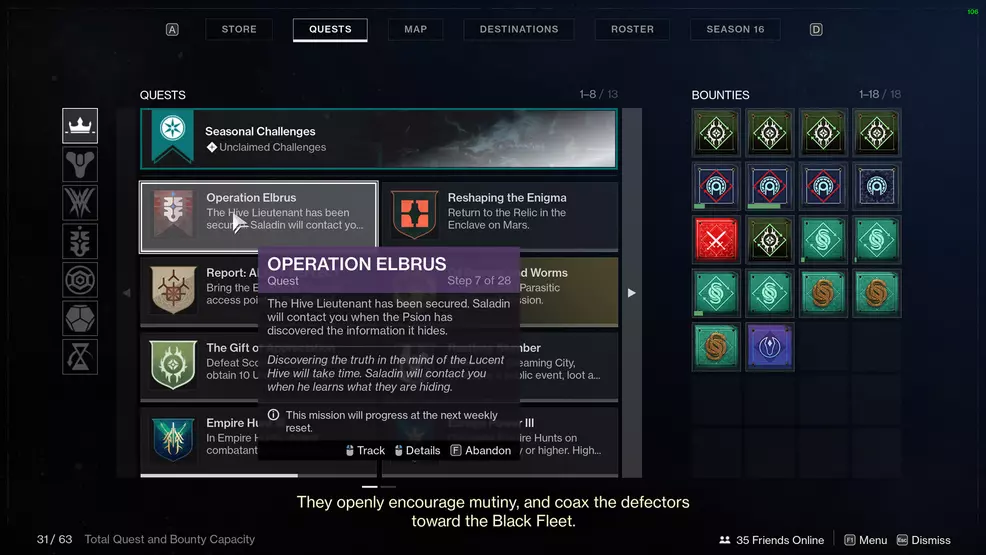
After hearing Saladin’s message, you will now need to wait until the next part of the Operation Elbrus arrives. This is a weekly mission that expands upon the narrative told in The Witch Queen. You may have also received another message, this one from Empress Caiatl. She will ask you to do something for her and you will receive a new Exotic quest, Kill the Messenger.
Operation Elbrus Part 2
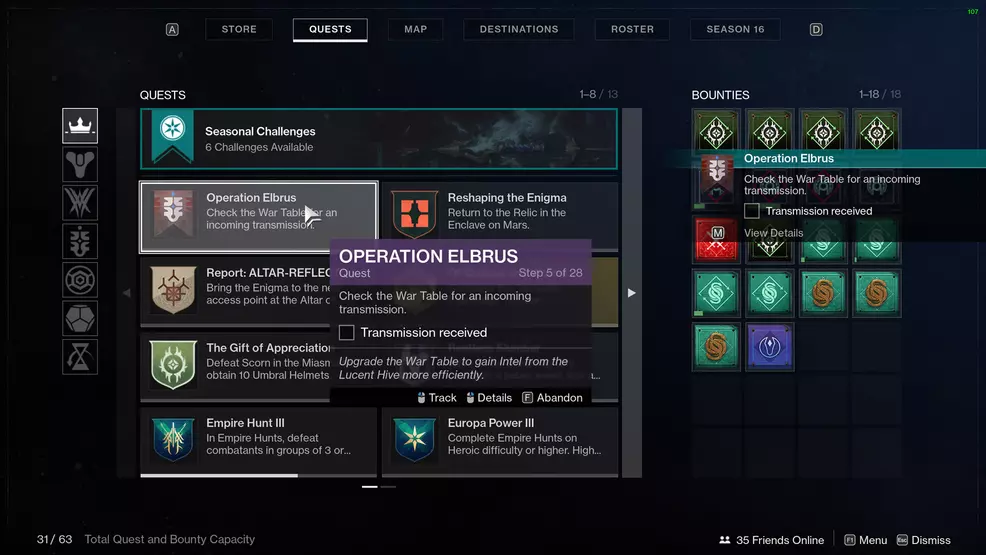
Step 8: Visit the War Table
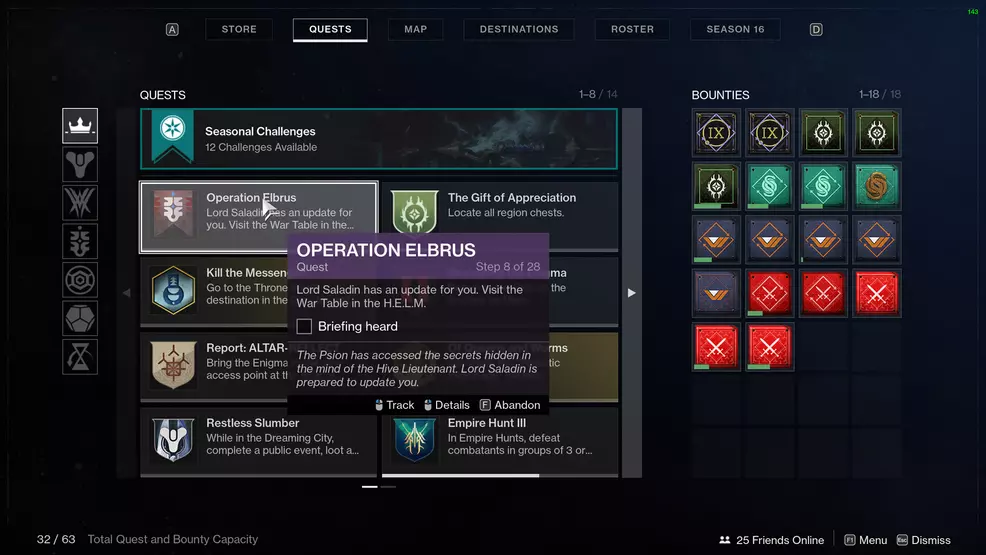
Go to the H.E.L.M. and speak with Lord Saladin via the War Table.
Step 9: PsiOps Battleground: Cosmodrome
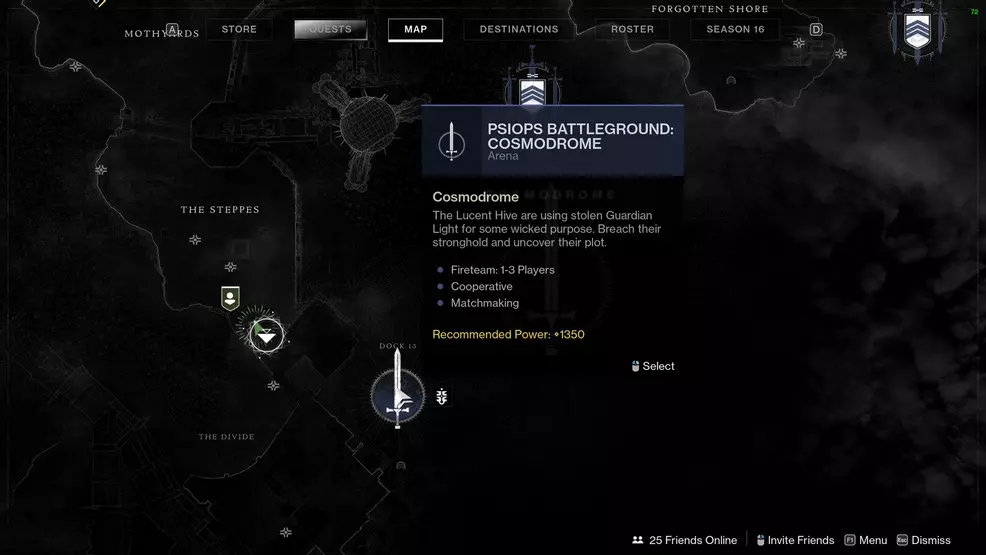
You will now need to play the Cosmodrome version of PsiOps Battlegrounds. Launch this from the Cosmodrome map via the Director. For this PsiOps, you must stay near the payload in order to move it through the battleground. Defeat the enemies that spawn along the way. Fight through the Cosmodrome, collect the items the Hive drop inside the building until you can deposit them near the bell. You’ll eventually fight the Hive leader and then be transported to the mindscape like the previous PsiOps Battlegrounds.
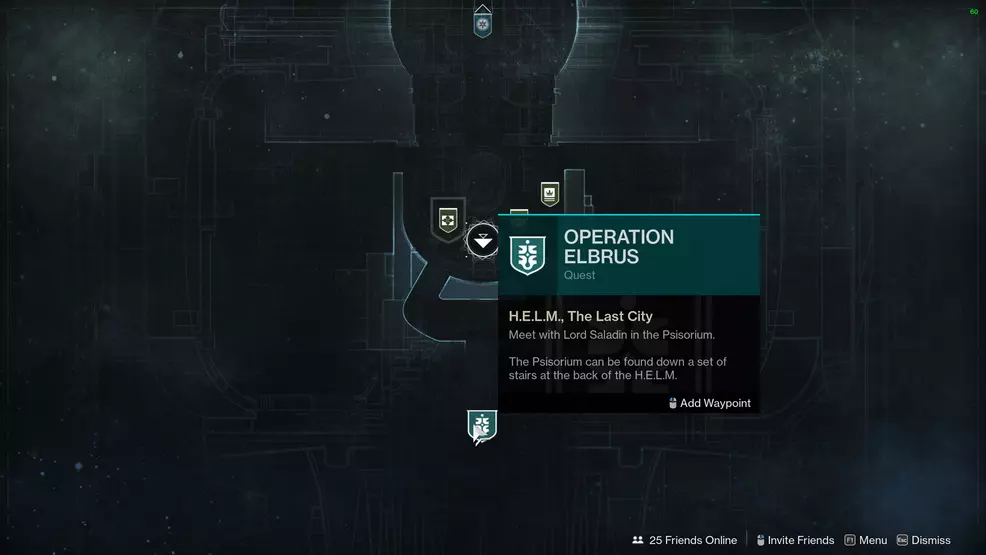
Step 10: Visit the Psisorium
A new area in the H.E.L.M. will now be available. Visit the Psisorium to continue the Operation Elbrus Part 2 questline. It can be found down the stairs behind where you spawn in. Listen to Saladin and Crow.
Step 11: Collect Psychogenic Intel
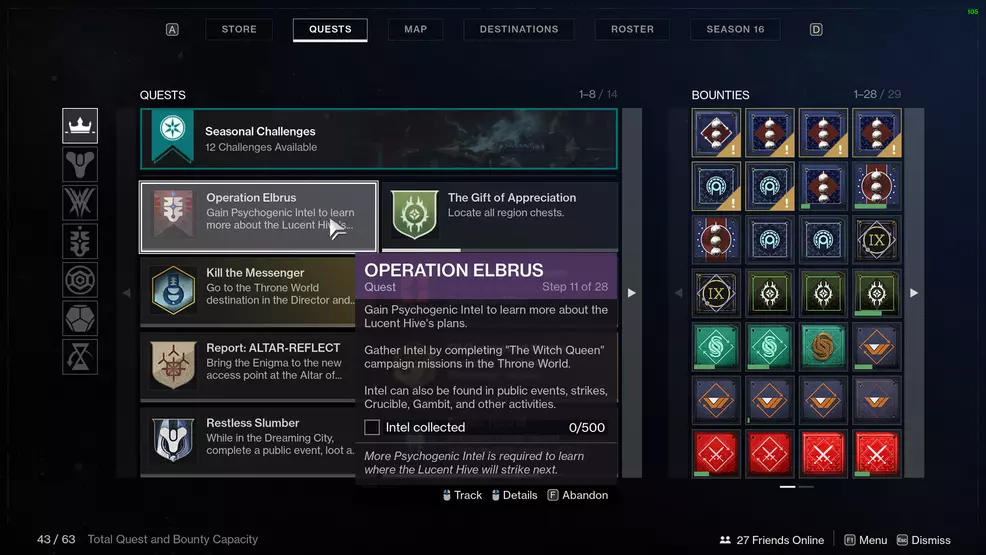
Go and collect 500 Psychogenic Intel. This can be collected from a variety of activities, including Strikes and Crucible. If you’re not getting any Psychogenic Intel to drop, make sure you aren’t sitting on 2,000 Psychogenic Intel, as this will prevent you from getting more. Either delete the whole stack or run some PsiOps Battlegrounds and open the Runic Chests.
Step 12: Play PsiOps Battleground playlist

With your Psychogenic Intel in hand, load up the PsiOps Battleground playlist from the H.E.L.M. map and open the Runic Chest. This playlist version will have Champions.
Step 13: Go to the War Table
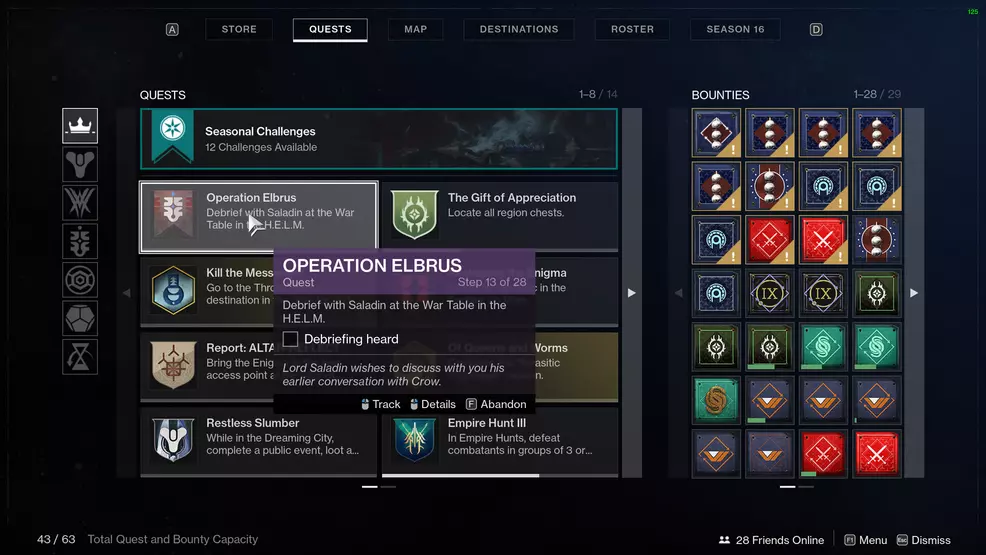
Go to the H.E.L.M. and listen to Saladin to complete this step.
Step 14: Wait for next week
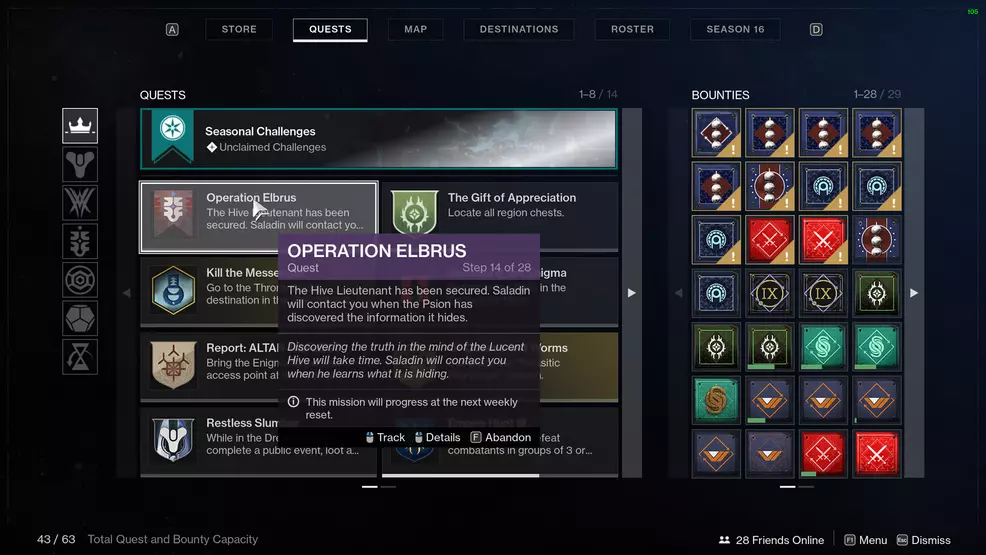
Once you listen to Saladin and claim your reward, you will complete Operation Elbrus Part 2. All that’s left to do now is wait until next week to start the next step.
Operation Elbrus Part 3
Part 3 of Operation Elbrus takes place during the third week of the Season of the Risen, although you can catch up at any point if you fall behind. Below are the steps to complete this week's portion of the questline.
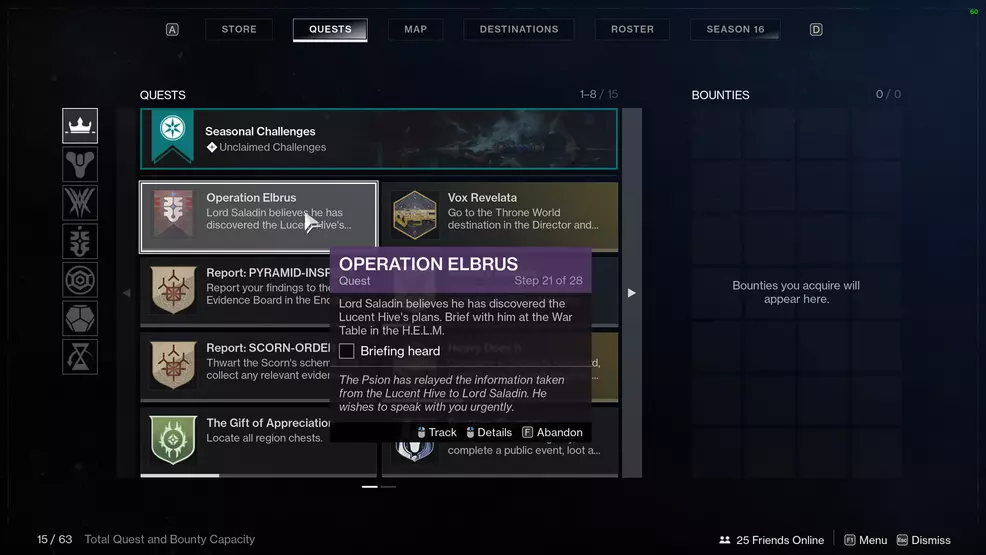
Step 15: Briefing heard
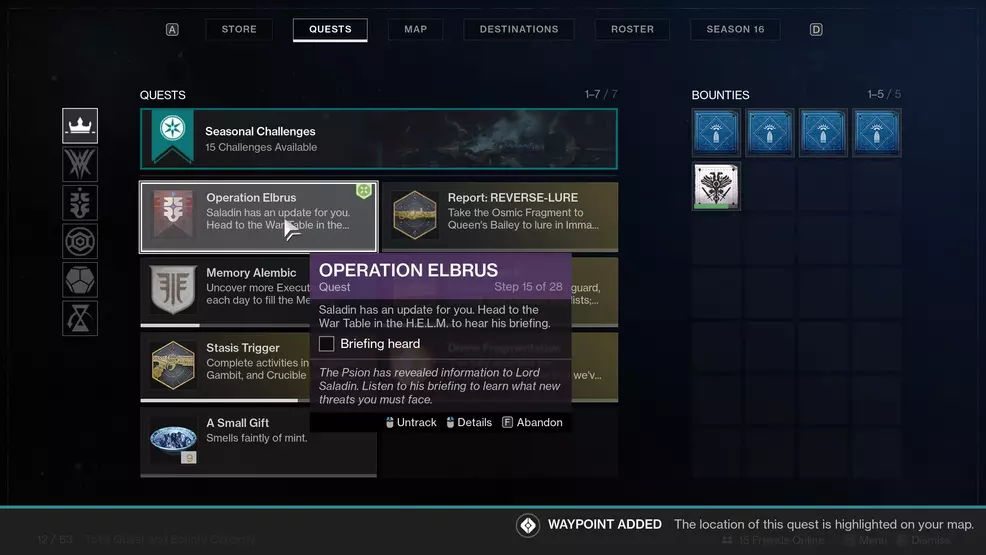
The first step of this week's Operation Elbrus questline is to head to the H.E.L.M., visit the War Table, and listen to a briefing from Lord Saladin. Load into the H.E.L.M. via the icon just above the Tower in your Director and do just that.
Step 16: Lighthoarder eliminated / PsiOps Battleground completed
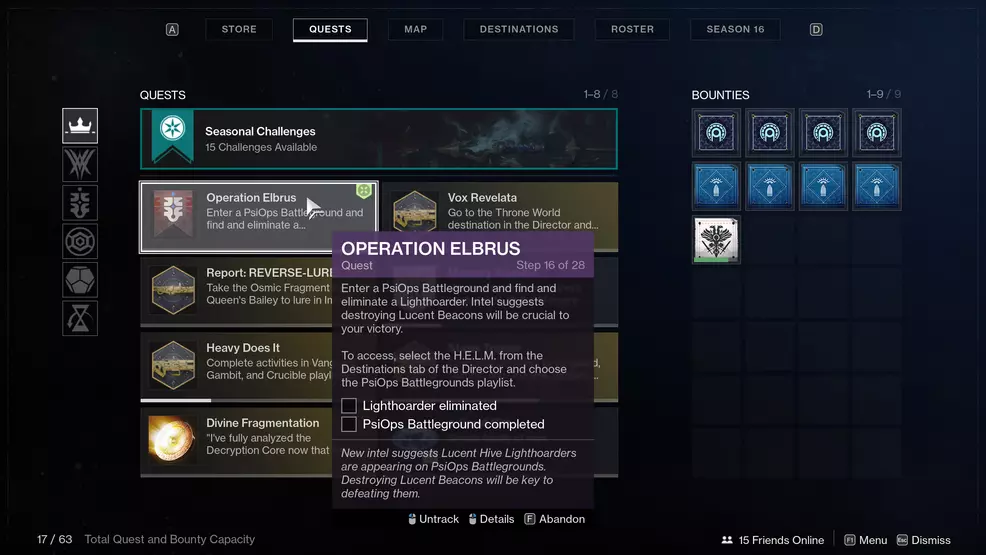
This step only requires that you complete a PsiOps Battleground activity, which can be found when you open up the H.E.L.M. through the Director. Once in the Battleground, look for a Lighthoarder. You cannot progress forward without eliminating them, so don't worry too much about finding one. It should count when anyone in your fireteam kills the Lighthoarder, so even if you don't get a shot in you should still be good. When you complete the PsiOps Battleground, this step will complete and it's on to the next.
Step 17: Intel collected
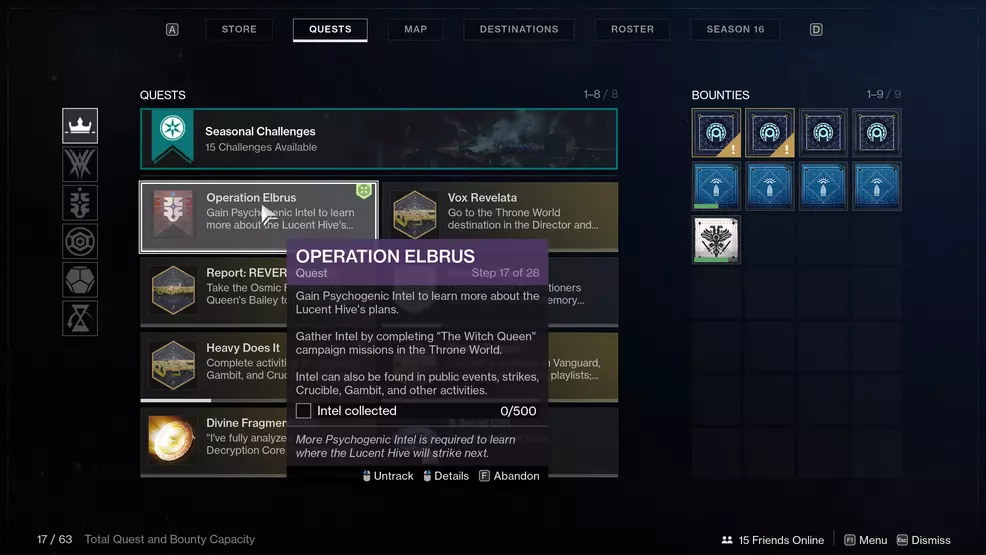
You must collect 500 Psychogenic Intel, but this can be tricky. You gather the intel from The Witch Queen campaign, public events, strikes, Crucible, Gambit, and more, but you can only hold 2,000 Psychogenic Intel at one time. We've addressed this problem with a guide, but the short solution is to spend 500 Psychogenic Intel by opening a Runic chest in a PsiOps Battleground activity, then go out into the world and earn the 500 you need for this step.
Step 18: Runic Chest decoded

Launch the PsiOps Battleground activity from the H.E.L.M. by opening it in your Director. Compelete the activity and open the Runic Chest at the end. That's the chest on the right if you're looking at two once you've captured the Hive boss. You will need 500 Psychogenic Intel for this, but you should have it after the previous step.
Step 19: Debriefing hard
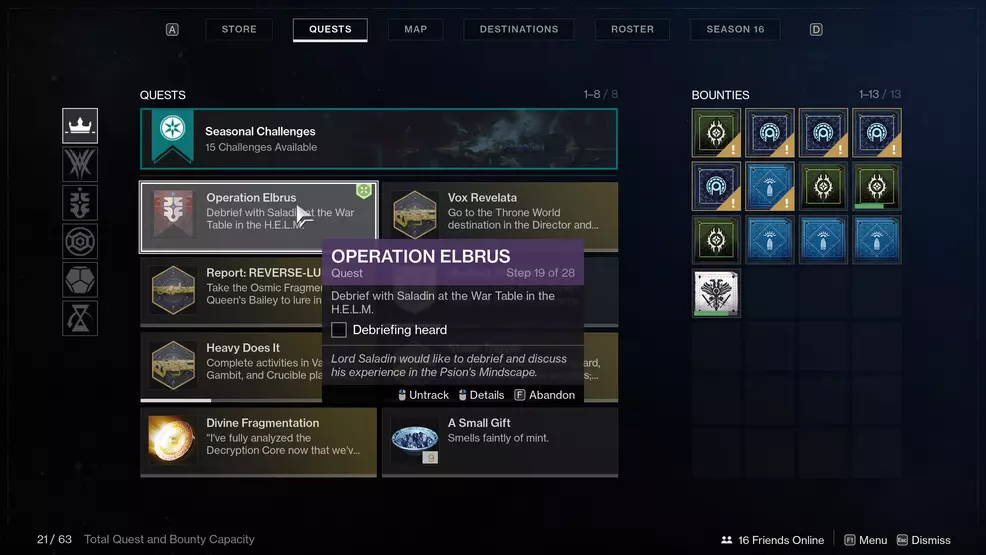
Head back to the H.E.L.M. by launching it from the Director and approach the War Table. You can listen to the debriefing there. You can also listen to a nearby radio transmission for some additional storytelling and lore.
Step 20: Wait for next week
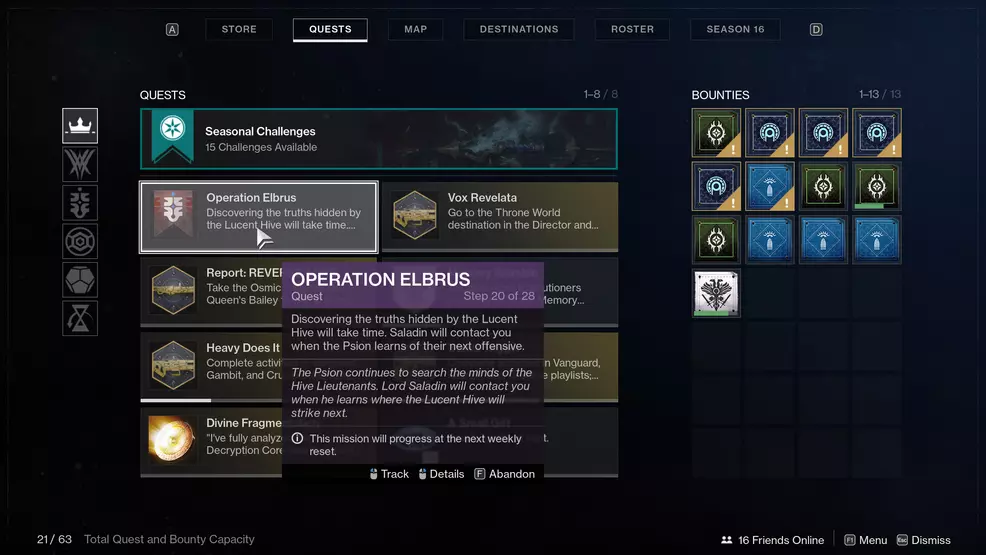
You're done for the week as far as Operation Elbrus goes. You can continue to engage in PsiOps Battlegrounds and visit the War Table for Umbral focusing and whatnot, but Saladin won't have more for you to do until the next reset.
Operation Elbrus Part 4
Operation Elbrus Part 4 started in the fourth week of Season of the Risen on March 15, 2022. If you're still playing during Season of the Risen, you can complete this part of the quest at any time.
Step 21: Go to the H.E.L.M.
Listen to Saladin’s briefing at the War Table in the H.E.L.M.
Step 22: Complete PsiOps Battleground: Moon

Open the Moon from the Director and launch the PsiOps Battleground: Moon. Complete the activity to progress to the next step. This version of the PsiOps takes you back to the Scarlet Keep.
Step 23: Go to the Psisorium
With the PsiOps completed, head to the H.E.L.M. and go to the Cabal wing where the Psisorium is located. This is down the stairs behind where you load in. Listen to Saladin and then continue.
Step 24: Collect Psychogenic Intel
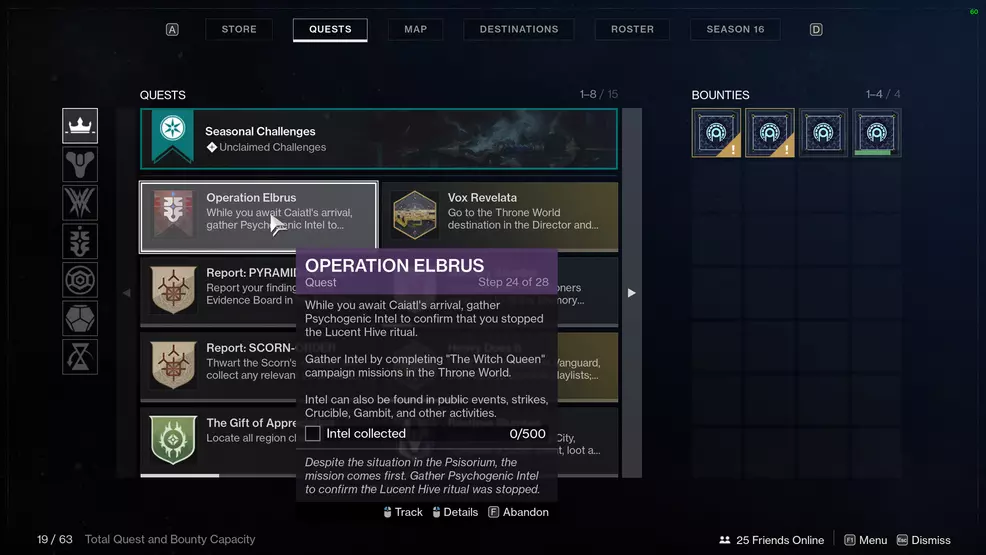
You must now collect 500 Psychogenic Intel. Remember that if you are full (you can only hold 2,000) you will be unable to get more. Delete the stack if you need to.
Step 25: Play the PsiOps Battleground playlist
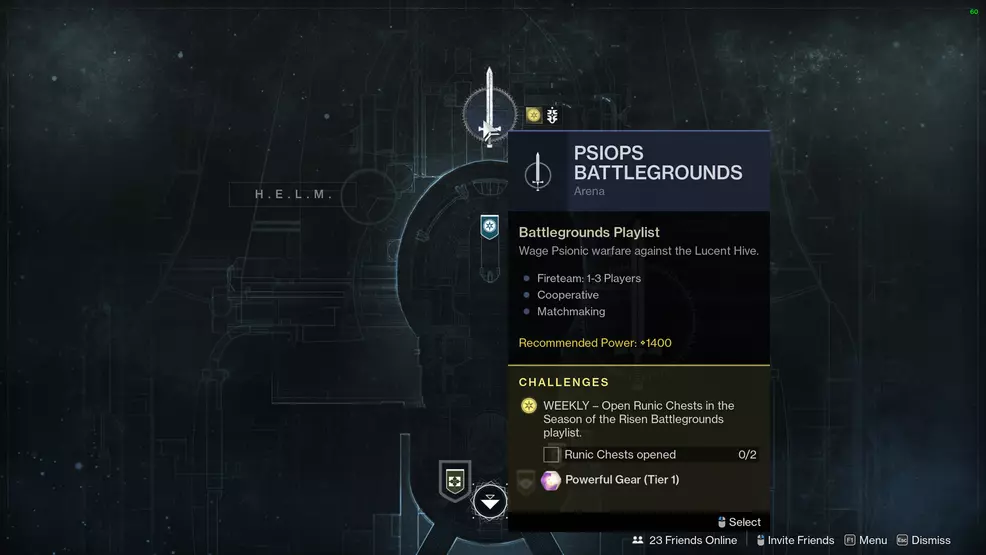
Enter the PsiOps Battleground playlist and open the Runic chest using 500 Psychogenic Intel. To launch the PsiOps Battlegrounds, open the Director, select the H.E.L.M. and choose the playlist.
Step 26: Go to the Hangar
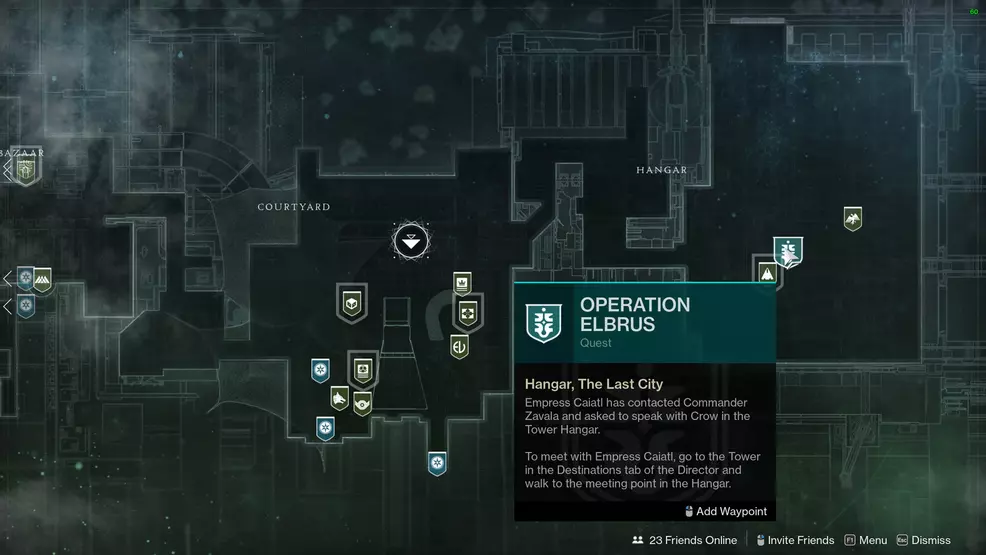
Head to the Hangar in the Tower to hear a conversion between Empress Caiatl and Commander Zavala. Interact with the flag that’s near Saint-14 to see the cutscene.
Step 27: Listen to Saladin’s message
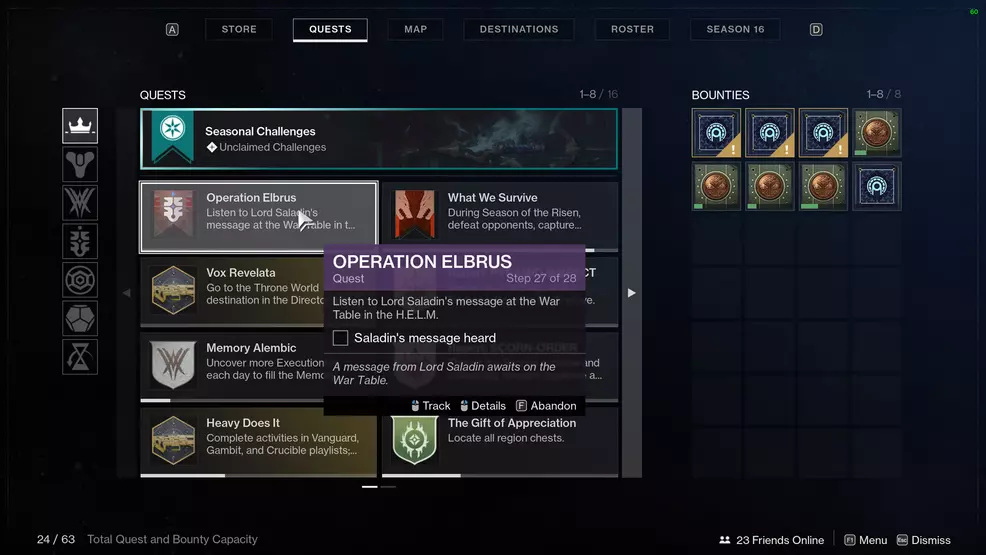
Go back to the H.E.L.M. and listen to Saladin’s message at the War Table.
Step 28: Listen to Zavala’s message

After hearing Saladin speak, you should automatically hear Zavala’s message. If this isn’t the case, return to the H.E.L.M. and interact with the War Table to hear the debriefing.
The Season of the Risen campaign in Destiny 2 is an on-going narrative that offers a new set of tasks each week. Check back with us on reset for a full rundown of the campaign. You can also check out the Shacknews Destiny 2 Guide for a treasure trove of valuable information.

-
Shacknews

 reply
replySam Chandler posted a new article, Destiny 2: Season of the Risen campaign walkthrough
