
How to complete Terminal Overload - Destiny 2
Terminal Overload is a new world event found on Neptune and is an excellent source of loot and Neomuna vendor reputation.
Terminal Overload is a new world event in Destiny 2. Accessible to all players, Terminal Overload is always active and found in various regions throughout the Neptune patrol zones. This event rotates daily in both location and loot awarded for completion. The three-day location cycle includes Ahimsa Park, Liming Harbor and Zephyr Concourse.
Launchable from the Director or by just entering the active zone on Patrol, Terminal Overload brings interesting encounters and worthwhile rewards. The three weapons that can be farmed here are Basso Ostinato, Circular Logic and Synchronic Roulette. These rewards also rotate daily with the location, and you can track both with our Terminal Overload schedule and weapon rotation guide.
Neomuna’s patrol difficulty leaves you at -15 power at all times so it’s a good idea to bring strong gear ready to take on the Vex and Shadow Legion in the area. Good mob clearing weapons such as Rocket Launchers, Machine Guns, or weapons with perks like Voltshot and Golden Tricorn which do high damage work wonders.
Terminal Overload breakdown
Terminal Overload is split into three sections. Each section provides a reward chest for a completion of the required objectives with only the final boss awarding the Neomuna-specific weapons. The three encounters are split as follows:
- Stage 1 & 2: Disrupt hack attempt, Deny Access, Reclaim Array, Free Array, and Deny Access
- Stage 3: Overload Array, Deny Access
Stage one and two are very similar and become more chaotic with enemy density increasing and more powerful foes in stage two. The mechanics largely stay the same, adding more challenging twists to the engagements.
Stage three contains two boss phases with mechanics to complete, starting with a Psion and ending with a giant Vex Minotaur. You will need a Terminal Overload key to obtain the Neomuna weapon on rotation for that day. This is the only way to acquire these three weapons. If you’re running low on keys or need to stock up, Shacknews has you covered with this Terminal Overload key guide.
How to complete Terminal Overload
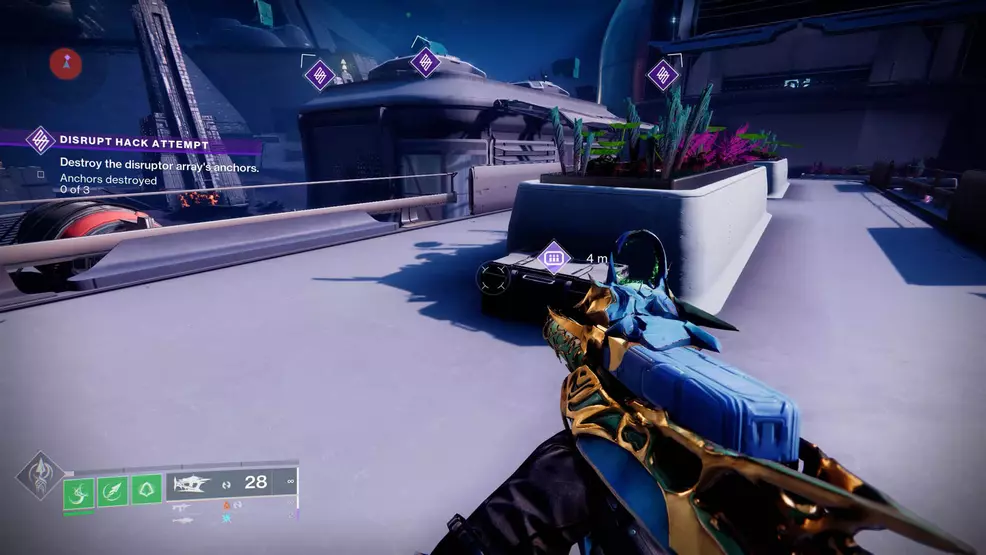
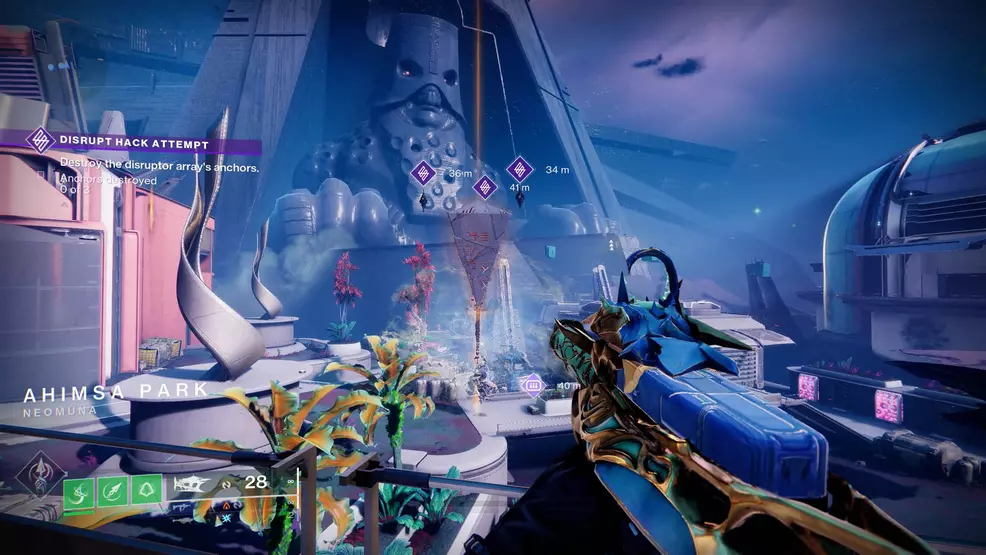
When entering the area or loading up Terminal Overload directly from the map, you will see three purple diamonds on your HUD indicating where to begin. If you are looking to load this directly from the map, it is shown by a diamond image next to the area of which Terminal Overload is occurring that day.
Shoot the 3 nodes to disrupt the Psion and progress through this world event. You have six minutes to complete stage one and stage two but don’t worry, failure only means you are not given the reward chest for stages one and two. You cannot fail the stage three boss phases, so keep chipping away until you defeat them.
Stage 1
The first stage is as simple as it gets, only requiring you to defeat enemies.
- Defeat Shadow Legion
Defeat Shadow Legion in the area. Cabal will spawn and engage to slow you down. Defeat the Cabal quickly as you and your fireteam can to progress to the next stage and save the most time. These are a mix of minor and major enemies so weapons and classes built for clearing big groups work best here.
- Capture the plate
A marker will appear to show the location of the plate. Stand on the plate inside the white aura, defeating any enemies that step inside as this stops capture progress and will be indicated by the aura turning from white to red.
Once the plate is captured, white glowing Minotaurs spawn, defeat them and they will drop an Arc Cranium which is used to destroy three floating nodes in the area. These glowing cubes are found in the air and marked on your HUD with purple diamonds. Once these are destroyed a giant Minotaur world boss will spawn.
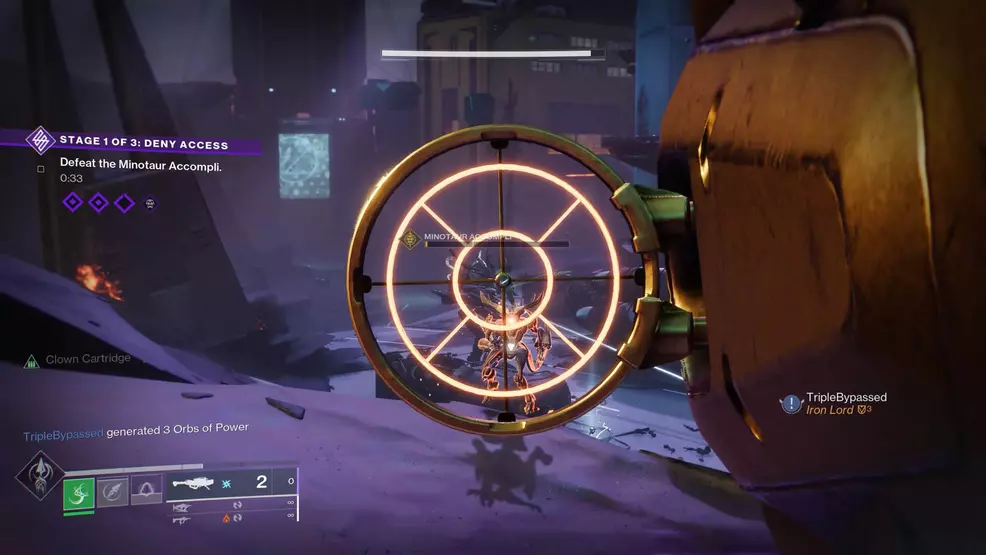
- Minotaur Accompli
There are no mechanics to master here. Defeat the Minotaur using your strongest damage causing tools to move on. The Arc Cranium that drops from the glowing Minotaurs can do some serious damage if you find them in the area during this battle.
Waves of enemies will continue to spawn during this engagement to try to slow down your progress so clearing some of these out can help focus damage toward the boss.
- Cabal Colossus
The final step in stage one is a Cabal boss which splits the battle into two phases.
Damage the Colossus until it reaches half health and this will cause four shield generators to appear that must be destroyed before you can finish off the boss. They are marked on your HUD and are quite noticeable due to the size of the orange shield they generate.
Once all four are destroyed, continue damaging the boss until defeated. This Cabal is quite tanky so don’t hold back with your heavy and super when taking it down.
If defeated within the total stage six minute time limit, you’ll hit the reward chest. If you fail to defeat the boss or the full stage in time, you will be moved on to the next stage but receive no chest.
Stage 2
Starting in another area of the map in the same way you start stage one, shoot the three nodes marked on your HUD to begin. Six minutes is up on the clock again to get from start to finish to hit the reward chest.
- Defeat Shadow Legion
Similar to the first stage version adding a few more yellow bar enemies to the mix. Clear the Shadow Legion in the area to fill your percentage bar and move forwards.
- Capture the plate
Same as stage one mechanically but now the main enemies are Harpies which spawn in the air all around the capture zone so this can be difficult to hit with shorter range weapons. Some enemies will also get close to try and disrupt the plate capture so if that happens take them out as soon as possible. If the plate capture is disrupted the white area around it will turn red.
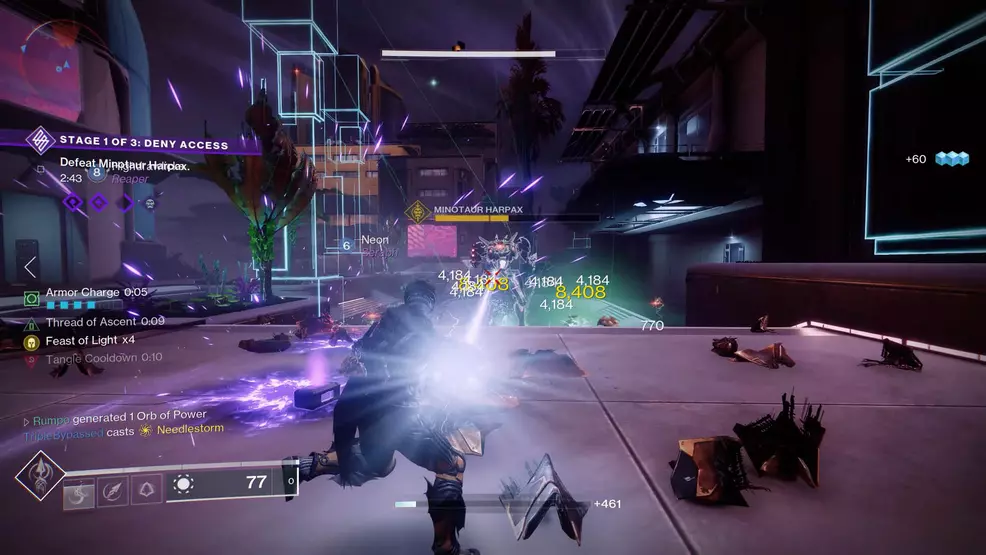
- Defeat Minotaur Harpax
Another giant Minotaur will spawn following the successful plate capture. Marked on your HUD, defeat the Minotaur to progress. Following the formula used to defeat Minotaur Accompli in stage one, destroy the Vex cubes using the Arc Craniums held by the glowing Minotaurs and finish off Harpax.
- Defeat Psion spotters calling for air strikes
Three Psions will spawn in a new area across the map. Kill these marked Psions to stop them calling in airstrikes against you and other Guardians in the area. Waves of challenging Cabal will also spawn to protect them so don’t hold back when battling through them to stop the offensive.
Once the three Psions are done, this spawns a Cabal tank named Test’udo. When the tank is at half health, more Psions calling airstrikes will spawn and the tank becomes immune. These Psions will be marked on your map by a purple diamond at each of their locations. Defeat the Psions to open up damage to the tank once more. The tank's weak spots are the thrusters (legs) which move it around. Finish it off to bag the reward chest and get ready for the stage three boss phase.
Stage 3
The Psion from the beginning of each encounter reappears for the final time. Marked on the final area of the map, go here and shoot the three nodes to disrupt the hack and engage the first boss.
- Defeat Sizmic
The encounter begins with Sizmic shielded and unable to receive damage. Cabal Phalanx will spawn in the area. Two will usually spawn on opposite sides of each other. The Phalanx are glowing white and marked on your screen so if you don’t catch them straight away you’ll be pointed in the right direction. Defeating one of them will cause an aura to appear on ground, stepping inside gives the shield breaker buff. Use this to remove Sizmic’s shield by doing damage from any source. With the buff the shield isn’t strong so use your weapons to get rid of it, saving your strongest gear for the direct damage phase.
Once the shield is down, you can unleash and burn the Psion down. Be mindful to keep up the damage, if Sizmic goes without damage his shield will recharge. This means the shield break mechanic must be repeated to again deal damage. A heavy ammo crate will spawn so don’t hold back; you can stock up again if needed. Finish Sizmic off to reach the final boss stage.
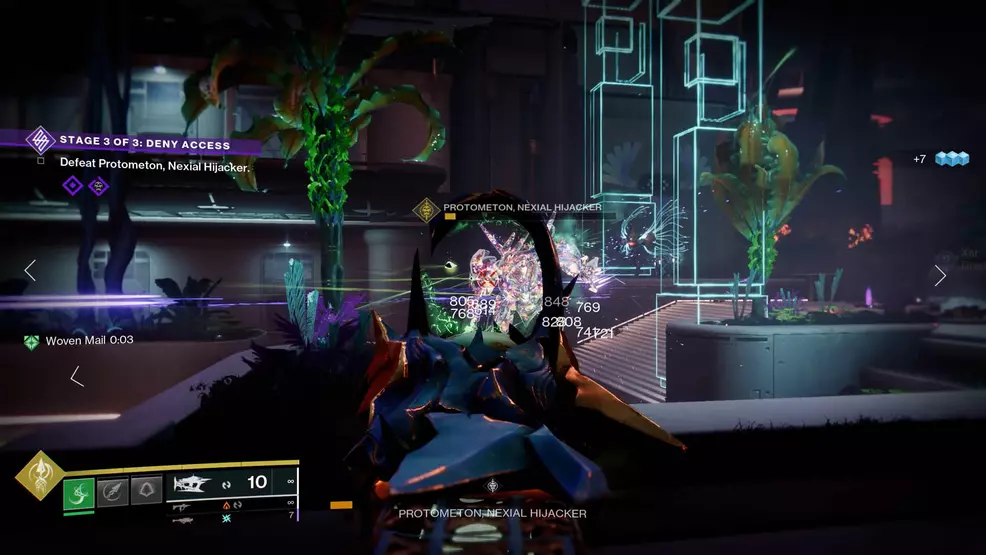
- Defeat Protometon, Nexial Hijacker
The final Vex Minotaur spawns adjacent to where you just took down Sizmic. Engage here to begin the final battle. There are a lot of high-end enemies in this battle that will keep spawning including Wyverns and exploding Goblins so don’t hold back on clearing the way through to the boss.
You will notice on the health bar at the bottom the screen there are three damage gates. When the boss’ health is reduced to the gate an immune phase will begin and they will enter an animation and glow white. Four crystals appear in the air around the arena and will be marked on your HUD. Unlike the earlier mechanic with the Arc Cranium, these can be destroyed with pure weapon and ability damage. You will also notice a red glowing cube next to these diamonds. Whilst the diamond is still in play, Vex darts will slowly spawn from them and if they get a hit, you will be detained by the Vex and need to shoot your way out or wait for teammates to break the shield. Once all four of the diamonds are destroyed, you can begin the next damage phase. You will repeat this process in the second damage gate until the boss is defeated.
For completing Terminal Overload, two chests will spawn and the one on the right will have a golden marker above it. This chest requires a Terminal Overload key to open and contains the exclusive Neomuna weapon on rotation for that day.
You will also earn a solid amount of reputation towards the new vendor, Nimbus, who rewards you with engrams for each rank up. Currently you can leave the area and return to open the regular loot chest multiple times to earn further reputation from Nimbus. Whether this will be patched is yet to be noted by Bungie but it’s worth taking advantage of while it is there. Hop on your sparrow, leave the zone, and then return. You can usually do this two or three times before the chests vanish and the next Terminal Overload event begins.
Terminal Overload adds fantastic immersion to Neomuna. Whether you are just passing by looking for loot or looking to dive into some action to test out a new build on strong enemies, there’s something for all Guardians to enjoy.
For more encounter guides to get the best from your time in Lightfall, be sure to check out the Shacknews Destiny 2 complete strategy guide.

-
Shacknews

 reply
replyRise of Bacon posted a new article, How to complete Terminal Overload - Destiny 2
