
How to complete Ketchcrash in Season of Plunder - Destiny 2
Here's how to complete the Ketchcrash seasonal activity for Season of Plunder in Destiny 2.
Season of the Plunder, Destiny 2's pirate-themed adventure, has now pulled into the space dock. Ketchcrash is the new seasonal activity that players will be spending considerable time in, and this is a breakdown of what to expect, advice, and how to get to your plunder.
Note: on the Tooltip of the activity it says Offensive, so the activity may change weekly to 'Defend' like the Witch Queen's Wellspring activity. If this does change, we will update this guide with any new activity details as the season evolves.
Ketchcrash Attack
When launching the activity via the H.E.L.M., you will notice two difficulties are selectable from launch. Power level 1520 to get us started, and a beefier Master mode with a recommended Power level of 1600 for aspiring pirate legends out there. Further Modifiers are included on Master Mode.
Space Pirates
The encounter starts with your Fireteam flying in to defend your new Ketch handed to you by the Spider. Your Ship is under attack by the now unfrozen Eramis and her Fallen forces in search of Dark Age Relics. For what reason is yet to be revealed. A cool new load-in animation showcases your 'crew' before launching you into the battle.
Repel the Pirates
Clear the bridge of Fallen. Skiffs appear surrounding your upper deck in the middle, left, and right. Clear them out to help take back control of the deck. Once done, it's time to fight to your enemy. Align the Cannon Accelerators, which are found in the four corners of the arena and will be highlighted by a marker. Stand on the plates to get your ship's cannons online, and help your crew defend the plates to fire the cannons. Fallen NPCs will drop in and take over the plates, defending them on the Guardians' behalf. The faster they fire, the quicker the progress to the next stage. Cannons can be deactivated if your Fallen allies become overwhelmed, so try to stand between them and the Fallen drop ships and take out any enemies that drop in.
Board the Ship
Source: Bungie
Once the Deck has been cleared, a Guardian cannon at the front of your ship will activate. Jump into the cannon to be launched onto one of the attacking ships. Clear the Fallen when you land and advance through the hull. You will reach a small room with three doorways (left, right and straight ahead) and a switch on the middle pillar. Before you push the button, there is a Raid Banner (which is easily missed) for the Fireteam to stock up on ammunition and abilities before proceeding.
Each Doorway holds a challenging encounter before we reach the Pirate Captain
- Left - Ether Tanks
- Ahead - Security Optic
- Right – 2 Spider Tanks
Below I have detailed what to expect from the 3 Boss Rooms:
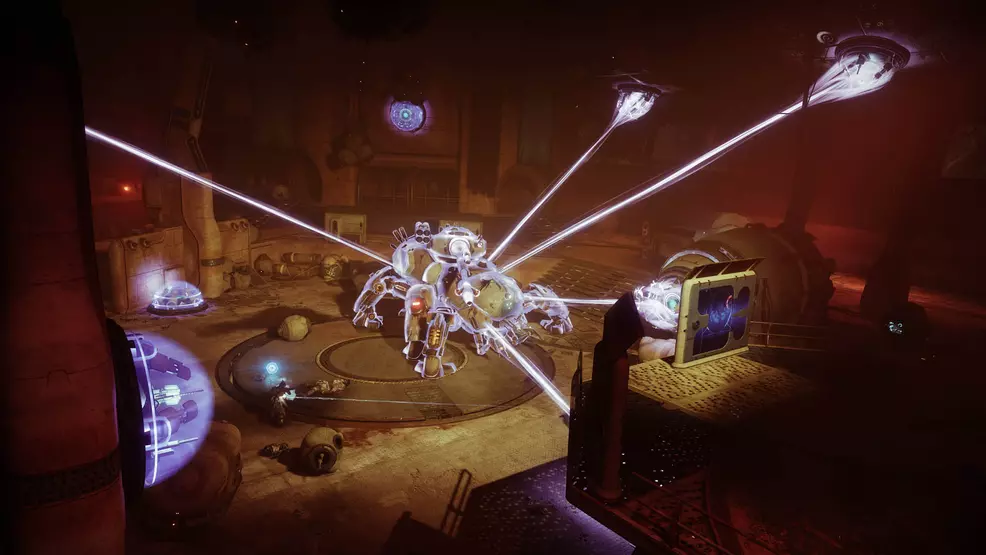
Destroy the Security Optic: First thing you will notice is the giant Servitor-like machine in the middle of the room on the wall. It's shielded and has two turrets in front of it and one sneaky turret on the ceiling just above and to the side of the Servitor. Three additional Servitors will spawn (left, right, and middle) near terminals. Once you destroy them a circle appears in front of the nearest terminal to where the Servitor spawned. Stand in the circle to hack the shield. Once all three Servitors are down and the terminals are hacked, the shield will lower for DPS towards the three turrets and main Security Optic. The turrets don't need to be destroyed but can help keep you alive during the damage phase. The Security Optic has two health gates (50/50) so you will need two rotations to take it down. Once the first damage phase is over, repeat the process.
Ether Shortage: You will enter an open room filling containers full of Ether with Fallen snipers spawning above and other Fallen on the main floor. Clear out the enemies around the room until a larger pirate named Shank spawns. Destroy this and it will drop bombs to pick up and throw. When you collect a bomb, certain Ether tanks around the room will become highlighted. Launch the bomb at these to destroy the tanks. From my experience here it takes a few sets of bombs (at least two), so repeat the above until all Ether tanks have blown. Once done, advance forward.
Spider Tanks: You will enter a large hangar-type room. Two Spider tanks will Spawn opposite each other separated by a platform in the middle. You will also notice purple domes scattered on the floor, walls and ceiling. When the encounter starts, waves of Fallen pour into the room. At first, it's business as usual with the Spider Tanks; shoot the legs so it collapses and exposes its core weak spot. This time, however, the Fallen are ready for it. The downed Tank will now be shielded, shown by beams of light shooting from the domes around the room and connecting to the tank. When this happens, a Fallen Scorch Captain will spawn and be marked on your HUD. Take them down and collect the dropped Scorch Cannon. Using the Scorch Cannon, you will have to shoot six of the domes directly to shut them down. Hit all six and the shield will break, allowing you to finish the Spider Tank off. If your Scorch Cannon runs out or you don't destroy the Spider Tank in one phase, don't worry, as the process repeats until you are successful. The shield domes do not repair if not done in one phase so it can be done at pace to keep yourself and crew safe as you take on the waves of Fallen. Once done, you move onto the final encounter.
Defeat Aye-I, Privateer
Source: Bungie
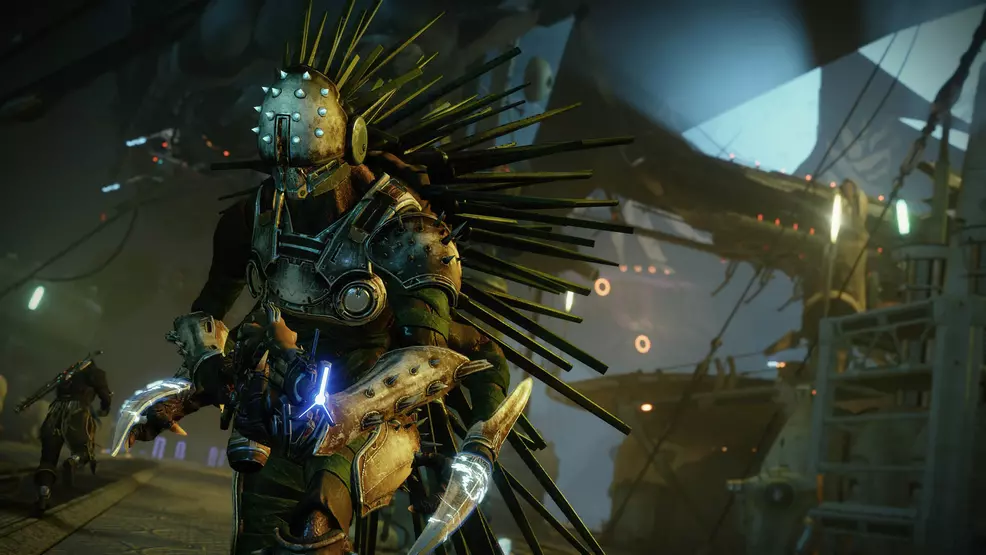
You will come face-to-face with the boss who will try to make their escape. Clear the room and chase off any remaining Fallen. The final Raid Banner will appear in the middle of the room next to a pillar with a button to progress to the boss fight. This week’s boss (Week 1) is a giant Shank, and after a stare down behind a shielded wall, the fight begins. You will recognize the arena immediately as it's the same space as the beginning of the activity where you fought on your own ship's deck. The same rectangular shape from one end to the other.
Fallen will spawn across the deck, attempting to block your path to the boss located at the opposite end of where you enter the arena. Fight through to the front of the ship to engage the boss.
The boss fights you in three damage phases with enemies spawning around you. It never moves from the front end of the ship so you can focus your Guardians there. Once each damage phase is done, the boss flies out away from the ship, shielded and protected by Servitors. To begin the next phase of DPS, take out all the Servitors protecting it. Stormchaser melts these little Servitors.
Repeat this for the first two phases. On the final phase, the lid of the Shank will break open and it will attempt to chase you down and shock you with blasts of Arc rather than shooting you. Defeat the boss in its Arc aggro phase and that's it, the spoils are yours.
It's worth noting there are three bosses over the course of three weeks as per the Triumphs section, which may change by a little or a lot. We will keep the guide updated as new bosses and encounters are added.
Loot and Celebrate (Emote) with Crew
Just ahead of where you entered the arena, pirate treasures scatter across the deck and your Fallen pirate crew appear to join in with the sea shanties. Emote with them for it to count as a Crew Celebration, which will be confirmed on the left-hand side of the screen. Enjoy your treasure, Guardian, including Map Fragments, Treasure Coordinates, and new seasonal armor and weapons. The Map Fragments are capped at 50 and I was picking up 11 per run, so make sure you use them on your Expeditions (Another new seasonal activity) during Season of Plunder.
FYI - Rewards seem delayed, so stay until end of the timer or they pop down the right side of your screen to ensure you get the drops before leaving. Cannot confirm if these would then go to the Postmaster but reports state Map Fragments will be lost. We can't have that.
Now you know what to expect for from the Ketchcrash seasonal activity it's time to go forth and plunder that booty. As we know there will be two more bosses. This guide may be updated to add a new boss, or a new guide posted if there are substantial mechanical changes throughout the activity. Until next week, enjoy this weeks Ketchcrash and check out our Destiny 2 Strategy Guide for more help with the latest season here on Shacknews

-
Shacknews

 reply
replyRise of Bacon posted a new article, How to complete Ketchcrash in Season of Plunder - Destiny 2
