
Kirby and the Forgotten Land - Downtown Grassland walkthrough
Complete all missions for the Downtown Grassland stage in Kirby and the Forgotten Land.
As you dive into the gorgeous world of Kirby and the Forgotten Land, you’ll work to complete various stages and missions for each stage, in addition to tracking down hidden Waddle Dees.
If you’re looking to get 100% completion on stages like Downtown Grassland, you’ve come to the right place. Below, we’ll walk you through Downtown Grassland including the location of all hidden Waddle Dees, and how to complete every mission on the list.
Kirby and the Forgotten Land - Downtown Grassland walkthrough
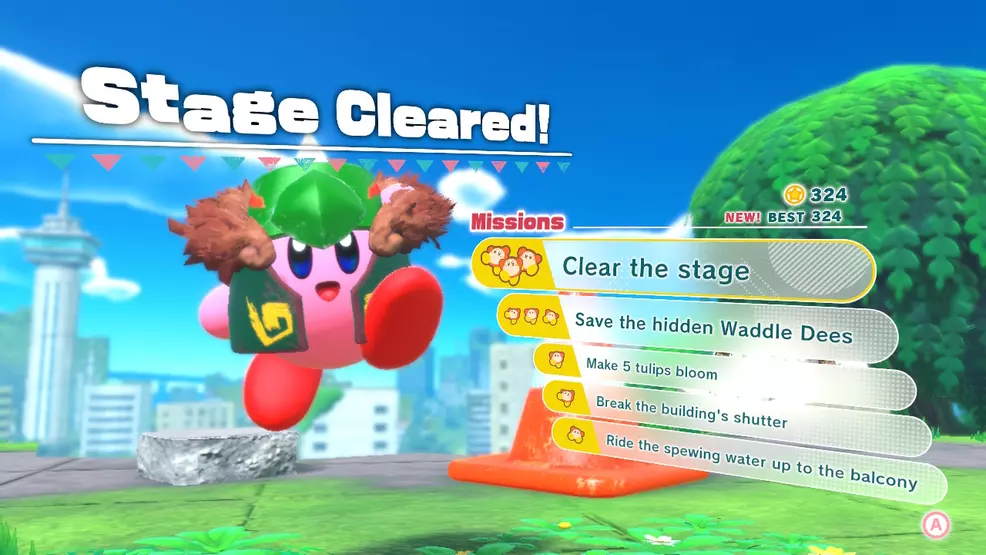
Downtown Grassland is the first stage in Kirby and the Forgotten Land and contains three hidden Waddle Dees and easy missions like breaking the building’s shutter, which can be done using Mouthful Mode to turn Kirby into a vending machine. To ensure you don’t miss anything, here’s what you’re going to need to keep an eye out for as you work your way through Downtown Grassland.

The first red tulip you’re going to want to interact with to complete the “make 5 tulips bloom” mission is located on a tree stump right at the starting area. Interact with it by walking over it to make the flower bloom.

Next, head straight and keep an eye out for a switch on the right-hand side. Activate that switch and you’ll open up an area with a piece of cake for Kirby to eat. If you go left while in this area with the cake slice, you’ll wind your way through a hidden passage.

At the end of this passage, you’ll find the second tulip.

To complete the mission “break the building’s shutter” you’re going to want to use Mouthful Mode to inhale a vending machine. With Kirby in Vending Mouth mode, you can spit out cans of soda at enemies. You can also spit these soda cans to break open the building’s shutter.

After doing this, climb the ladder at the back up to the top to find a collectible figure.

In the area with cannonballs, inhale a bomb-throwing enemy to have Kirby switch to the Bomb Copy Ability. After that, throw bombs at the boxes underneath the canons to ensure you don’t get hit by any cannonballs as you proceed forward.

Also, before you proceed through the canon area as a whole, remember to look to your left to find another tulip on top of a barrel.

After the canon ball area, there will be a few cones and you’ll want to use Mouthful Mode again to inhale one of these cones.

With Kirby using Cone Mouth, you’ll be able to use a downward spike attack to break open special areas on the ground and broken pipes.

To complete the “ride the spewing water up to the balcony mission” you’re going to want to look for the pipe as seen in the image above, then use your downward spike attack to break the pipe.

Once you’re on the balcony, keep going until you see a stack of silver boxes. Use your downwards pike attack to break these boxes and uncover a hidden collectible figure.

The next area has a small mini-boss fight. For this, we recommend using the Bomb Copy Ability if able.

When you reach the next area you’ll want to head right and climb the ladder up to the top.

There, you’ll be able to use Mouthful Mode again to reveal one of the stage's hidden Waddle Dees.

To find the next hidden Waddle Dee, you’re going to want to head left to find another yellow ladder leading to the top of a building. Climb this, then inhale the sword enemy. If you already have a Copy Ability equipped, press and hold Y to drop it to allow you to equip the Sword Copy Ability. With this equipped, cut the vine holding up a cone on the right.

Inhale the cone, then use your downward spike attack to eliminate the large turtle foe (the game calls this enemy a Tortorner). In doing so, you’ll reveal another hidden Waddle Dee. Heading straight, you’ll climb up a set of steps. As you’re doing this, keep an eye out for the area shown in the image below.

Here, you’re going to want to let the Buffahorn enemy run past you, then with the area clear, head inside to find the next red tulip.

When you reach the top you’ll encounter an extremely large turtle foe similar to the other Tortorner you encountered. The game calls this enemy a "Tortuilding" as its shell is comprised of an entire building. Use the areas of cover where you can dip down underground, allowing the Tortorner's mouth to pass above you.

At the end, the Tortorner will break open a pipe which you can break and ride the water spout up to the top. From there, you can use your downward spike attack again to get rid of the Tortorner.

After you use your downward spike attack to defeat the Tortorner, the Downtown Grassland stage will come to an end.
We hope this walkthrough has helped you complete the Downtown Grassland stage of Kirby and the Forgotten Land with all hidden Waddle Dees found, and all missions completed.
For more on Kirby and the Forgotten Land, we have other helpful guides including one that runs through five things we think you should know before playing Kirby and the Forgotten Land.

-
Shacknews

 reply
replyMorgan Shaver posted a new article, Kirby and the Forgotten Land - Downtown Grassland walkthrough
