
Destiny 2: Season of the Hunt campaign walkthrough
A step-by-step guide of the Season of the Hunt campaign in Destiny 2, which introduces players to a familiar face and has them hunting Wrathborns.
Destiny 2: Season of the Hunt has officially kicked off and it brings with it a new campaign storyline for players to experience. This quest is called Hunter and the Hunted and includes the questline, Hunt for the Wrathborn.
Season of the Hunt campaign – Hunter and the Hunted
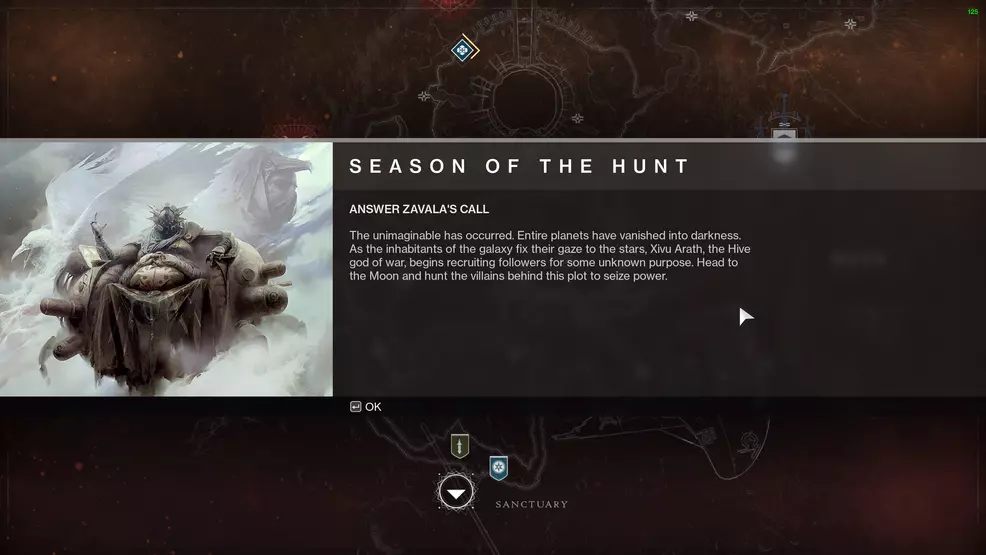
The Season of the Hunt starts with Hunter and the Hunted, taking players to the Moon in search of Osiris. Before you begin, make sure you’ve finished the prerequisites necessary to start the Season of the Hunt campaign. With that done, you’ll be able to continue with Trail of the Hunter and then shift to Hunt for the Wrathborn.
Trail of the Hunted
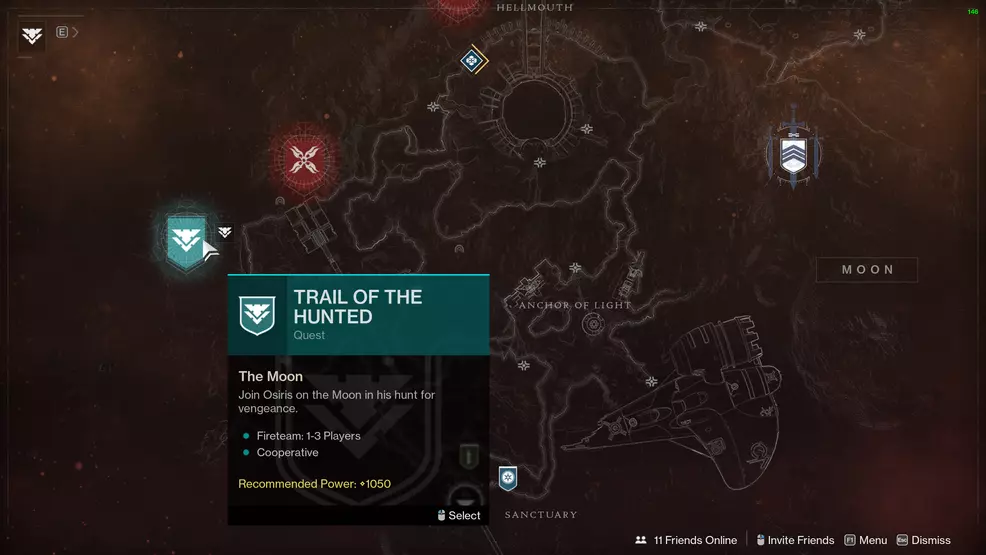
Your quest begins on the Moon in Trail of the Hunted. This is a short stint into the Shrine of Oryx to help Osiris. The main task is to pursue the High Celebrant through the Moon’s underground tunnels. Fight through the area and enjoy the cutscene.
Speak with Spider
After the cutscene ends, go and talk with Spider in the Tangled Shore. He’ll ask you to start working with Crow.
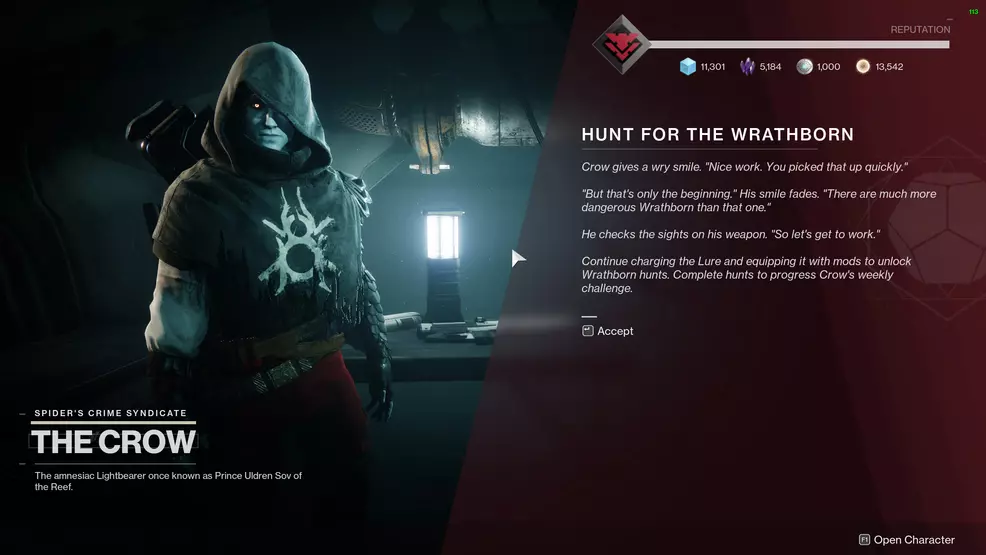
Speak with Crow
Speak with Crow in the Tangled Shore in a storeroom behind Spider and accept the new quest, Hunt for the Wrathborn.
Hunt for the Wrathborn
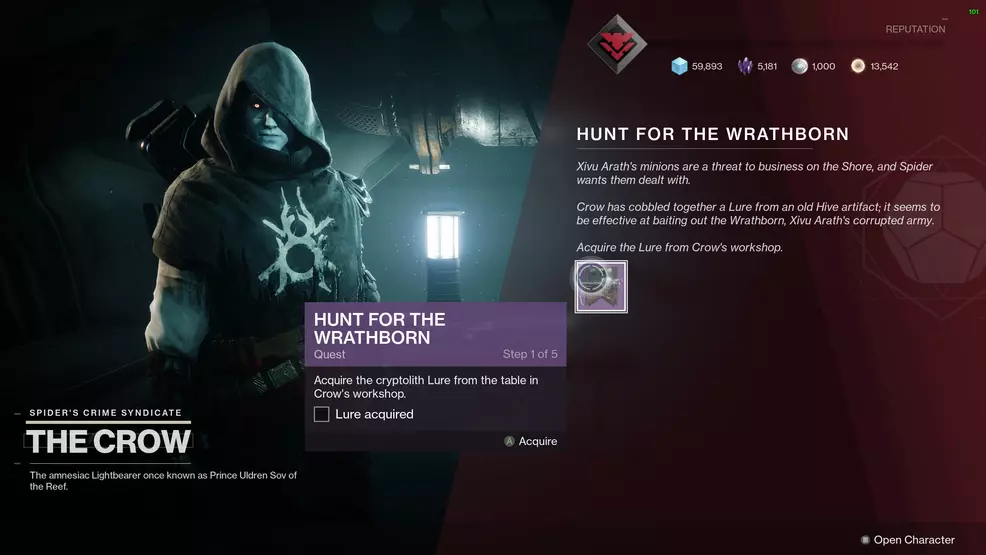
After accepting the quest, stop speaking to Crow and grab the Lure off the table to your left. This Lure is the main tool for Season of the Hunt and this quest will get you familiar with using it.
Configure the Lure
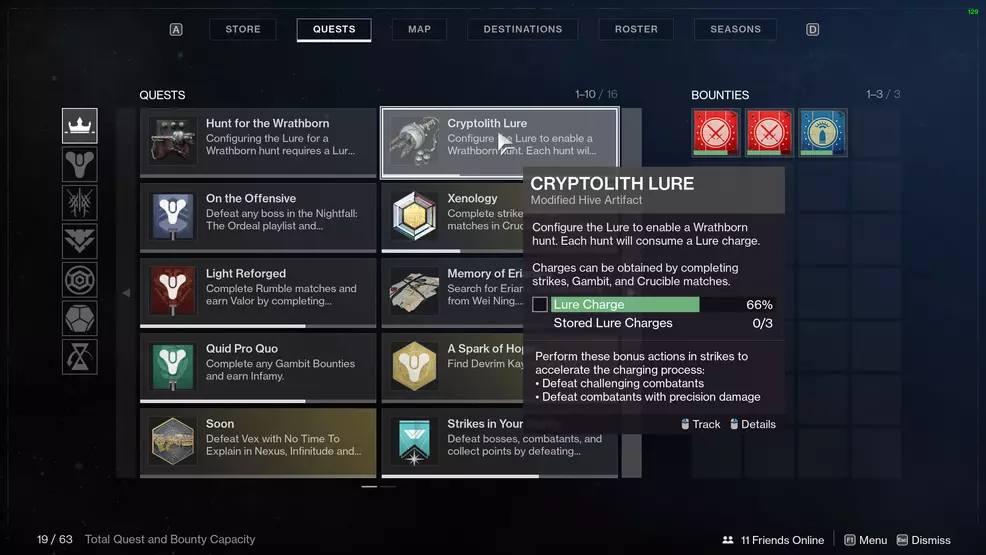
Next, you’ll need to configure the Lure by charging it. This is accomplished by playing Crucible, Gambit, and/or Strikes – dealer’s choice. Remember to grab Crow’s bounties before you continue.
Each time you use the Lure to initiate a hunt, part of its charge will be consumed. This must be recharged every time. To speed up this process, you can focus on whatever is the day's bonus actions. Check the bottom half of the Lure to see the daily bonus. Sometimes it will be defeating challenging combatants in Strikes (precision kills boosts it further), other times it will have you defeating High-Value Targets in Gambit, and it may even task you with playing some Crucible. The Lure comes partially charged, so it should only take one Strike to complete.
Insert mods into the Lure
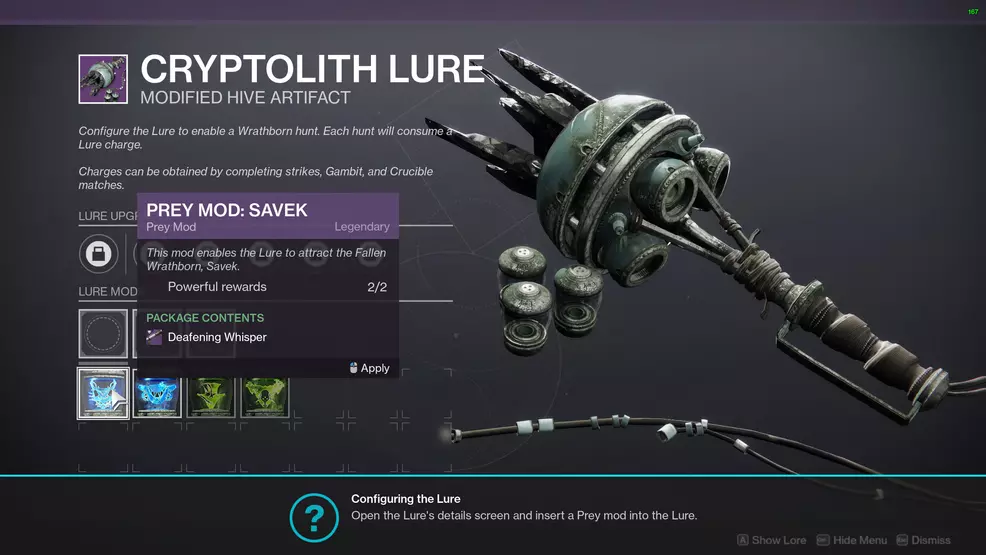
Once the Lure is charged, you will need to insert a couple of mods into it. This is quite similar to the Chalice of Opulence from Season of Opulence.
Open the Quest tab and select Details on the Lure. Insert one of the Prey mods, there is one to hunt Savek and another to hunt HKD-1, both of them Fallen. In the next slot, insert the Trophy Mod: Dormant (this will likely be your only option at this time). In the final slot, insert another Dormant mod.
Place the active Lure in a cryptolith
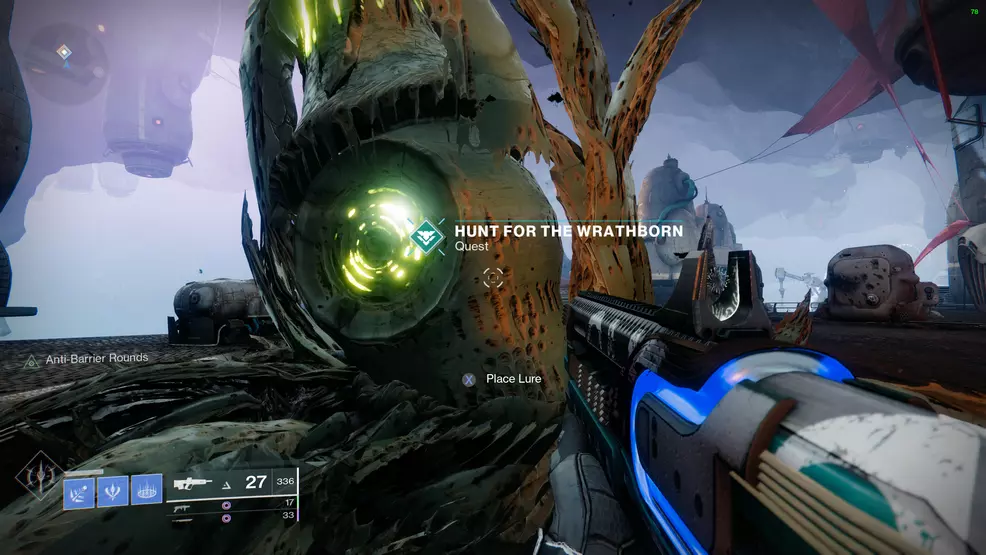
Now that the Lure is set with the bait, you will need to place it at a cryptolith to draw out your hunt. The quest will have you trigger the cryptolith that’s on the Tangled Shore. Find the cryptolith by heading to the Thieves’ Landing fast travel point.
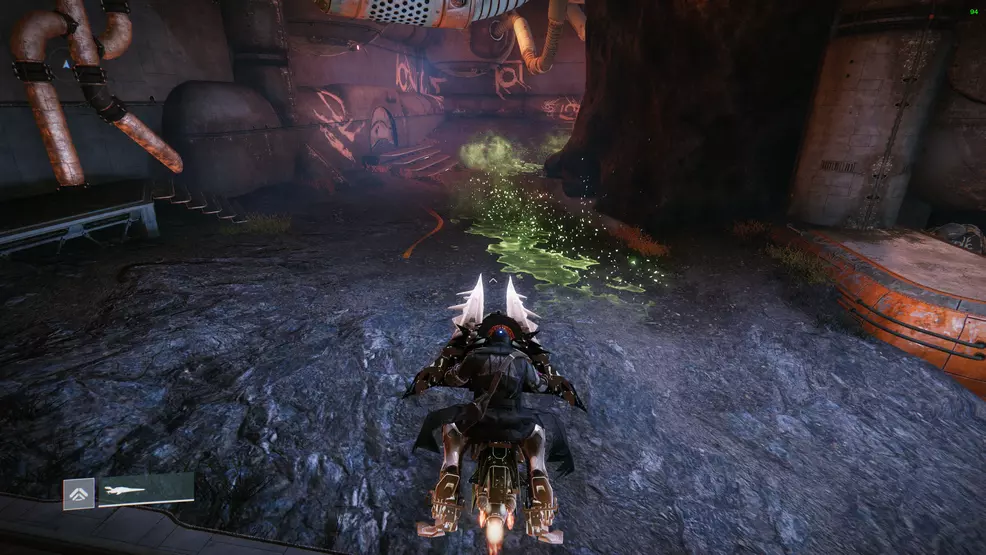
Place the Lure and get ready to clear the enemies and fight the Wrathborn. After dealing some damage, it will try to escape. You will now need to track it to its lair. Do this by following the green markings on the ground.
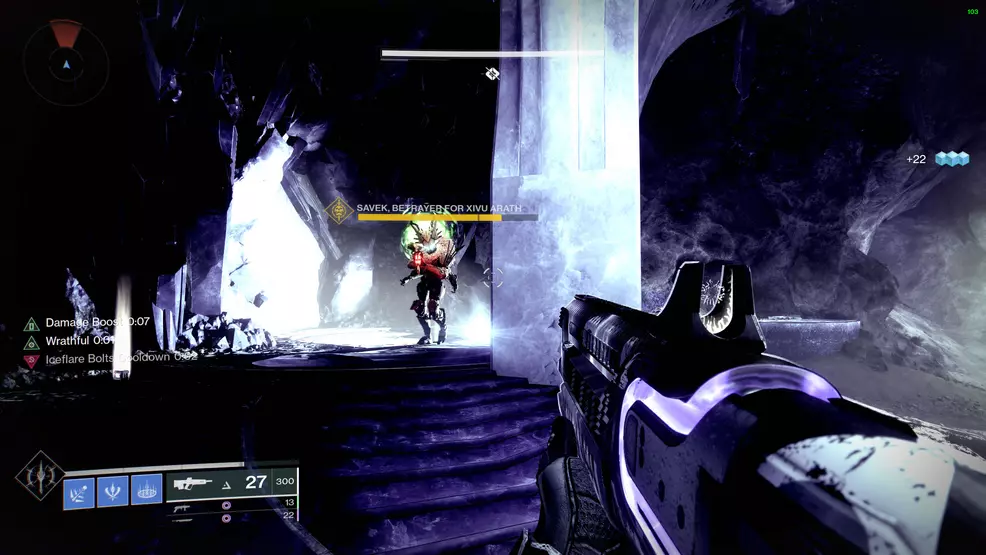
When you reach the Wrathborn’s lair, place the Lure again to draw it out. To remove the Wrathborn’s immunity shield, defeat the yellow health bar enemies, stand in the pool they drop, and then shoot the Wrathborn.
Speak with Crow
Return to the Tangled Shore and speak with Crow. You’ll unlock a bunch of other mods for the Lure. From here, you can continue creating Lures, going on hunts, and upgrading the Lure to give you more powerful gear.
That’s all there really is to the Season of the Hunt campaign. It kicks off with Hunter and the Hunted and concludes with Hunt for the Wrathborn. As far as introductory quests go, this one is fairly short but it gets straight to the point. Be sure to stop by the Shacknews Destiny 2 guide for more coverage of this newest season.

-
Shacknews

 reply
replySam Chandler posted a new article, Destiny 2: Season of the Hunt campaign walkthrough
