
All Ahamkara bone locations in Warlord's Ruin - Destiny 2
Where to find all Ahamkara bones in Warlord's Ruin for the Heed the Whispers, O Vengeance Mine Triumph in Destiny 2.
Hidden around Warlord’s Ruin are 10 Ahamkara bones for players to find. These are the bones of Hefnd, one of the fabled Ahamkara. In order to unlock the Title, Wrathbearer, you will need to find all of the bones as part of the Triumph, Heed the Whispers, O Vengeance Mine. These bones are locked behind the progression of the quest, In the Shadow of the Mountain.
All Ahamkara bone locations

Source: Shacknews
There are 10 Ahamkara bones to find in Warlord’s Ruin. These are scattered throughout the dungeon with the first one you need to collect being found after the final boss fight. This is part of the quest, In the Shadow of the Mountain. While this is the first Bone of Hefnd you will find, it is actually the tenth one listed in the Triumph.
The Ahamkara bones are also locked behind progression of the quest, In the Shadow of the Mountain. You must advance the quest before you can dispel the higher level Taken Corruption locks on the doors. Part of advancing the quest involves gathering a lot of Dark Ether Tincture, so anticipate farming the dungeon for a while before you can unlock all these bones.
Ahamkara Bone 10
The first Ahamkara bone you must collect is technically #10 in the Triumph checklist. This is found after defeating the final boss in the dungeon. It is beside the last loot chest, on the ground to the left.
Ahamkara Bone 1
Source: Shacknews
The next bone is immediately after crossing the rope bridge before the first boss. Go up the stairs, into the fortress, slide under the iron gate, and down the stairs to a dispel door. Unlock the door to find the bones. While this is the second bone in this guide, it is the first bone on the Triumph list, so I have labeled it as such.
Ahamkara Bone 2
Source: Shacknews

Source: Shacknews
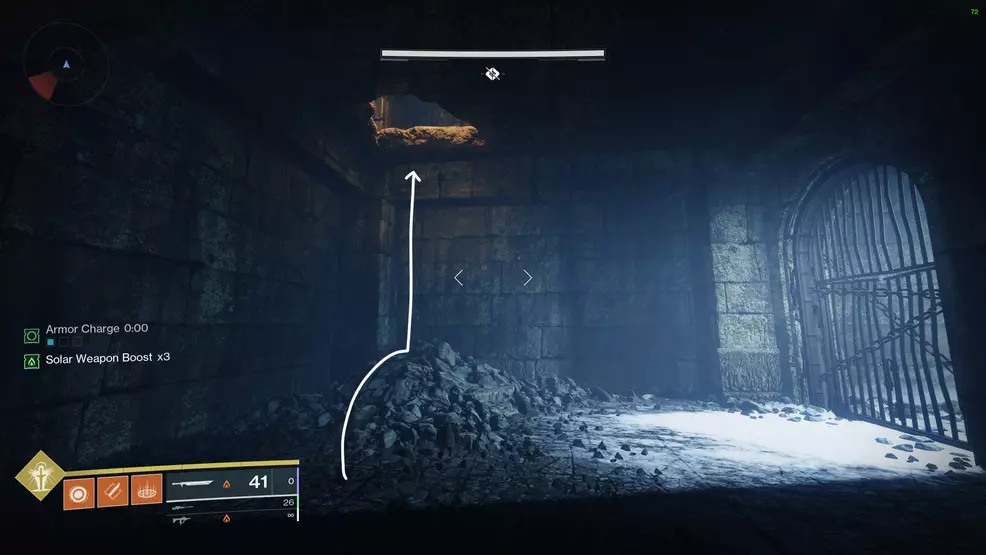
This Ahamkara bone is found after escaping the prison and in the maze. The first time you jump up through a hole in the ceiling you are close. Jump over the spike trap that's on the left wall and look for the dispel door on your right.
Ahamkara Bone 3
Find this Bone of Hefnd after the second boss fight when you go back out onto the cliff. Follow the cliff edge all the way to the end. You will find a door in the side of the mountain that leads to another Level 1 dispel door.
Ahamkara Bone 4
Source: Shacknews

Source: Shacknews
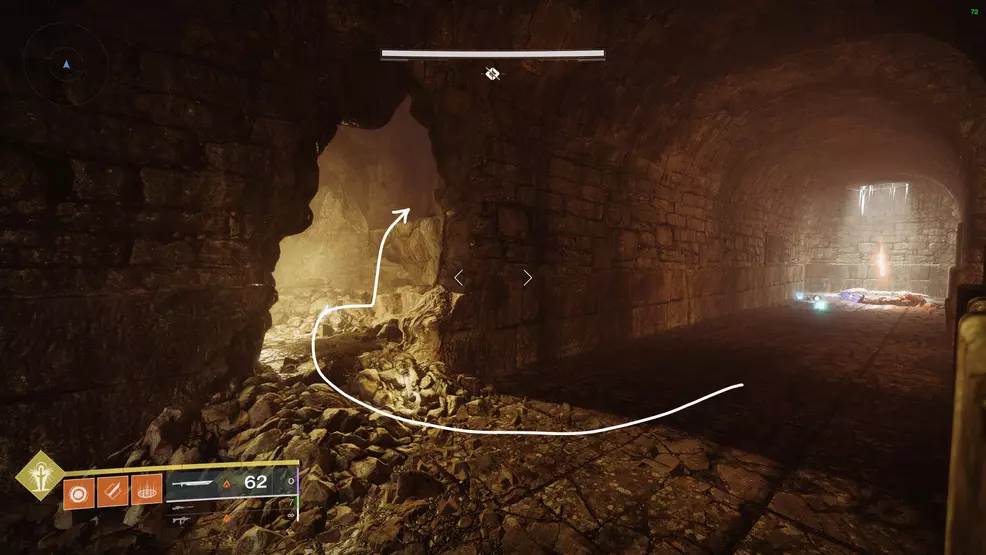
You must advance the quest, In the Shadow of the Mountain, to unlock this next Ahamkara bone. Find it after escaping the prison. This one is located after you jump up into the ceiling and when you climb through the natural cave formation. You’ll end up in another part of the maze with double-spikes on the wall. Go over the spikes and take the hallway on your left to find the Level 2 dispel door.
Ahamkara Bone 5
Source: Shacknews
The next bone is after the prison escape and across the broken bridge where the Chimaera bombards you and you fight Scorn. When you reach the other side, go to the right along the cliff to find another Level 2 dispel door.
Ahamkara Bone 6
Hefnd’s next bone is after the second boss and immediately after the room with all the trap chests. Slide through the crack in the wall and jump up the cavern. In the snowy room with the Scorn, look for an obscured hole in the wall that leads to yet another Level 2 dispel door.
Ahamkara Bone 7

Source: Shacknews
Source: Shacknews
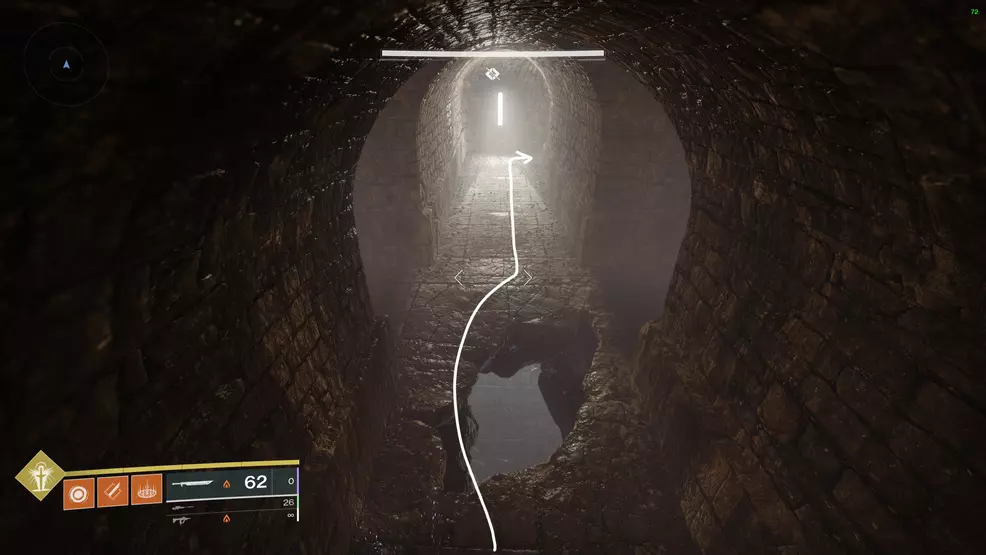
Find this Ahamkara bone behind a Level 3 Taken Corruption door in the maze after the prison. It is after you jump up into the ceiling for the second time (after going down a set of stairs). Instead of dropping down the hole to continue, jump over it to find the Level 3 door.
Ahamkara Bone 8
The second last Ahamkara bone is inside the mountain near the massive Taken Blight. Look for the Taken pushy walls, there will be a little ledge you can drop down to. It’s a bit tough to see but it leads to another Level 3 door.
Ahamkara Bone 9
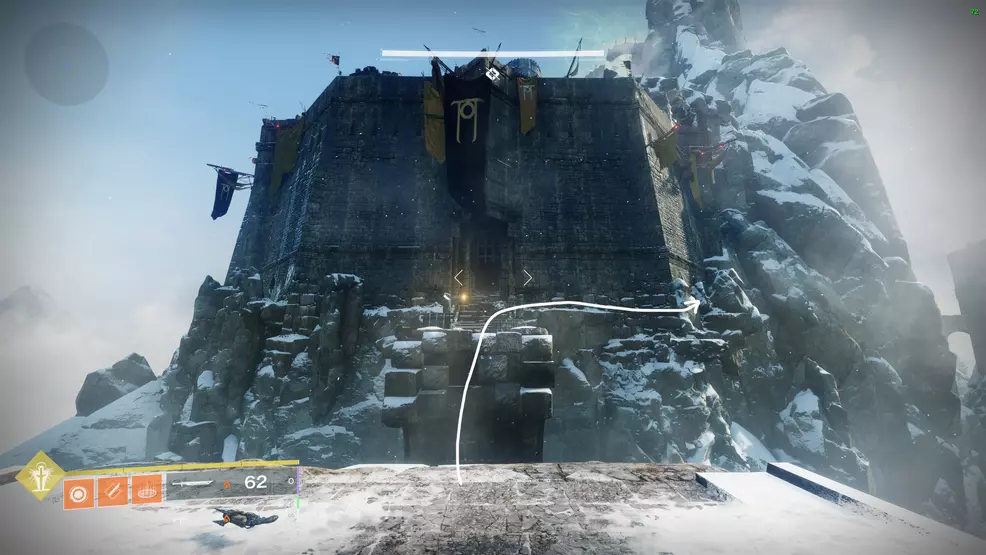
The last Ahamkara bone is on the way to the last boss fight. After exiting the inside of the mountain with the Taken Blight, climb up the mountain to the section with the floating debris between the three tall mountain pillars. There will be a fortress door that leads to the final Level 3 Taken Corruption lock.
Once all 10 Ahamkara bones are collected, you can unlock the Triumph, Heed the Whispers, O Vengeance Mine, which will increase your chances of getting the Exotic Sidearm, Buried Bloodline. Plus, with all the Bones of Hefnd found, you’ll be one step closer to unlocking the Title. Read over our Destiny 2 Strategy Guide for more guidance on this dungeon and the raids.

-
Shacknews

 reply
replySam Chandler posted a new article, All Ahamkara bone locations in Warlord's Ruin - Destiny 2
