
How to build a ship - Starfield
Prepare to go down the deepest rabbit hole when you build a ship in Starfield.
One of the more complicated and oddly satisfying things about Starfield is when you decide to build a ship. The controls can be confusing and the number of moving parts overwhelming. After spending hours building ships, I’m going to break it down and make sure you’re on the right path.
How to build a ship
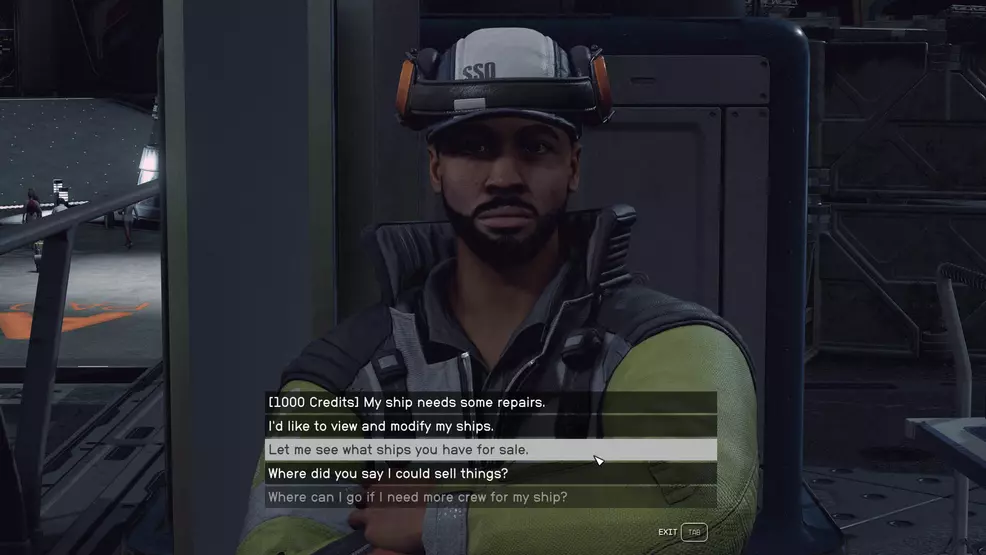
To build a ship in Starfield you must own at least one ship, which you will within about 30 minutes of starting the game. Unfortunately, you cannot build a ship from scratch. You must first own a ship, speak to the Ship Services Technician, and then choose the option I’d like to view and modify my ships. From there, you want to choose the Ship Builder from the bottom right corner of the screen. This will bring you to a screen where you can begin to add, move, remove, and manipulate the various components of your ship.
If you really want to build a ship from scratch, once you enter the Ship Builder option, you can select each component of the ship you’re viewing and delete it. This will leave you with a blank canvas where you can start from scratch. The best part about this is that you’ll get credit for all the parts you deleted, so you’ll be able to build your new ship for free until you surpass the value of the ship you began with as your base.
Ship Builder screen
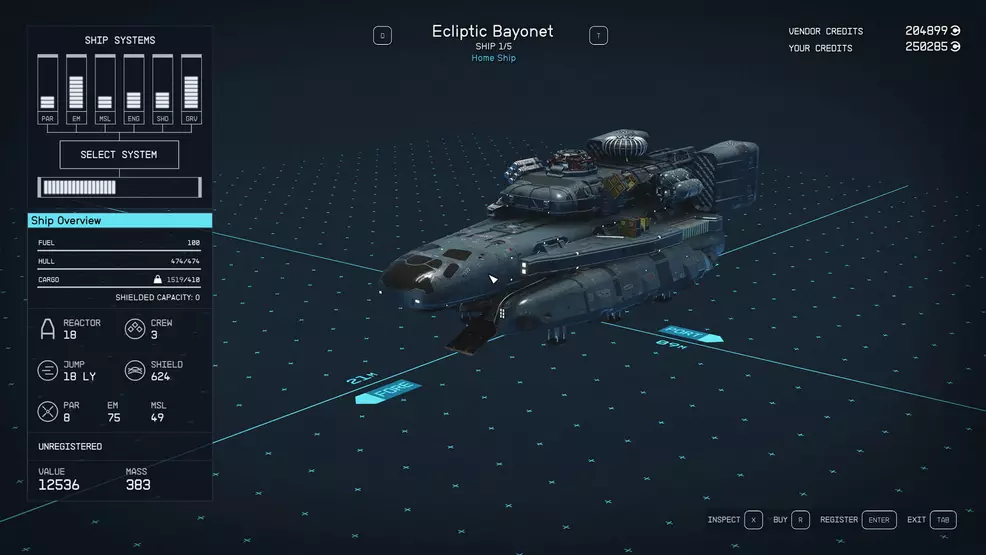
The ship builder screen has several important components to understand before we begin. First, if you zoom out as far as you can you will see the full canvas that you have to work with. Your ship must fit within these boundaries. If you look at the grid on the canvas you will see your ships length and width in meters, as well as labels for your Fore, STBD (Starboard), Aft, and Port. These are the four sides of your ship, and it’s important to make sure that the parts you select match the side you’re attempting to attach them to. For example, adding a Deimos Bumper - Port Fore to the Starboard Aft part of your ship won’t work. The piece quite literally will not attach.
Next, check out the readings along the bottom and top left of your Ship Builder screen. There’s an overwhelming amount of information there initially, but the thing we want to take note of are the colors of the readings. Numbers in red indicate a suboptimal reading, and the numbers in blue indicate an optimal reading. This will become clearer as we go.
Also, on the right side of the screen near the bottom will be a reading for errors. If you don’t see this, that’s a good sign, but if you’re building a ship from scratch, you will see eight errors with a blank canvas. If you want more information on errors, click the Flight Check button at the bottom. This will give you both errors and warnings. You must have zero errors when you finish your ship, but you can have warnings.
Finally, there’s a ruler on the right side of the screen with two buttons; one on the bottom and one on the top. When you have a ship part selected, you can move the part up and down to snap it into place by pressing the corresponding button. If you ever struggle to snap a part into place, this is likely the solution.
Selecting ship parts
To begin building your ship from a blank canvas, select the Add option at the bottom. This will give you a list of parts that this Ship Services Technician has on hand. Some will be greyed out, meaning you can’t purchase those. If a part is greyed out, hover your cursor over the part and it will tell you what skill you’re missing.
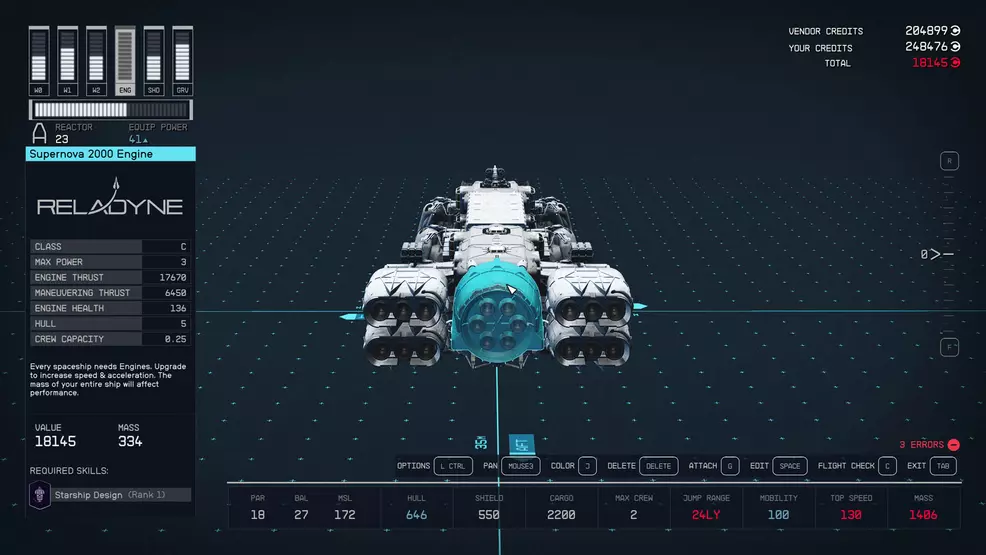
The second piece of information you’re looking for when selecting a ship part is class. There are Class A, Class B, and Class C components. Ther are also parts that have no class listing, which means those parts can work with any of the three classes. By default, you will be a Class A pilot, meaning you can build Class A ships to fly. You cannot add modules that exceed the reactor class. So, if you have a Class A reactor, you can’t use a Class B engine.
Without exception, your ship must have the following components:
- Cockpit
- Docker
- Engine(s)
- Grave Drive
- Landing Bay
- Reactor
- Fuel Tank
- Landing Gear
Keep in mind that it would be nutty to build a ship that didn’t also include a Cargo Hold, Shield, and a Weapons, but you can skip them if you’d like.
Building your ship

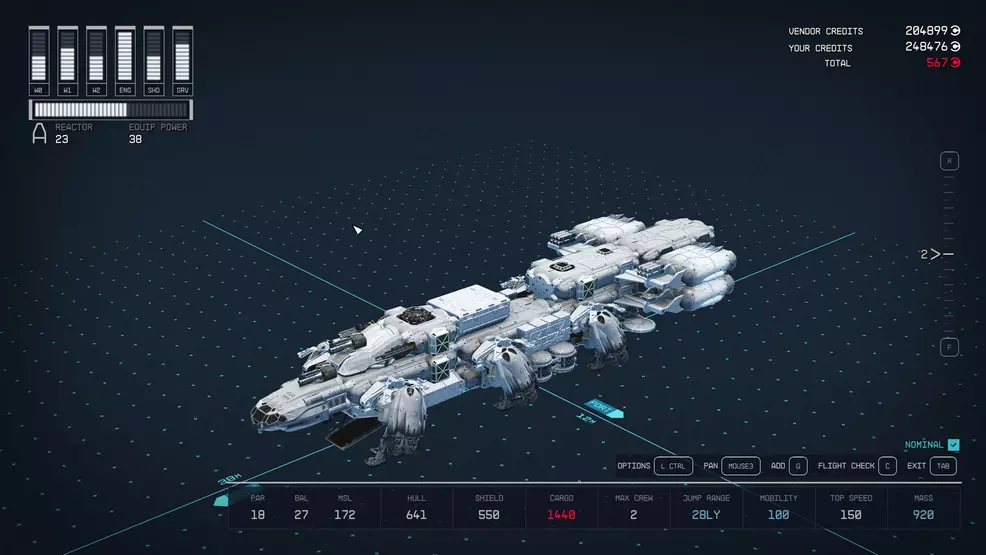
I add the cockpit to my ship first, as this gives me the front of the ship and helps set the aesthetic. From there I add my HABs so that I can get the basic length, width, and shape of my ship sorted out. Once I have a good idea of the structure, I start to add in the Engines, Grav Drive, and Reactor. Typically, the Shield and Weapons are the last things I add to my ship (beyond cosmetic items).
Once you have the foundation for your ship in place, it’s a matter of eliminating the errors while reaching the aesthetic and function you desire. For example, the ship I built was an absolute unit, which required me to slap four engines on it to generate enough power to maintain good mobility. I also found that I was running out of room in my Cargo Hold, so I added three in total, two of which were Shielded Cargo Holds so that I could smuggle Contraband.
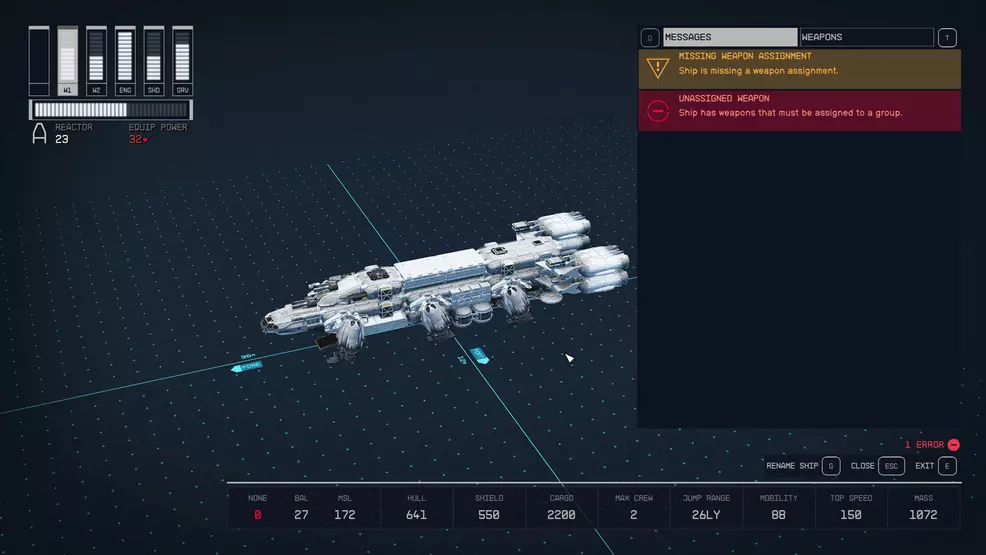
After you add the weapons, you may see a couple of errors and warnings that say ship is missing a weapon assignment, and ship has weapons that must be assigned to a group. If you open the Flight Check menu, you’ll see a Weapons tab. Click there to assign weapons to your controls and keybindings.
When it’s all said and done, you should have a blue reading that says Nominal in the bottom right corner of your screen. This means that you are clear of all errors and warnings and your ship should perform as expected. This reading can exist even if you have Mobility and Mass in the red, for example. Yes, your ship is too heavy, and its Mobility will suffer as a result, but the ship will still work. I spent most of my playthrough in Starfield with a tank of a ship that could barely turn in space combat, but it was still flight ready. The goal will normally be to have all those numbers along the bottom (and the top left) white or blue. Remember, red is bad, white is fine, and blue is great.
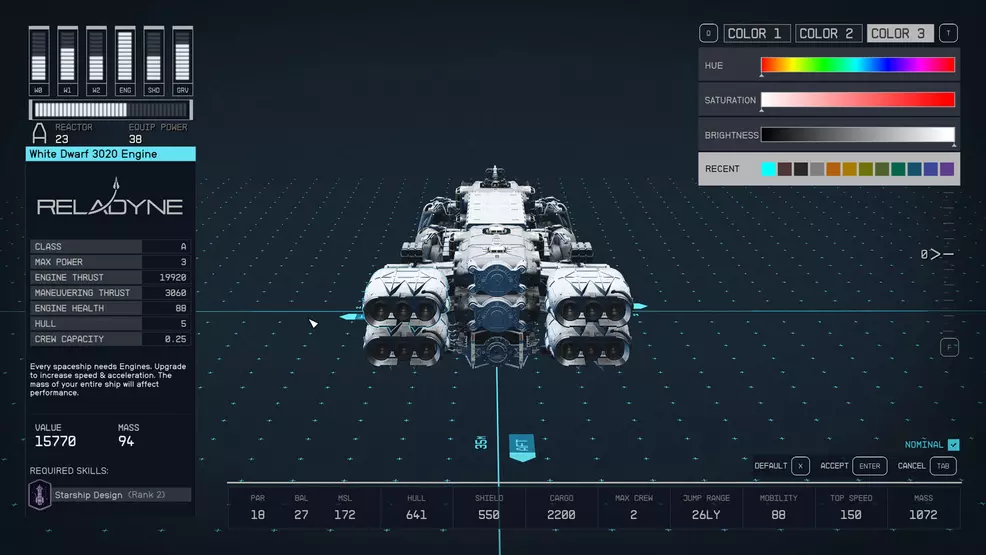
If your ship is Nominal and you’re pleased, hover over any component and choose the Color setting at the bottom, or you can change your ship name in the Flight Check menu. If you want to change the color, I hope you’re not color blind. I typically go with black or white since Starfield lacks the proper accessibility for this sort of color customization.
Now that you’ve built your ship, exit the Ship Builder, and look at the landing pad behind you. Your ship will be ready for you to hop aboard and look around or take it for a spin. Before you do, though, check out our Starfield Strategy Guide for more help with all the cool things you can do.

-
Shacknews

 reply
replyBill Lavoy posted a new article, How to build a ship - Starfield
