
How to get the Ruinous Effigy Exotic Trace Rifle - Destiny 2
A step by step walkthrough for how to get the Ruinous Effigy Exotic Trace Rifle in Destiny 2, including finding all 25 Calcified Light and defeating Savathun's Marionettes.
This guide will show players how to get the Ruinous Effigy Exotic Trace Rifle in Destiny 2. This includes the Interference mission, finding all 25 Calcified Light, and defeating 15 Savathûn’s Marionettes.
This guide is in progress. Last updated: July 7, 2020 at 10:00 p.m. EDT.
Ruinous Effigy Exotic Trace Rifle
The Exotic quest to get Ruinous Effigy is called Growth. This quest will take Guardians through a few steps. The first few aren’t too bad, but things can get a bit more involved as you really dig in. The steps are as follows:
- Get Growth quest from the Prismatic Recaster
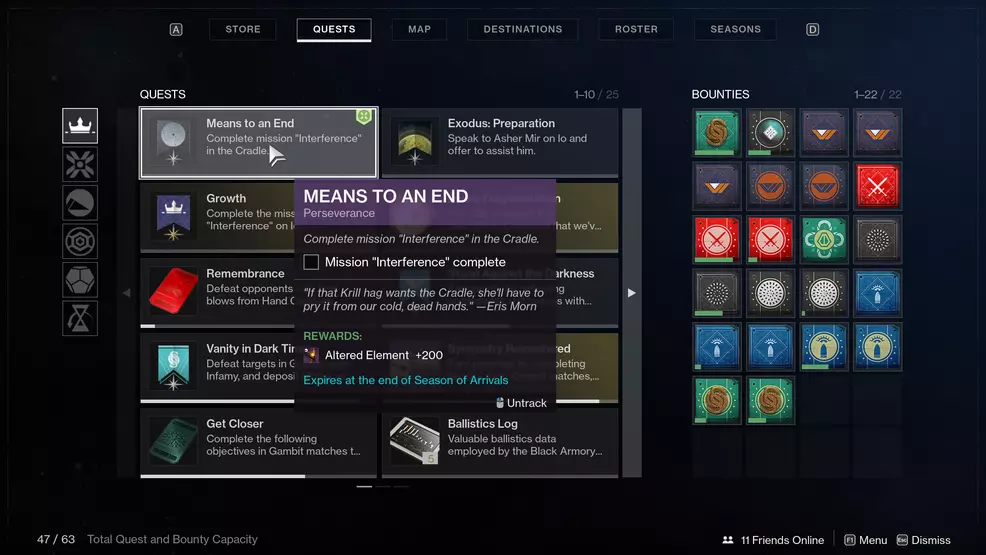
- Complete the Interference mission by completing the Means to an End weekly quest
- Collect Calcified Light and defeat Savathun's Marionettes
- Compete in Gambit or Reckoning, get precision mulitkills, and get Void kills
- Use the Umbral Decoder to get Ruinous Effigy
Growth: Gift
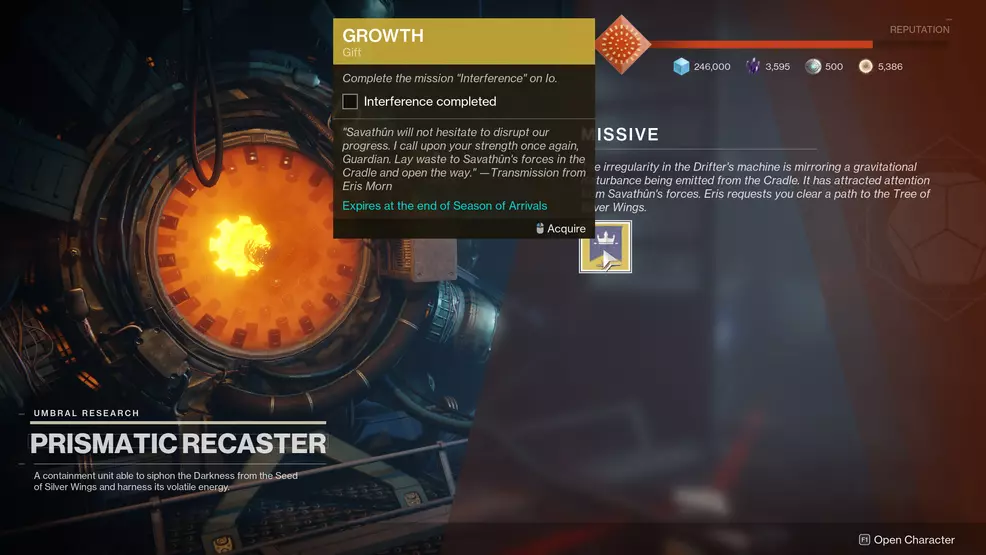
The first quest step is called Gift and requires Guardians to complete the missions Interference. To do this mission, Guardians must first visit the Prismatic Recaster neart Drifter and start the weekly quest called Means to an End. Work through that until you unlock the Interference mission on Io. Complete Interference (Power 800), then you’re on to the next step.
Growth: Pendulum
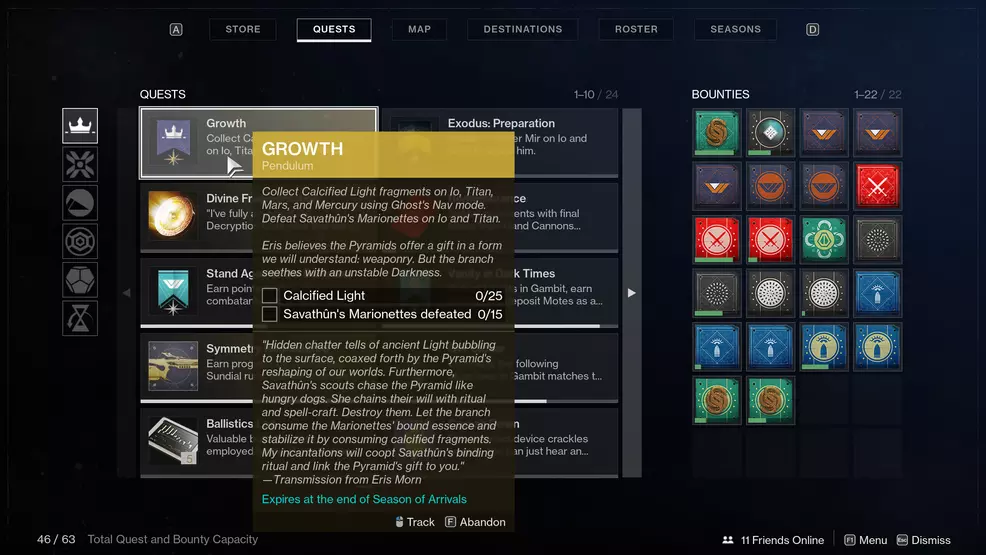
This quest step requires Guardians to do the following:
- Calcified Light - 25
- Savathûn’s Marionettes defeated - 15
Tip: If you bring up your Ghost, the Calcified Light will be shown on your HUD, making it easy to track them down if you’re having trouble following the instructions and screenshots.
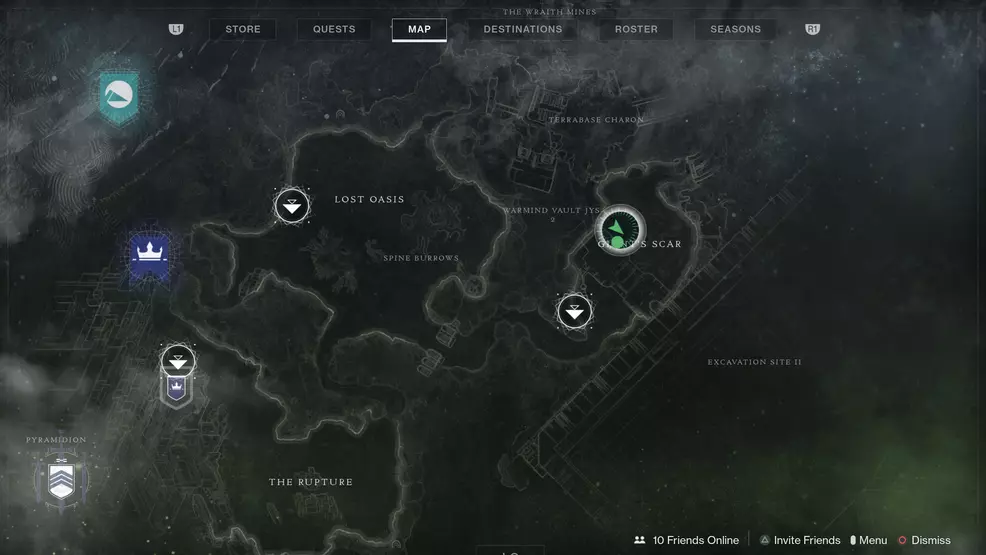
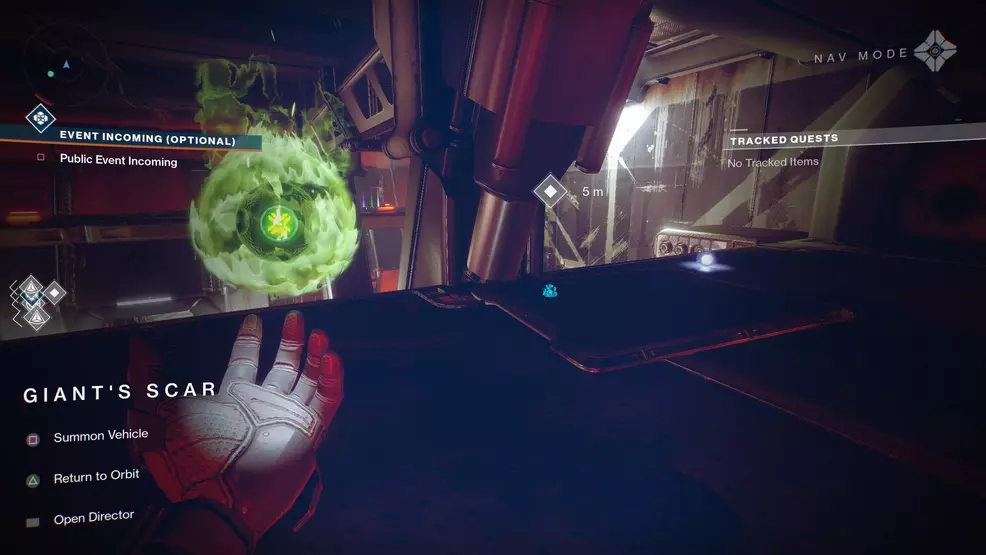
Calcified Light 1: Giant’s Scar, Io
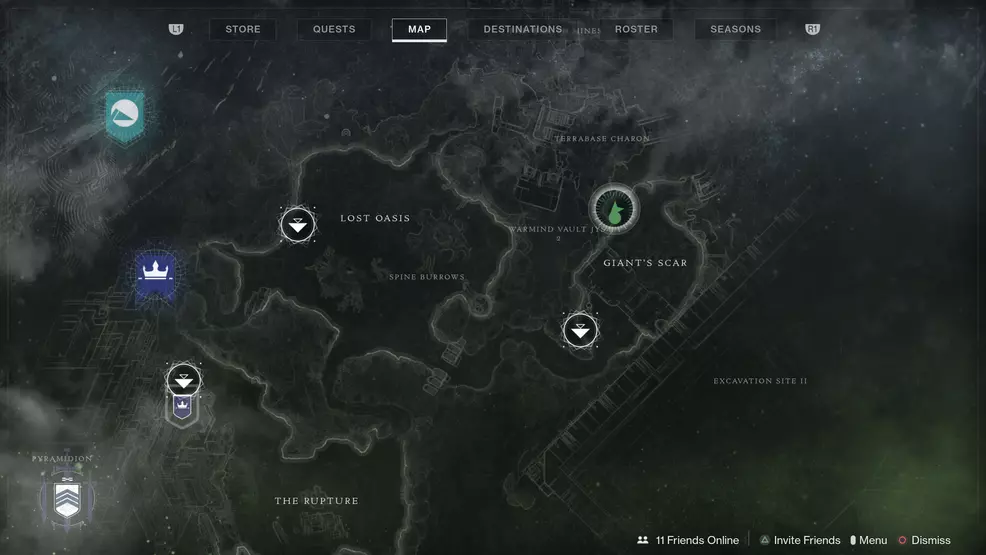
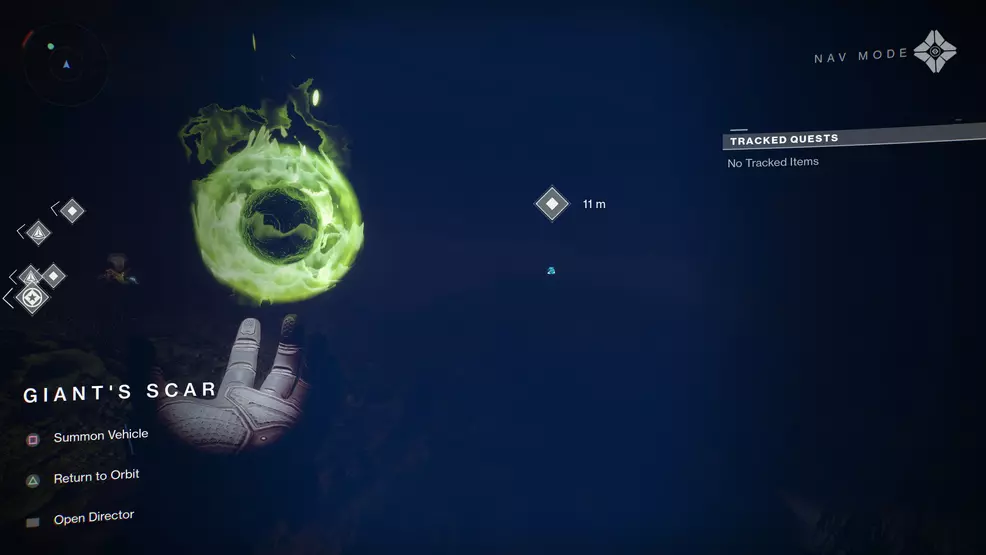
The first Calcified Light can be found in the cave where Xur hangs out when he’s on Io. Head to Giant’s Scar via the fast travel point, then go through the building and head to the left.
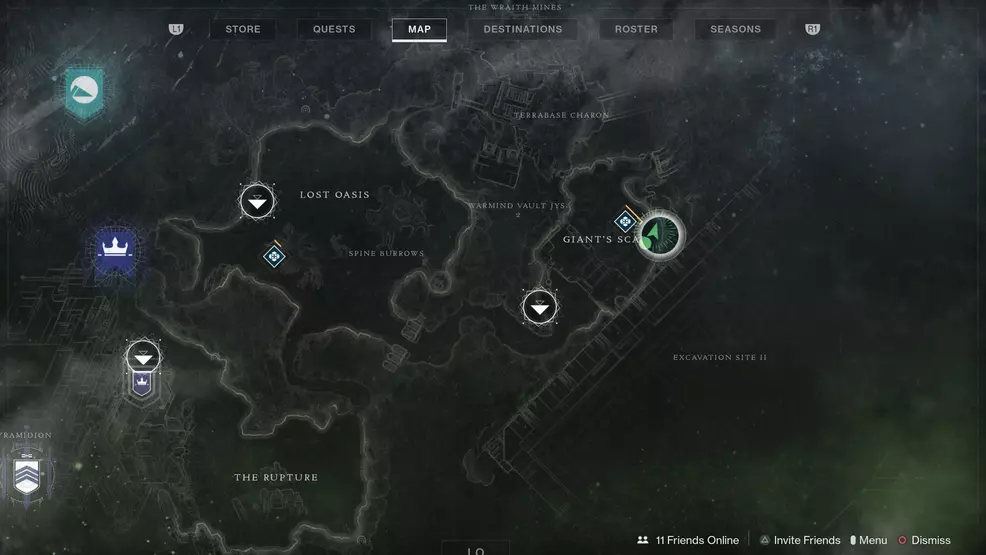
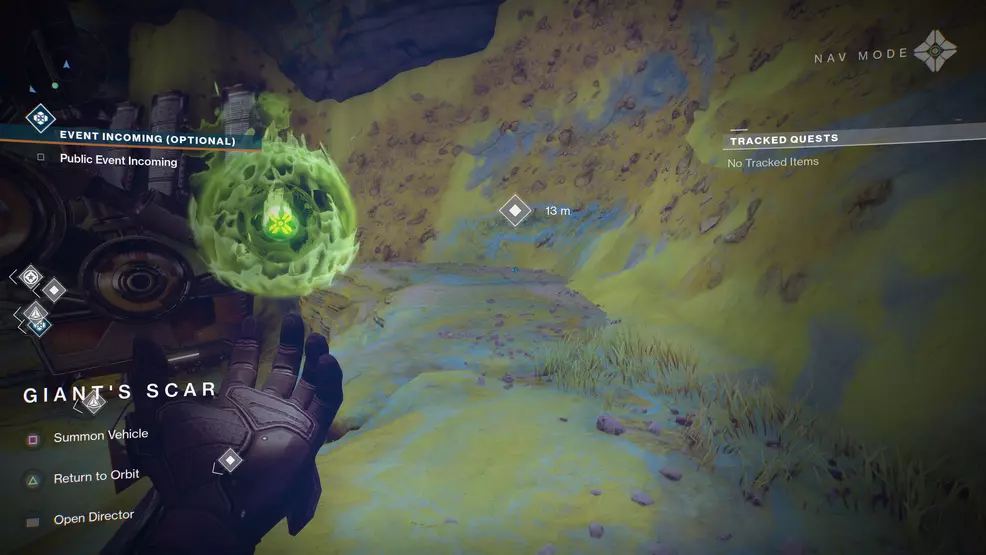
Calcified Light 2: Giant’s Scar, Io

Near the cave where Xur hangs out is the next Calcified Light in Giant’s Scar. Look on top of one of the arms for the giant drill to find it.
Calcified Light 3: Giant’s Scar, Io
When you spawn into the Giant’s Scar fast travel point, go forward and through the building. Straight in front of you will be another Calcified Light to collect.
Calcified Light 4: Giant's Scar, Io
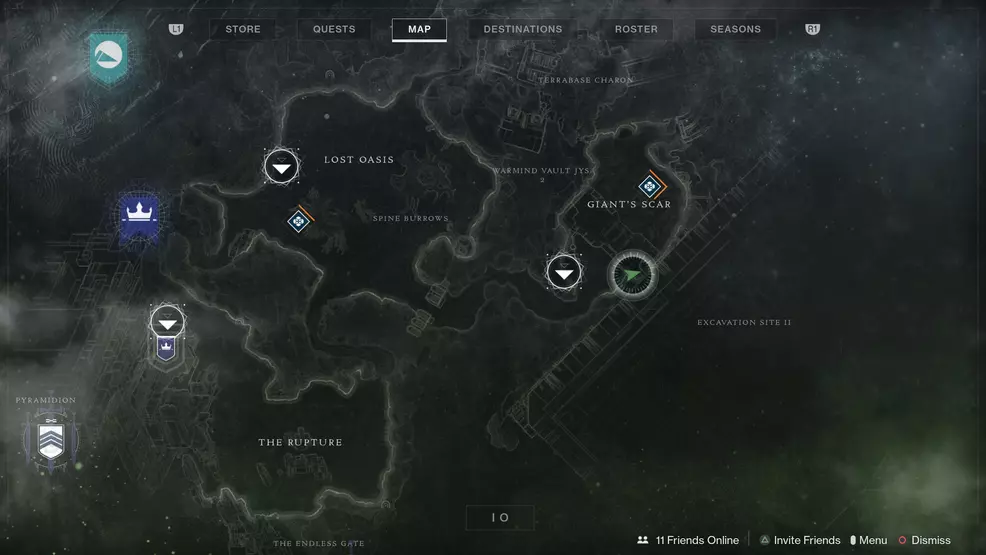
Spawn in at the Giant's Scar fast travel point and head into the building in front of you. You can find the Calcified Light on the uper level of the building. Remember to use your Ghost if you need some help.
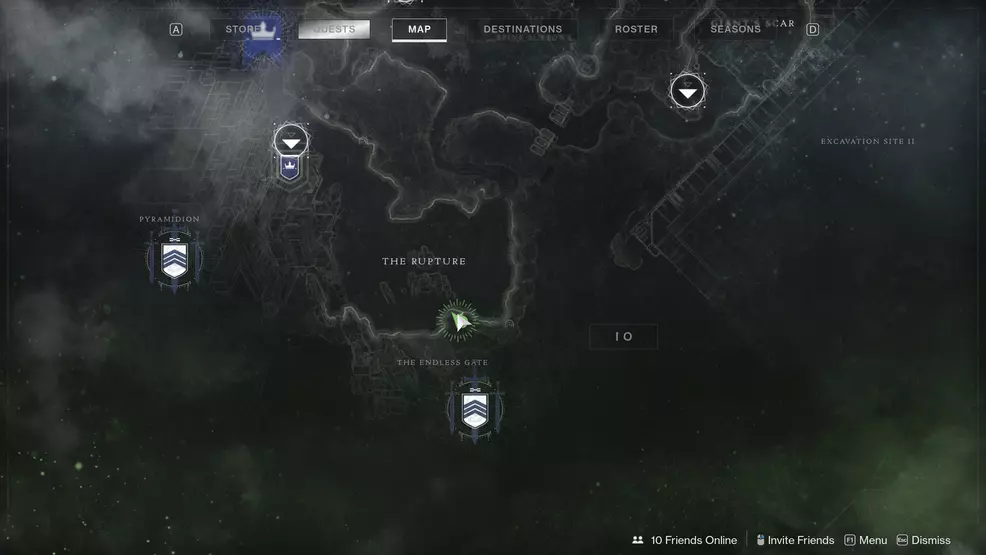
Calcified Light 5: The Rupture, Io
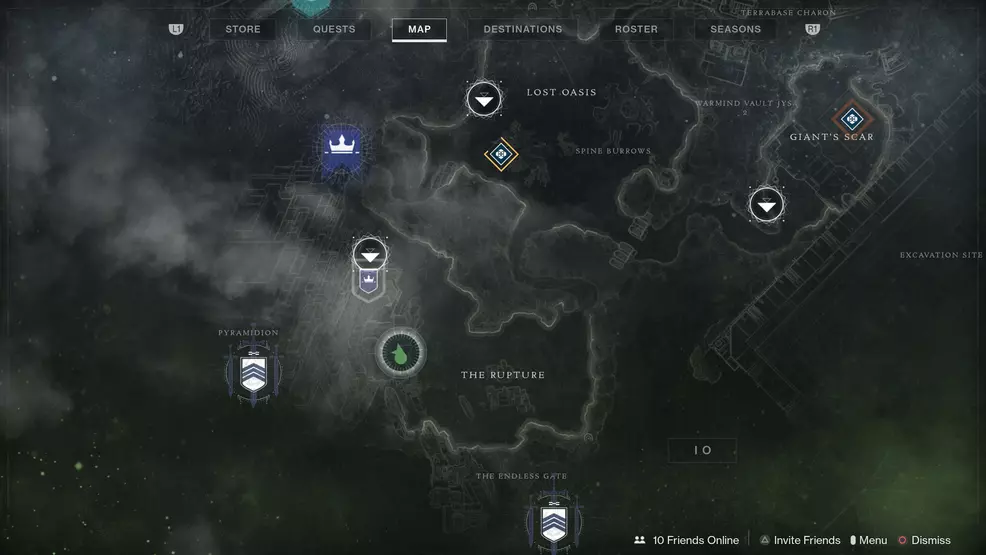
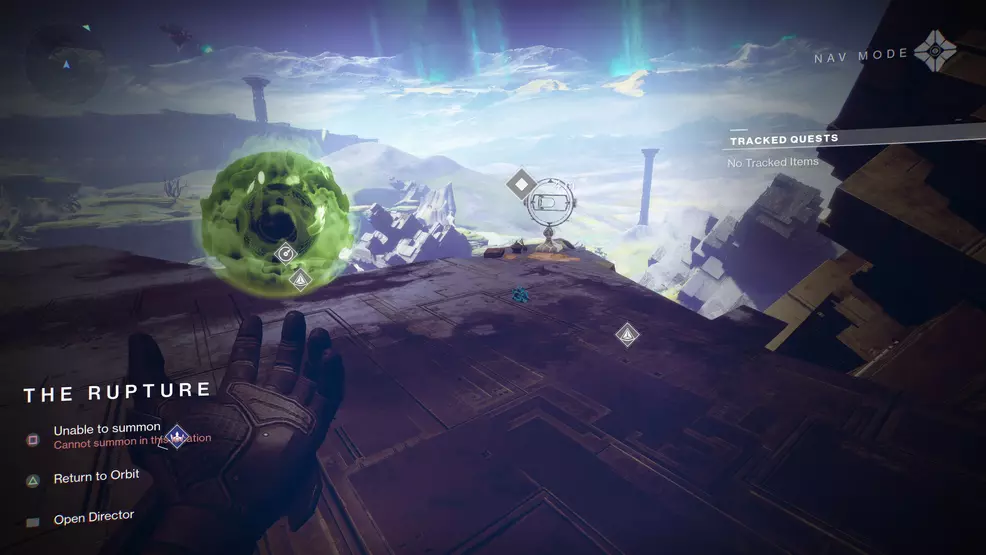
This next Calcified Light fragment is found at the top of the Pyramidion in The Rupture on Io.
Calcified Light 6: The Rupture, Io
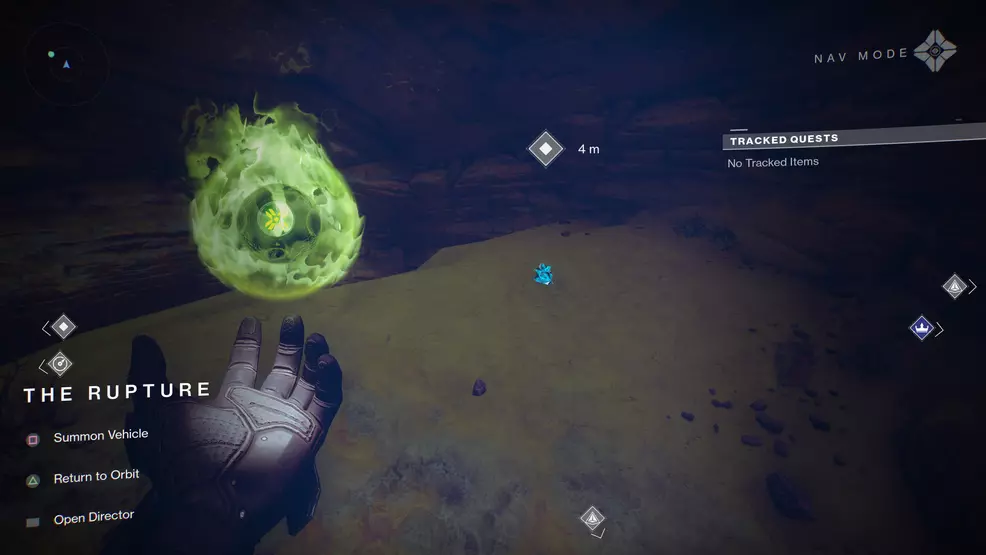
This next Calcified Light is found at the bottom of The Rupture area. Look for a small entrance to a cave, the fragment is up on a ledge.
Calcified Light 7: The Rupture, Io
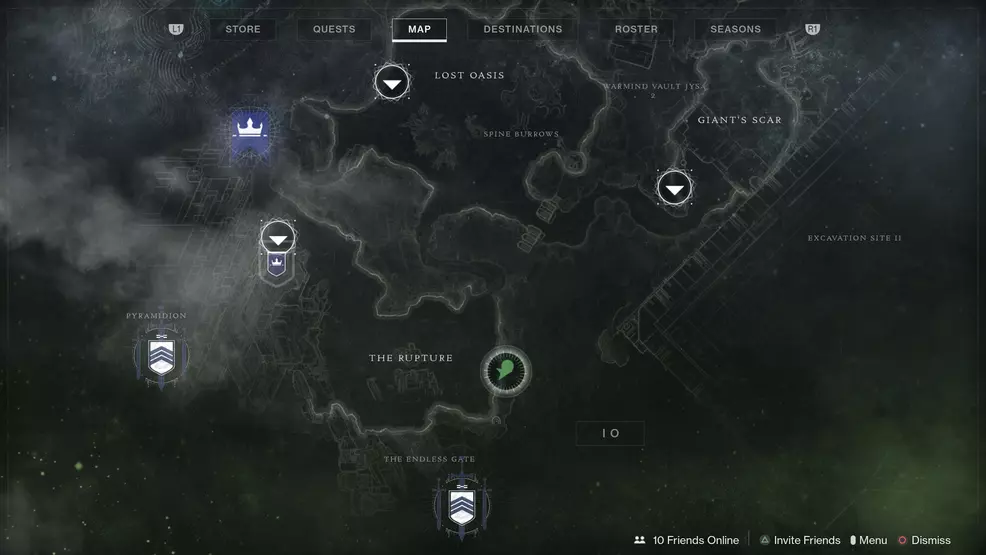

Another Calcified Light can be found in in The Rupture, to the north of the Aphix Conduit Lost Sector. Look for an entrance to a cave with a large rock obscuring the hole. There is also a flat, circular bay nearby.
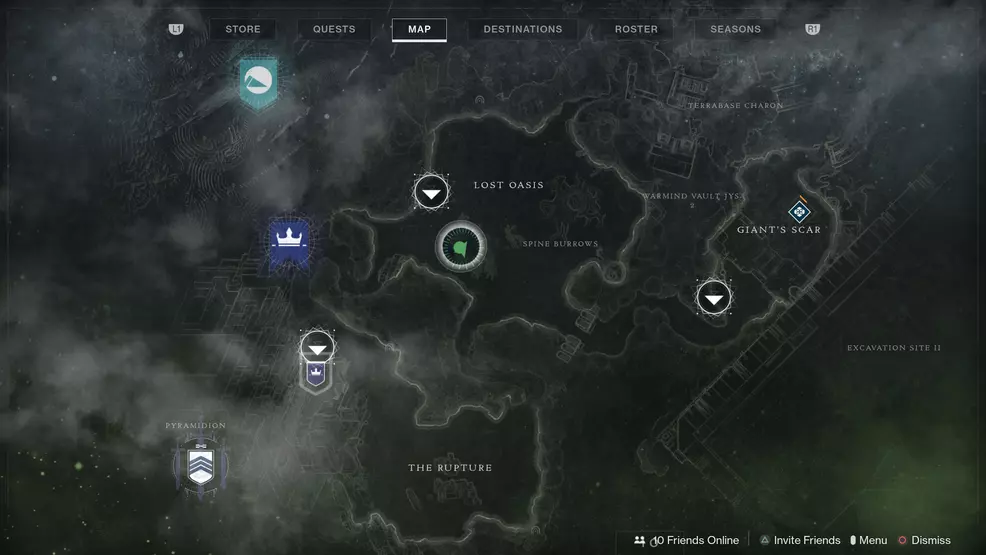
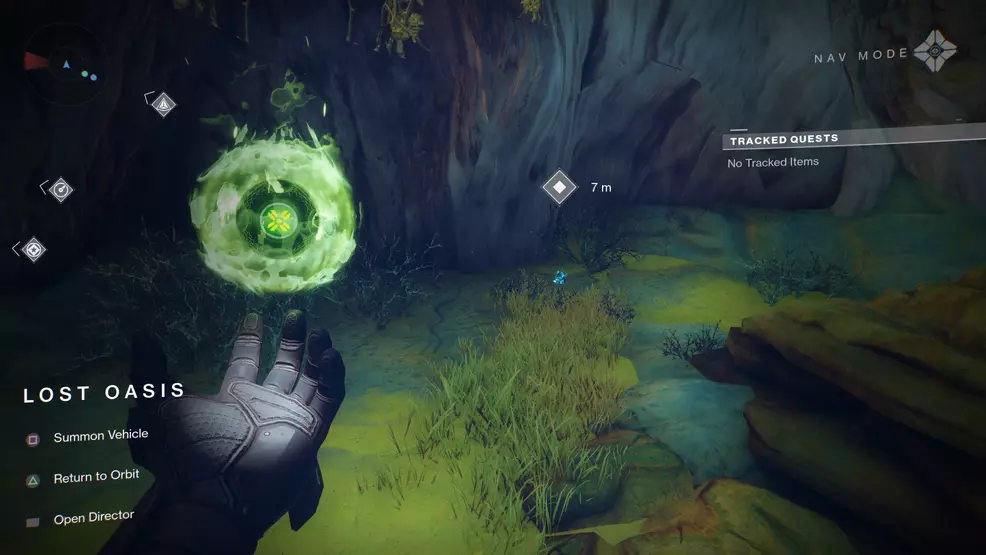
Calcified Light 8: Lost Oasis, Io
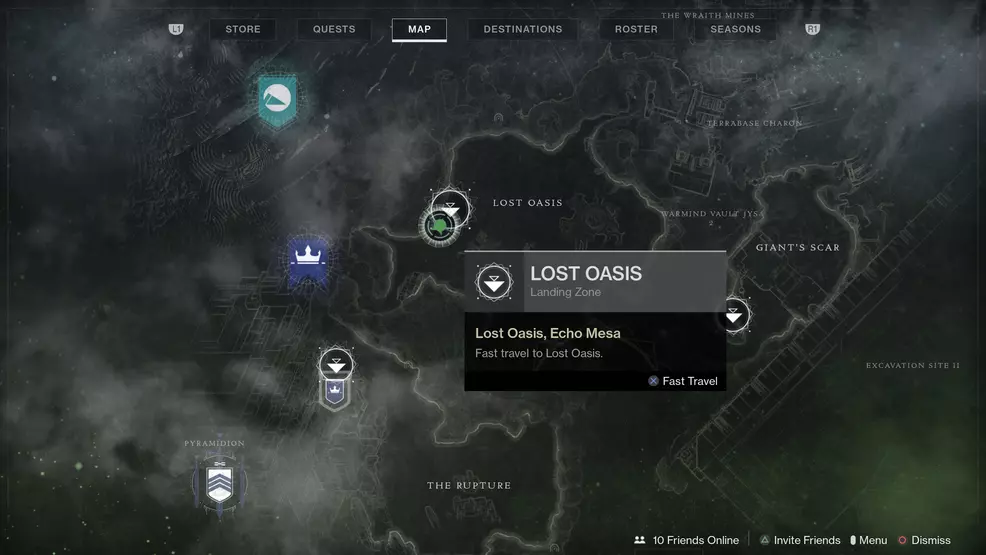
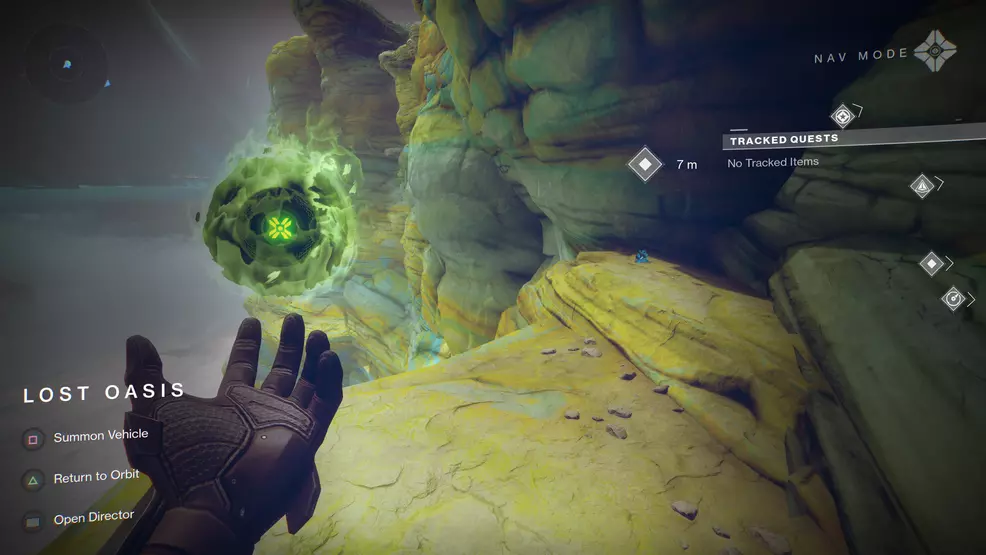
Use the Lost Oasis fast travel point on Io and go to the edge to spot this Calcified Light fragment.
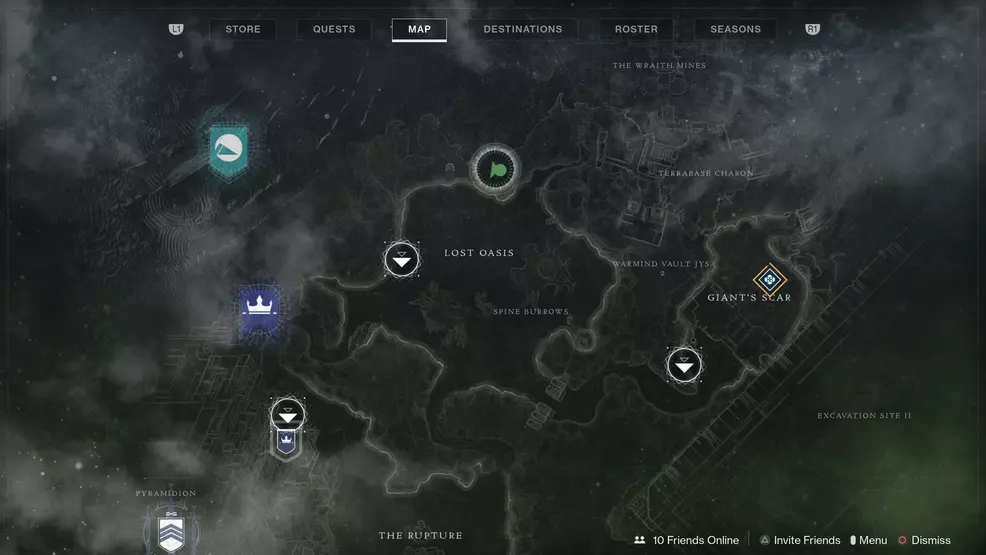
Calcified Light 9: Lost Oasis, Io
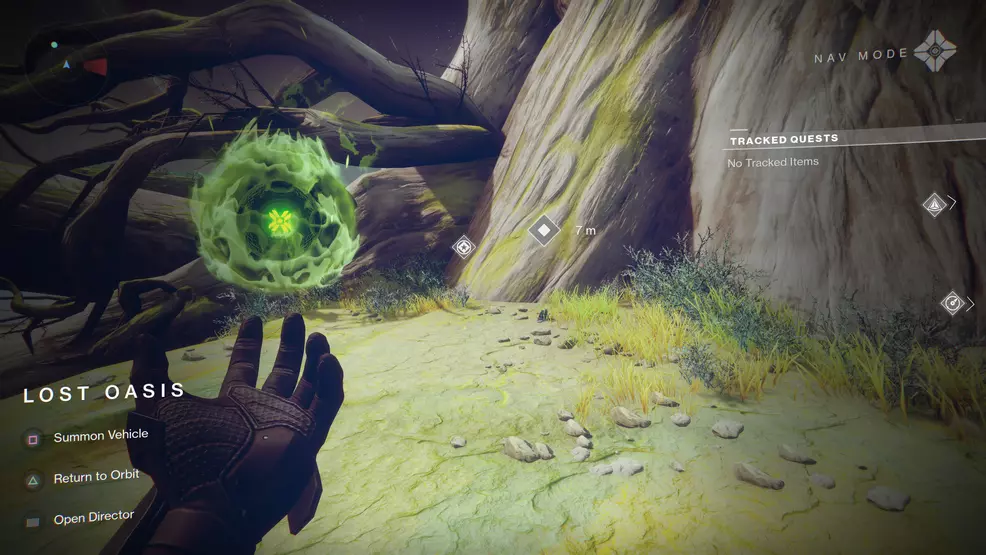
Go to the middle of Lost Oasis on Io towards the big tree and jump up high to the top. The Calcified Light fragment is on a flat plateau.
Calcified Light 10: The Rupture, Io
The next Calcified Light is to the north of Lost Oasis, up behind the Grove of Ulan-Tan Lost Sector. Travel as if you were going to the Wraith Mines, there will be a large opening in the cliff wall leading to a glowing tree. The fragment is behind the tree near the wall.
Calcified Light 11: Glacial Drift, Mars
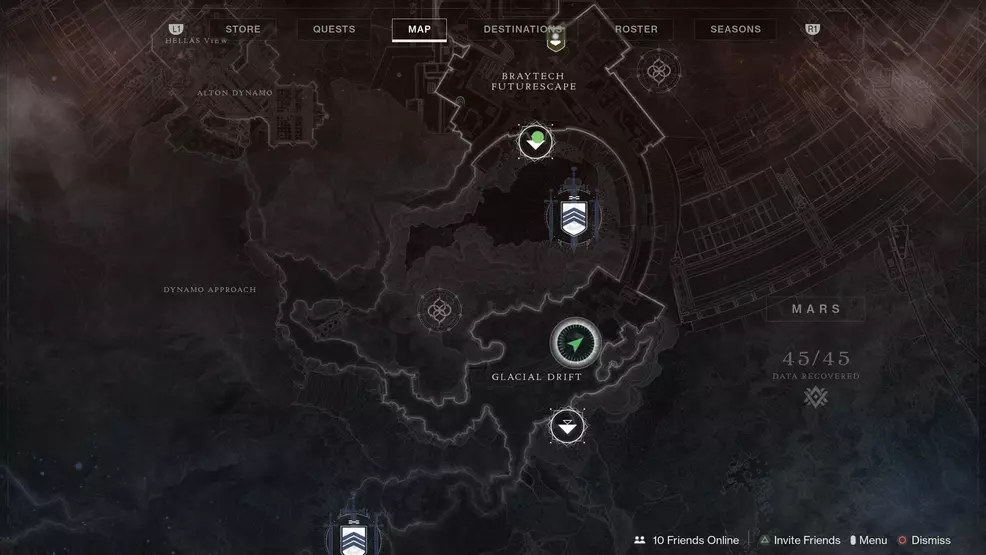
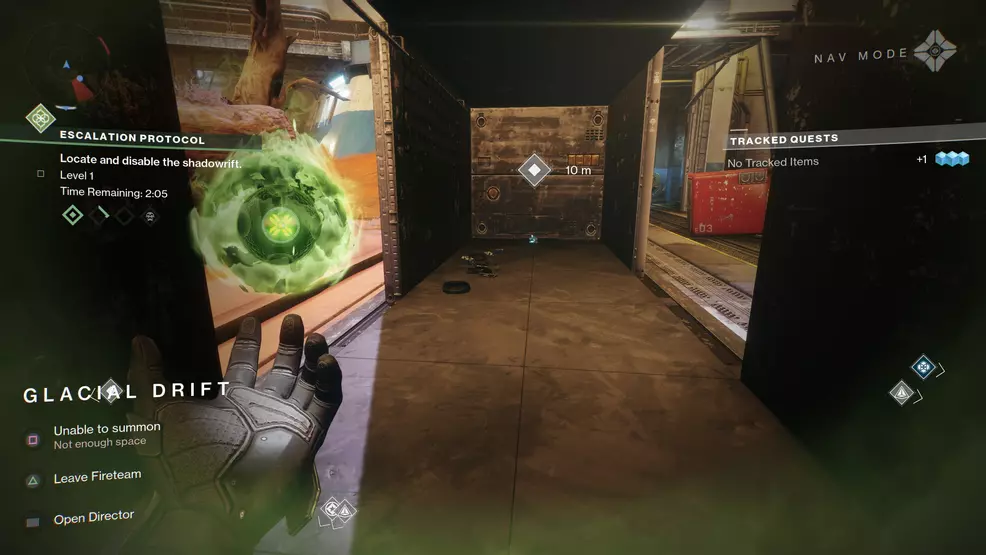
Jumping over to Mars now, this Calcified Light is in the Glacial Drift, inside one of the train carts.
Calcified Light 12: Glacial Drift, Mars
From the fast travel point in Glacial Drift on Mars, head left toward the building at the end of the train tracks. Inside this is the next Calcified Light fragment.
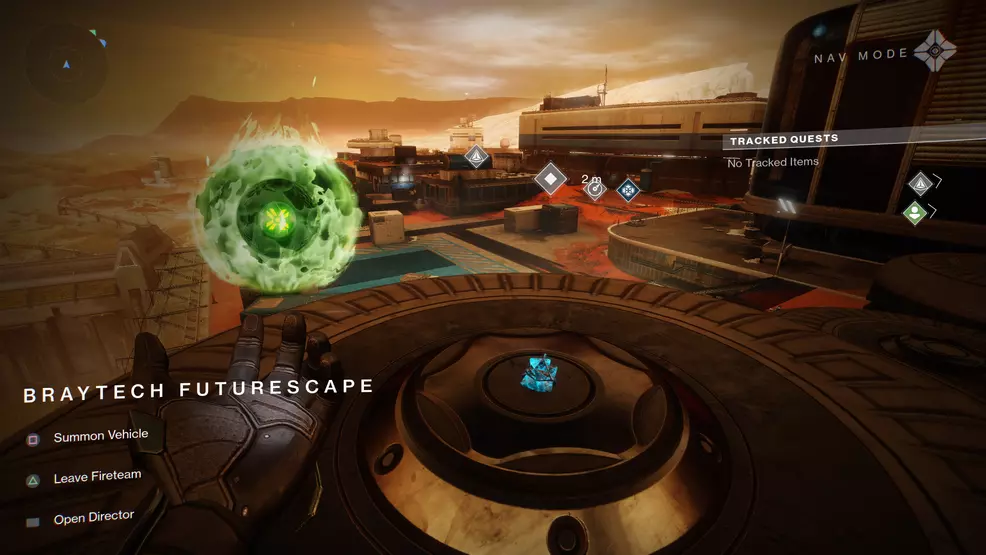
Calcified Light 13: Braytech Futurescape, Mars
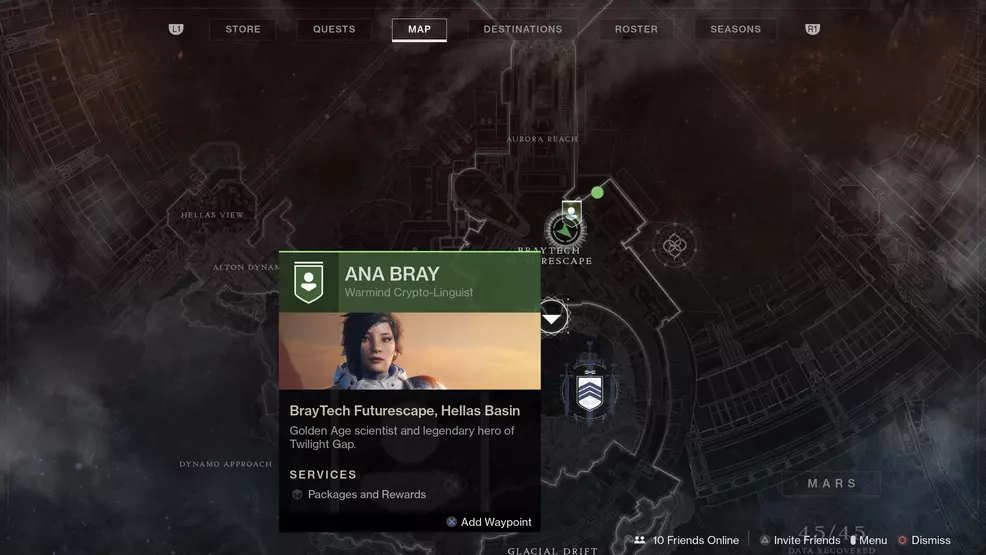
This Calcified Light is right by Ana Bray inside the Braytech Futurescape building on Mars.
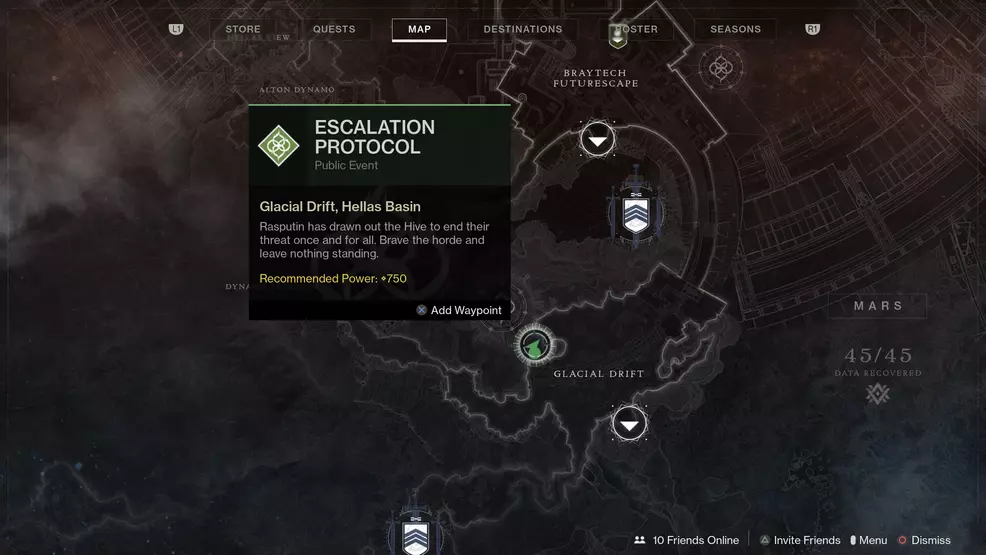
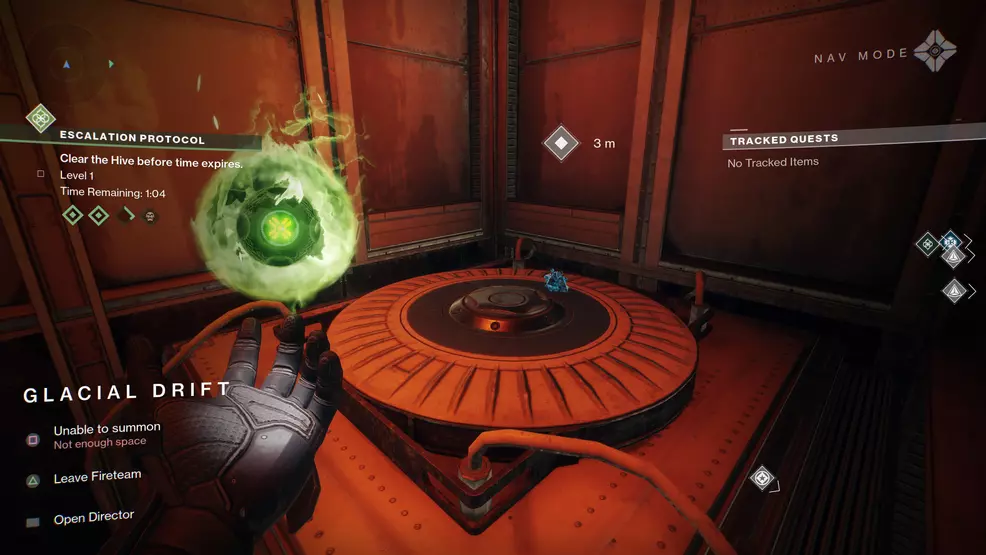
Calcified Light 14: Braytech Futurescape, Mars
To find this Calcified Light fragment, go right from the Braytech Futurescape fast travel point on Mars toward the large open area where Escalation Protocol fights happen. The fragment is on top of one of the canisters.
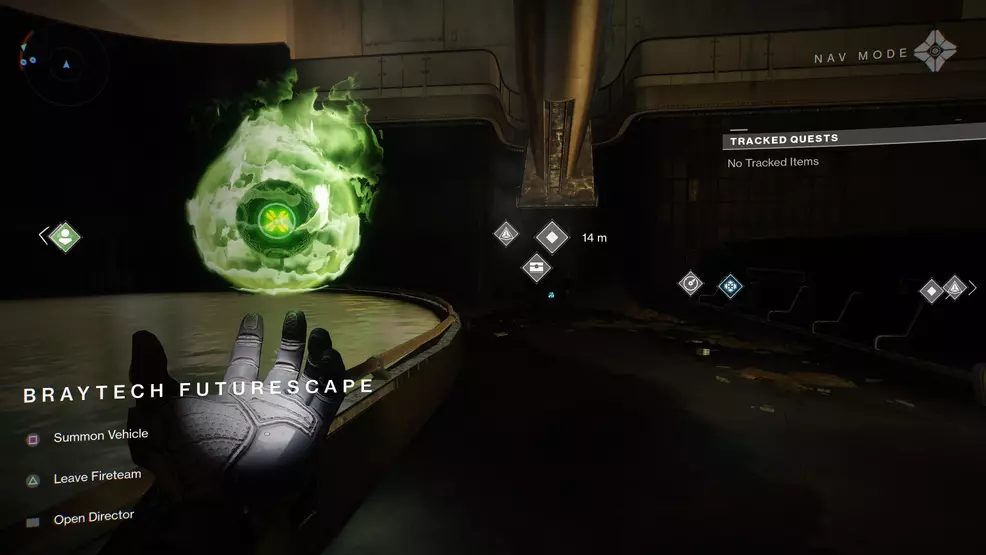
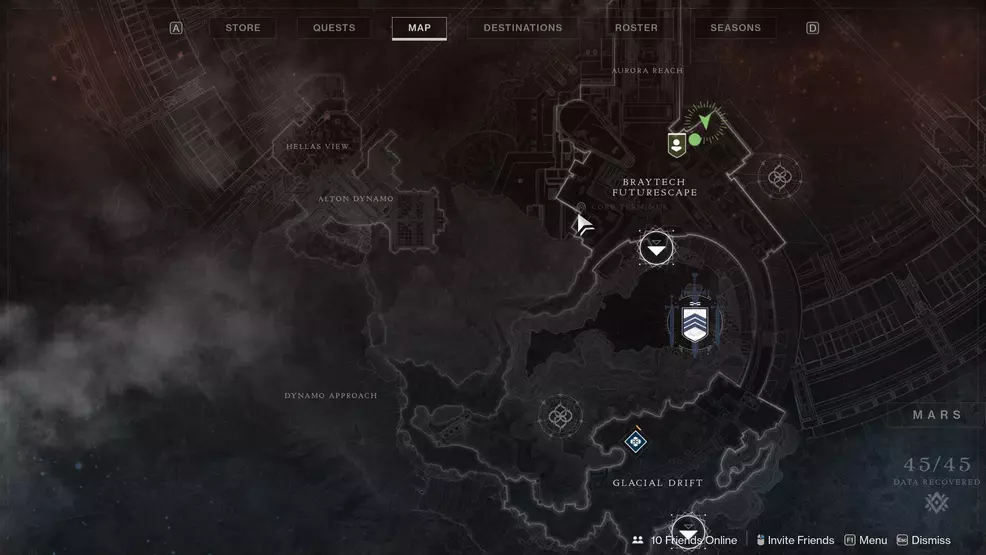
Calcified Light 15: Core Terminus Lost Sector, Mars
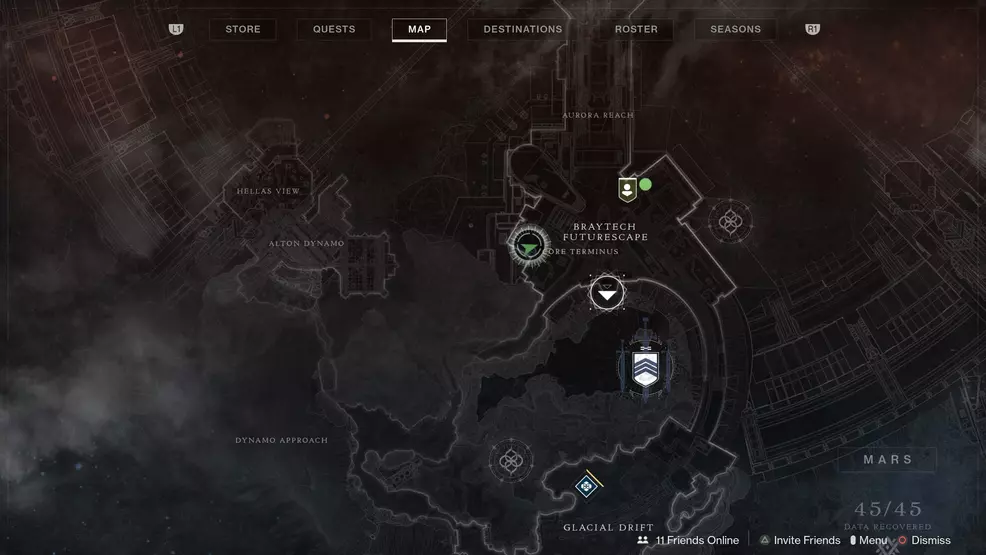
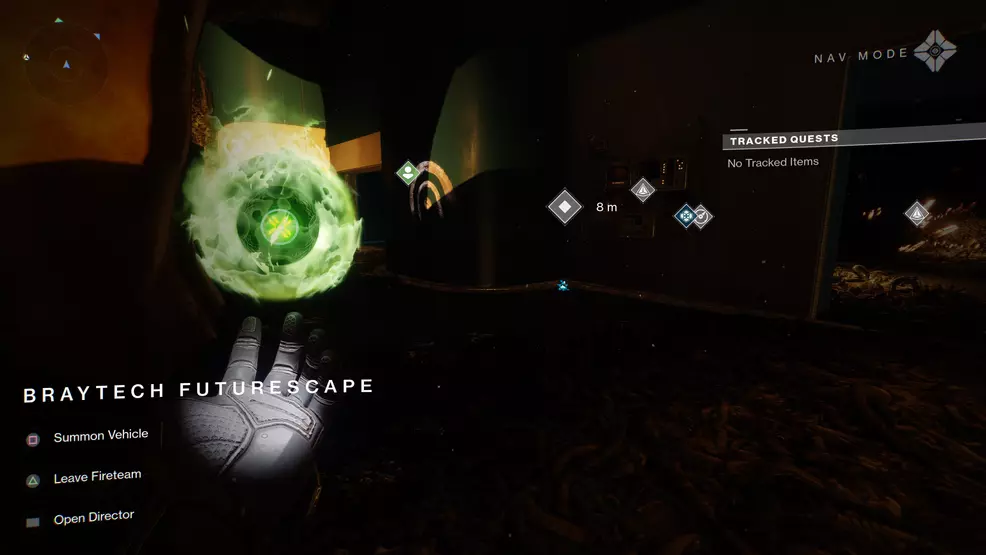
Go to the entrance of the Core Terminus Lost Sector on Mars in the Braytech Futurescape area. The fragment is tucked in a corner by the entrance.
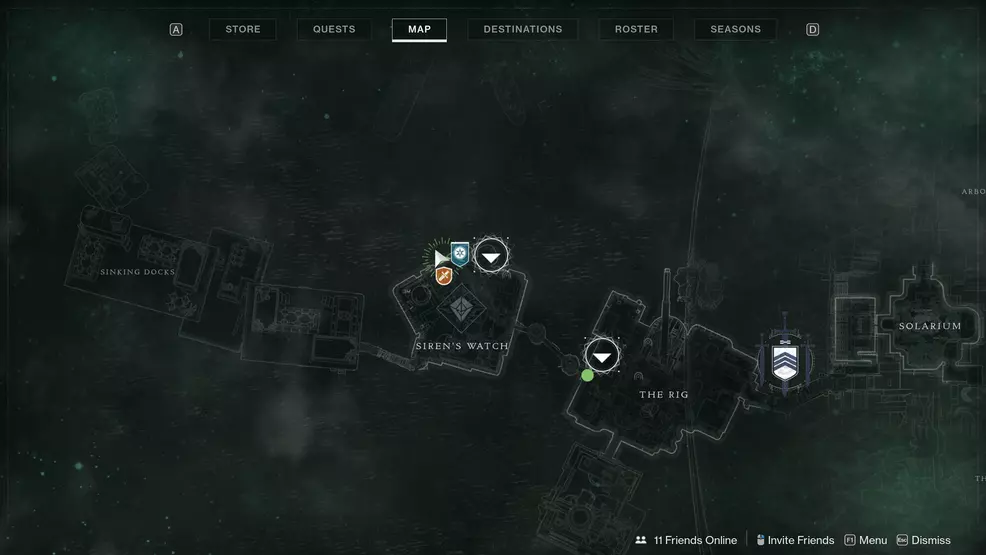
Calcified Light 16: Siren's Watch, Titan
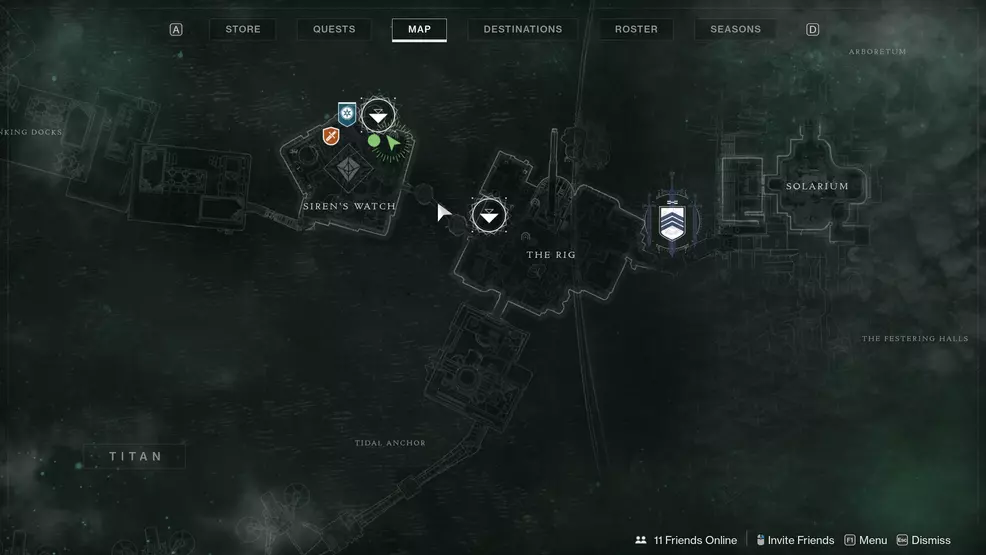
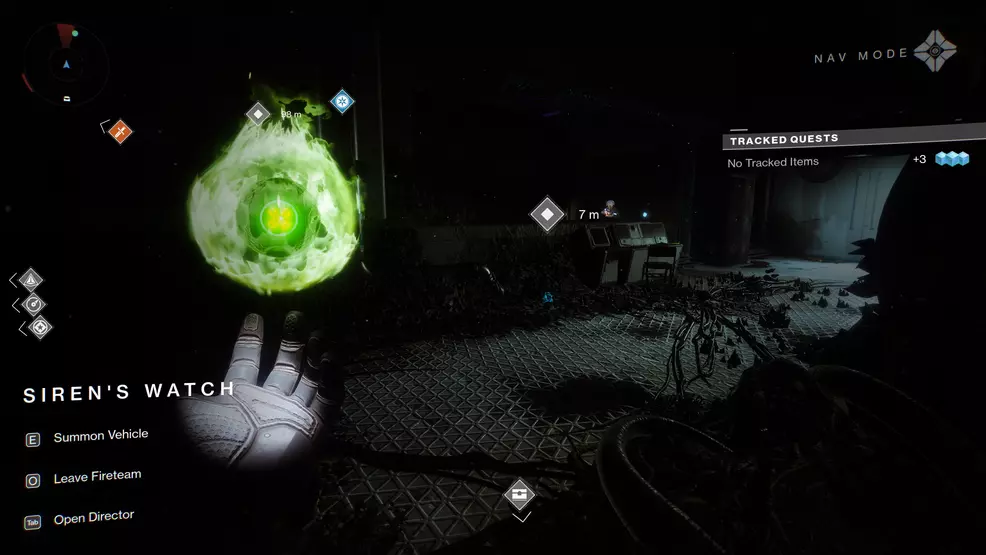
Scooting over to Titan now, the first Calcified Light is found to the left of the fast travel point in Siren's Watch. From the fast travel point, drop down to the left to the building and make your way inside. The fragment is beside a computer terminal.
Calcified Light 17: Siren's Watch, Titan
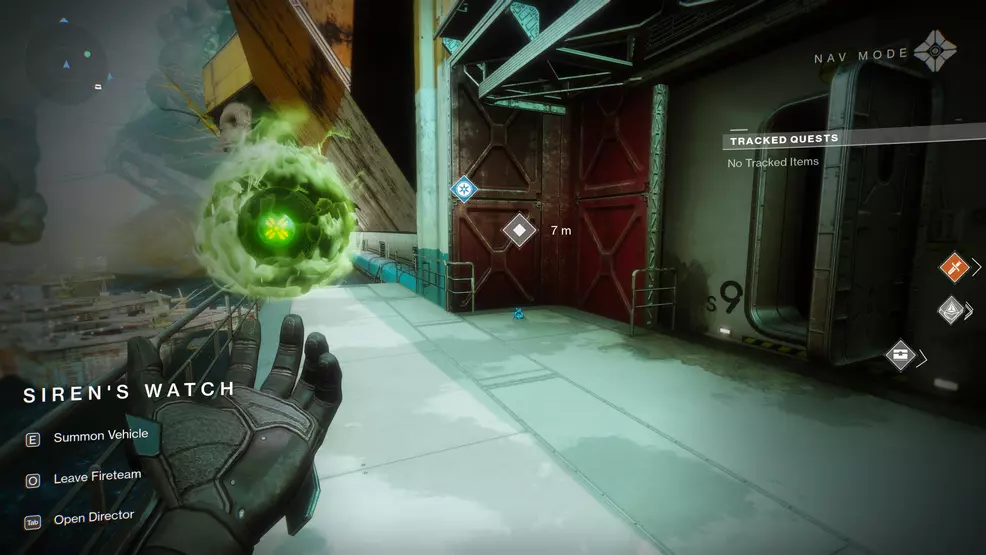
Another Calcified Light can be found in Siren's Watch, on the outside of the facility near Sloane.
Calcified Light 18: The Rig, Titan
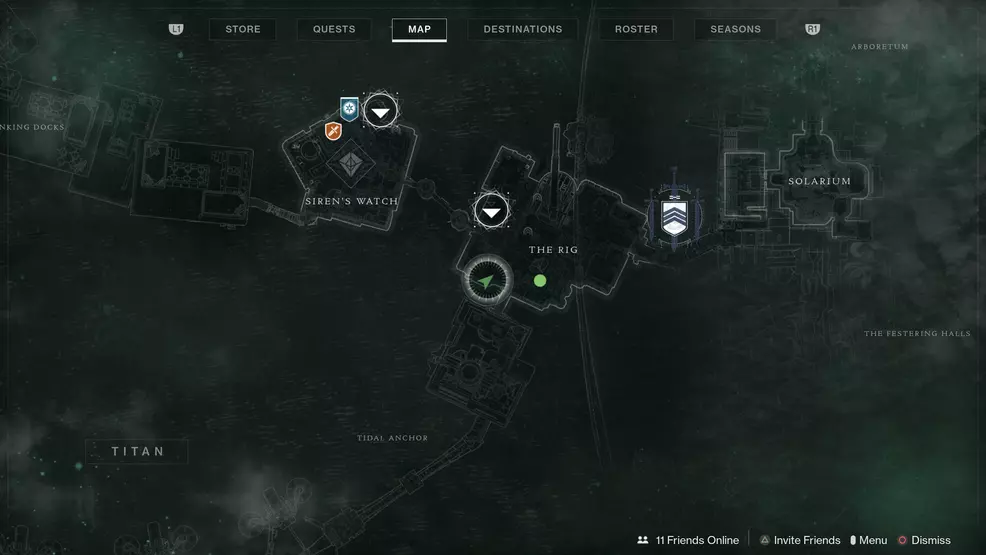
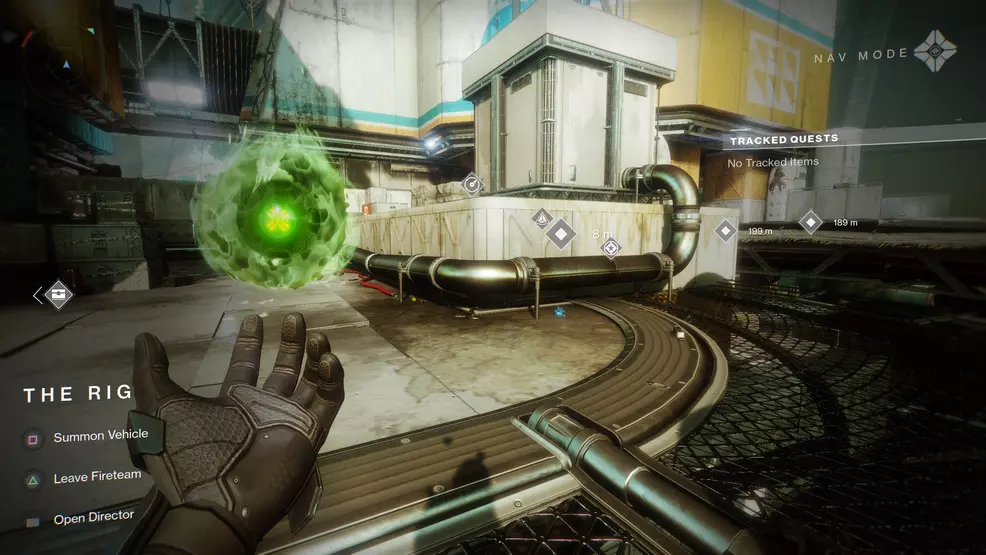
From the fast travel point on The Rig, head south toward the Tidal Anchor area. The Calcified Fragment is found tucked under a pipe before crossing over to the next area.
Calcified Light 19: The Rig, Titan
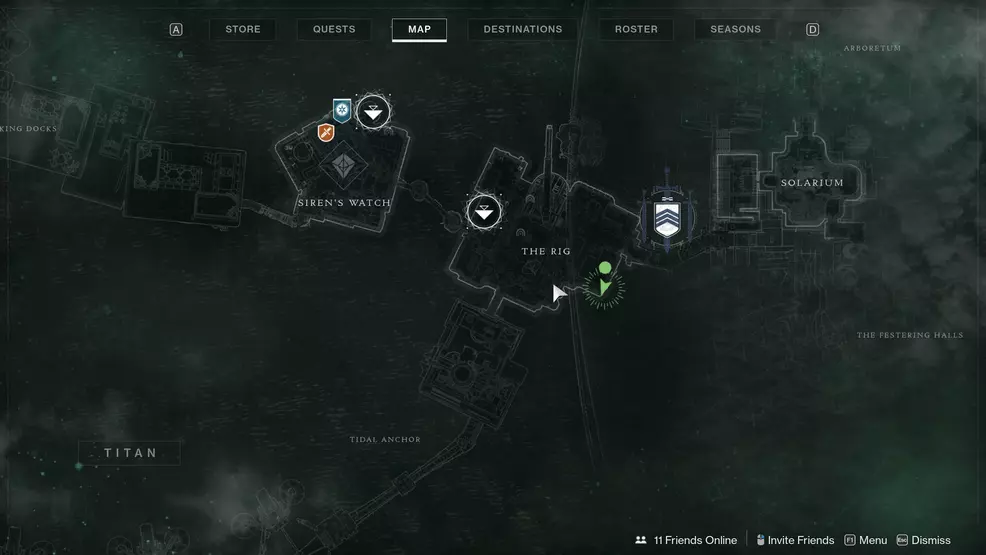

To find this Calcified Light, head to the southwest corner of The Rig. The fragment is overlooking the ocean waves.
Calcified Light 20: The Rig, Titan
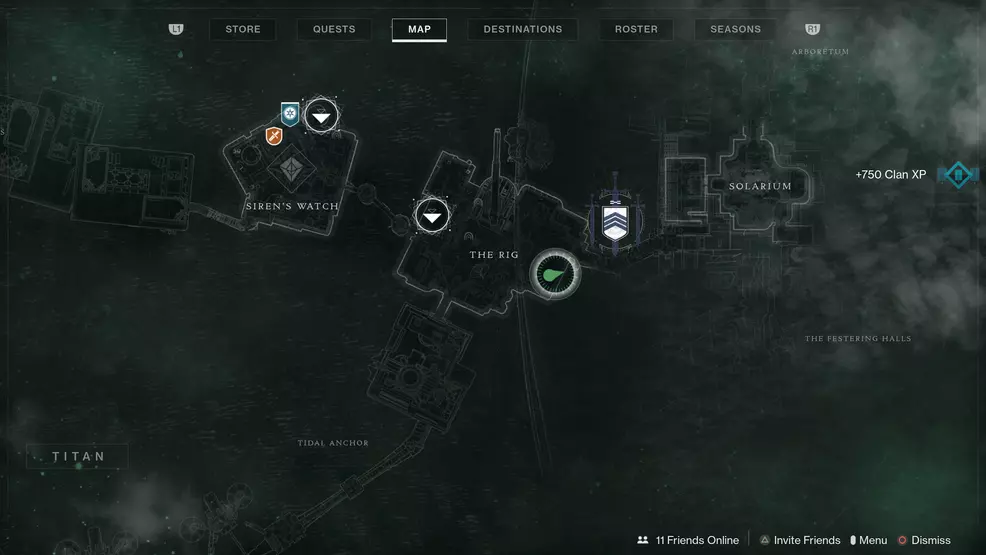
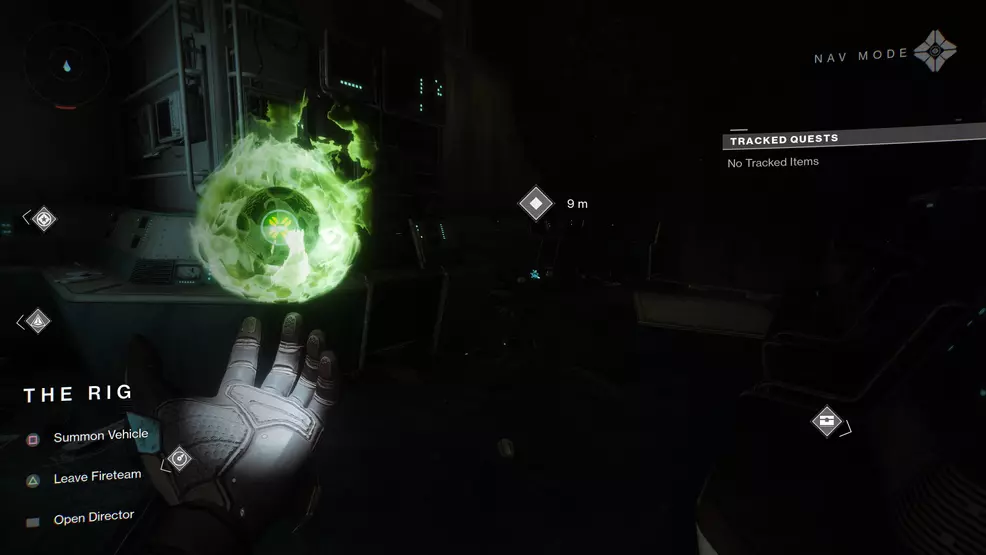
This Calcified Light is in The Rig, on the right-hand side of the map, near a line of computer terminals.
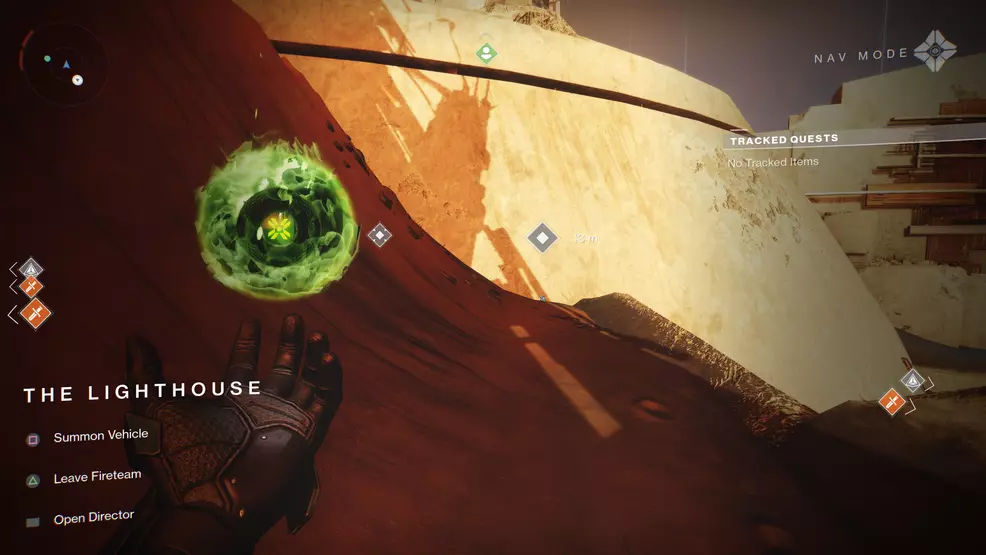
Calcified Light 21: The Lighthouse, Mercury
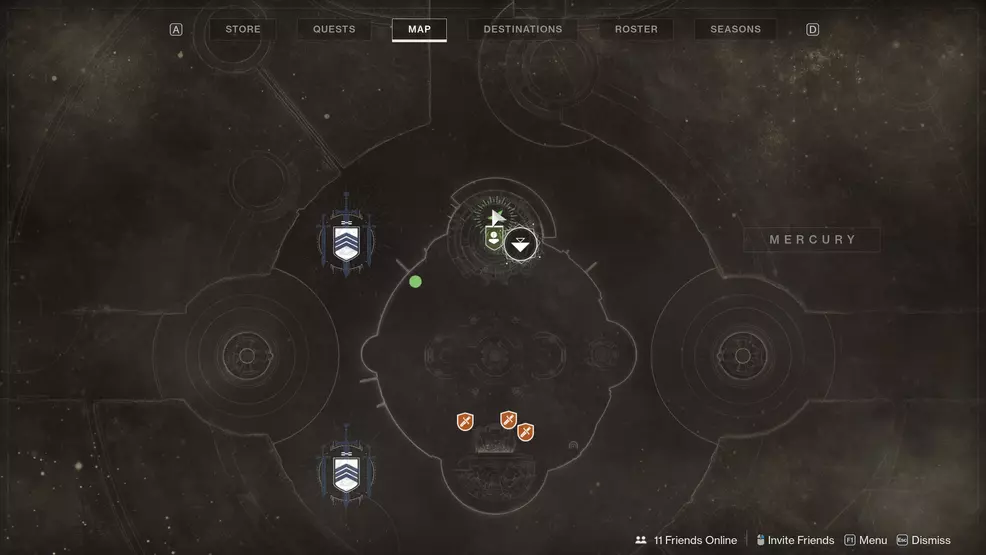
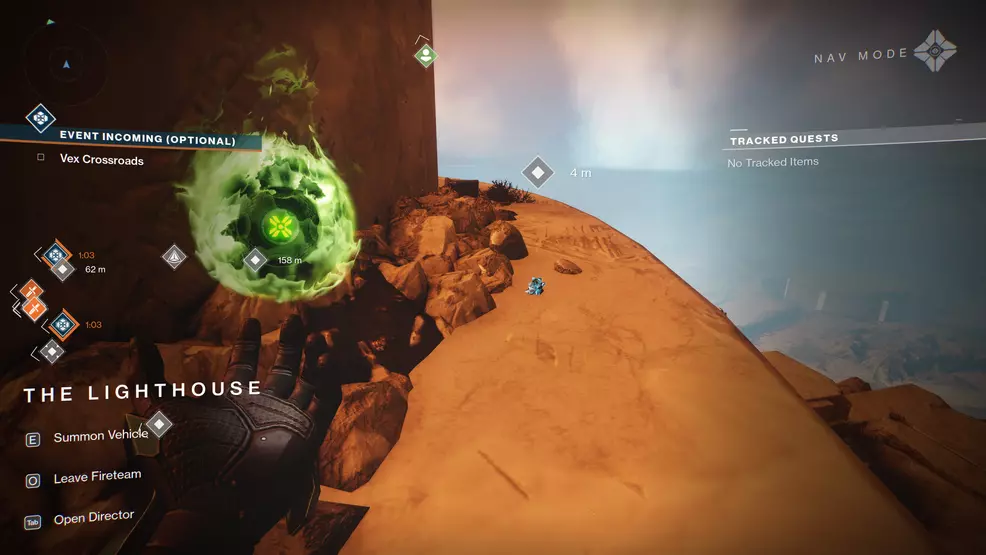
Over to Mercury now, the first Calcified Light is behind the Lighthouse.
Calcified Light 22: The Lighthouse, Mercury
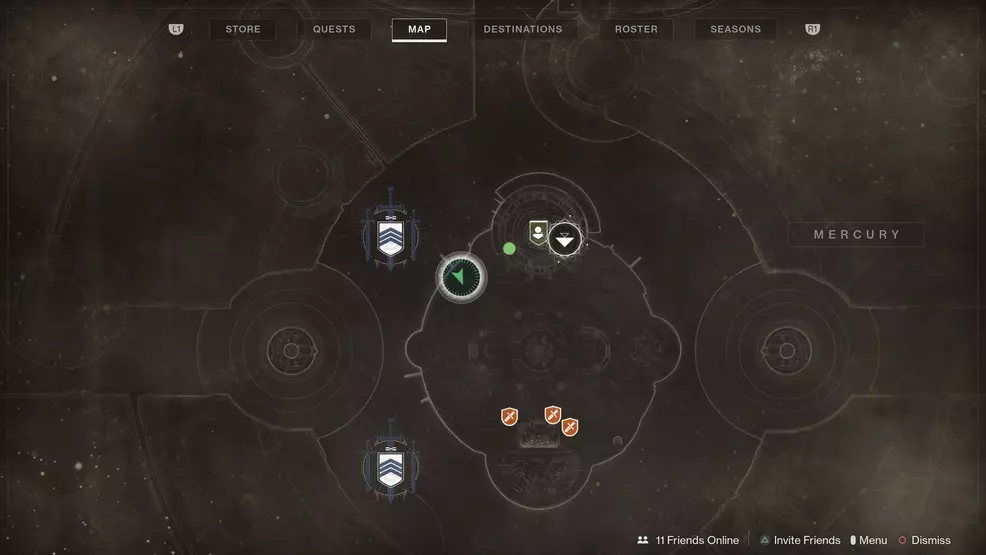

This Calcified Light is to the left of the Lighthouse, by a tree and rock.
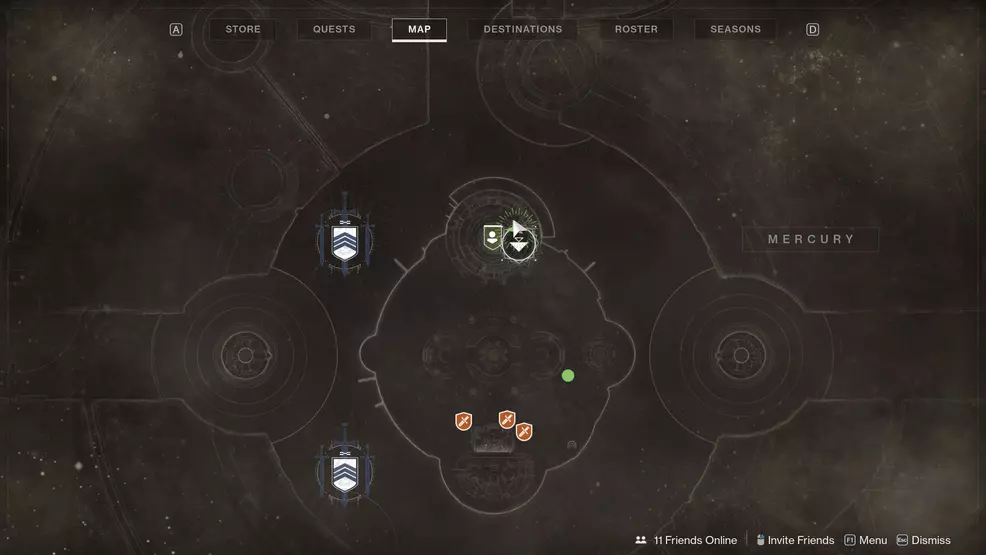
Calcified Light 23: The Lighthouse, Mercury
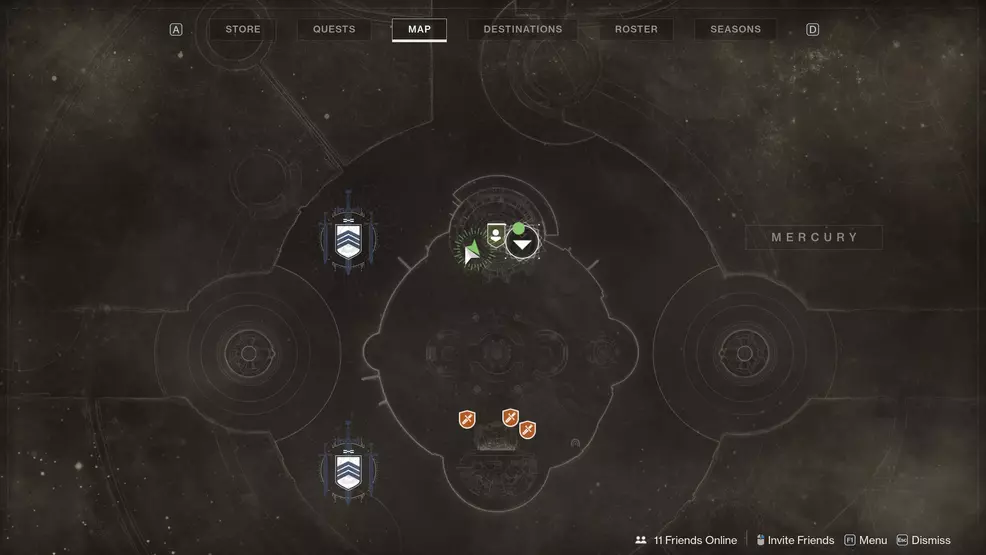
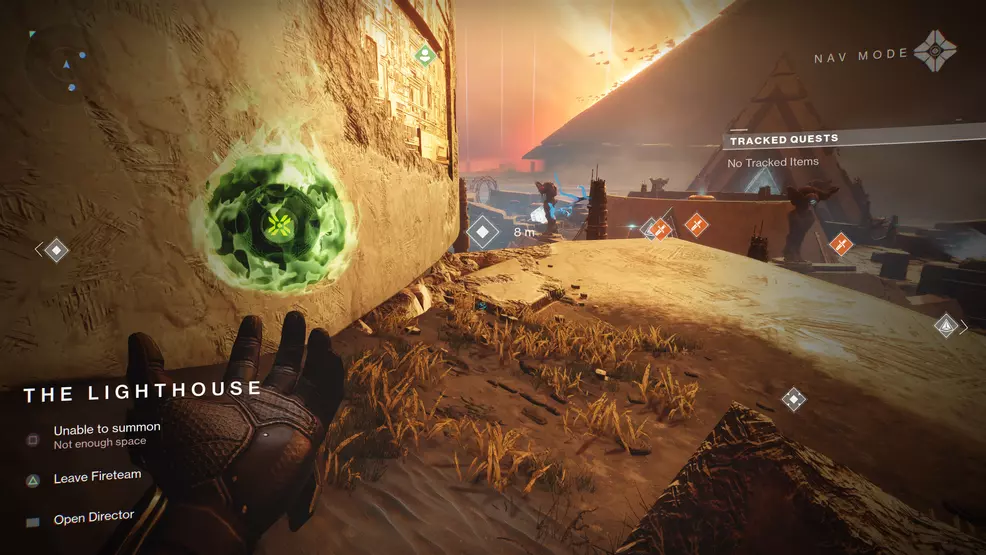
Another Calcified Light is tucked up against the Lighthouse, on the left-hand side of the map.
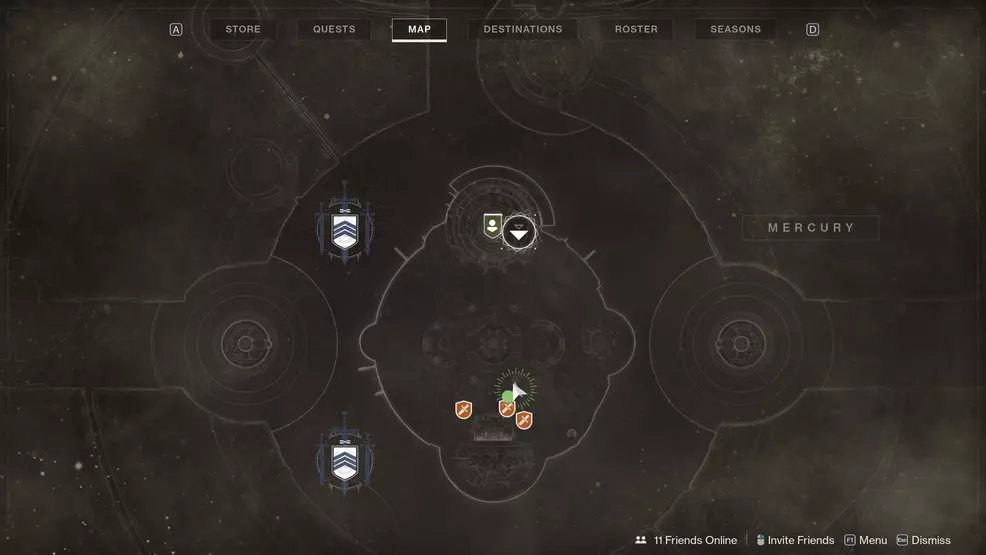
Calcified Light 24: The Lighthouse, Mercury
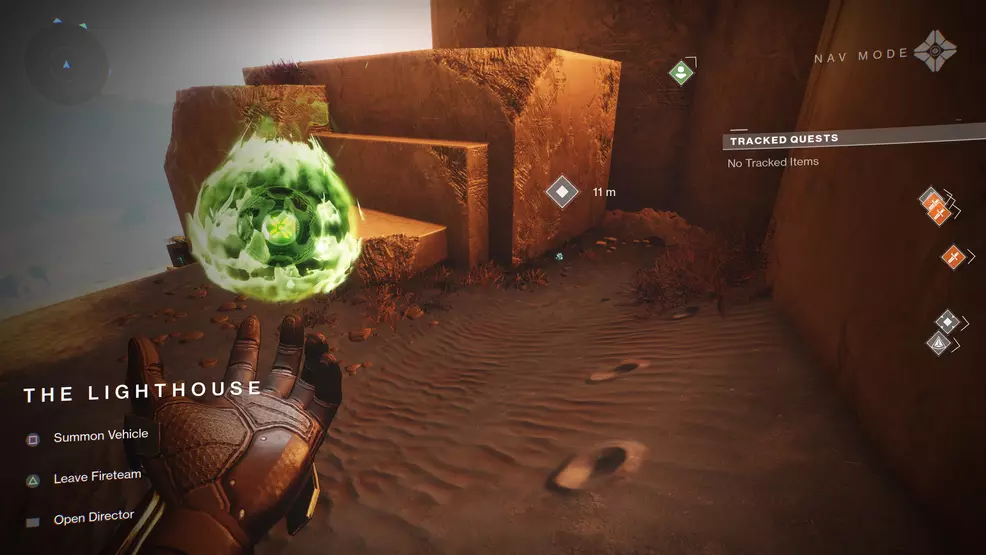
This Calcified Light is around the right of the Lighthouse, behind some block steps.
Calcified Light 25: The Lighthouse, Mercury
The last Calcified Light fragment is on the south side of the area, down near the Infinite Forest. You'll find the fragment tucked up against the curving wall of the central area.
Growth: Feed
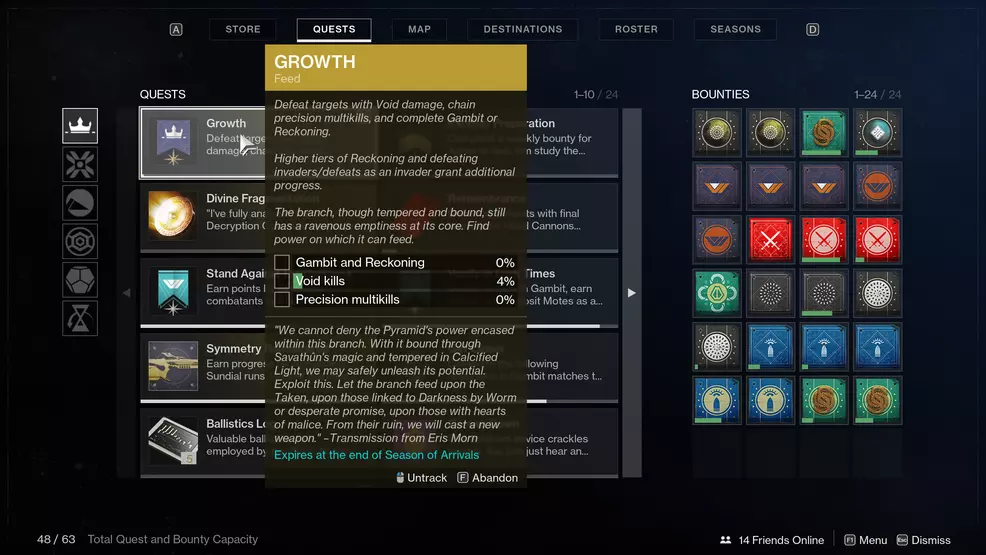
The next step in the Growth quest for Ruinous Effigy is called Feed. This step has players defeating targets with Void damage, chaining together precision multikills, and completing Gambit or Reckoning. High-tier Reckoning and defeating Invaders or killing Guardians as an Invader rewards more progress.
- Gambit and Reckoning
- Void kills
- Precision multikills
Growth: Shape
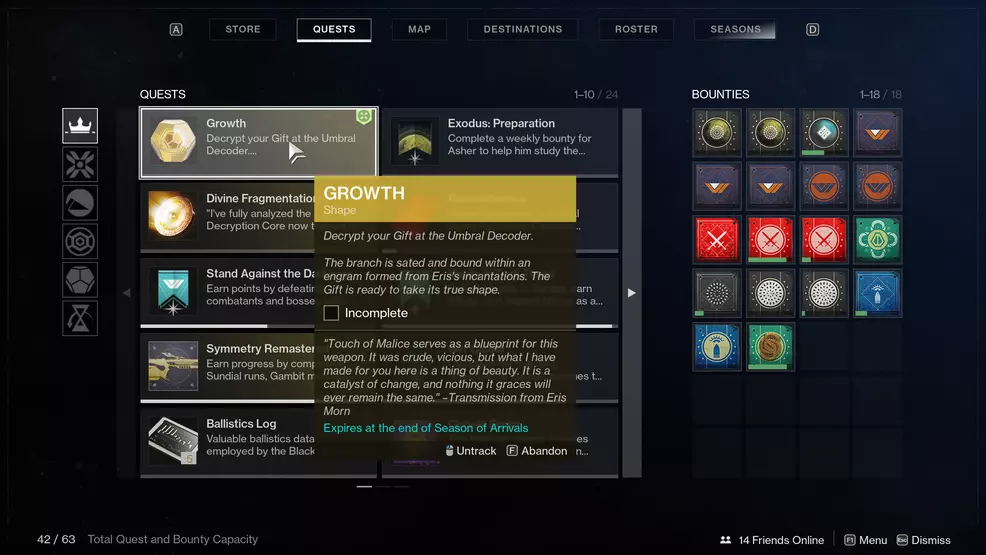
The last step in the Growth quest is Shape. The only task is to return to Drifter and use the Umbral Decoder to decrypt your gift. This will unlock Ruinous Effigy, at which point you can start destroying all 50 of Savathun's Eyes.
Ruinous Effigy perks
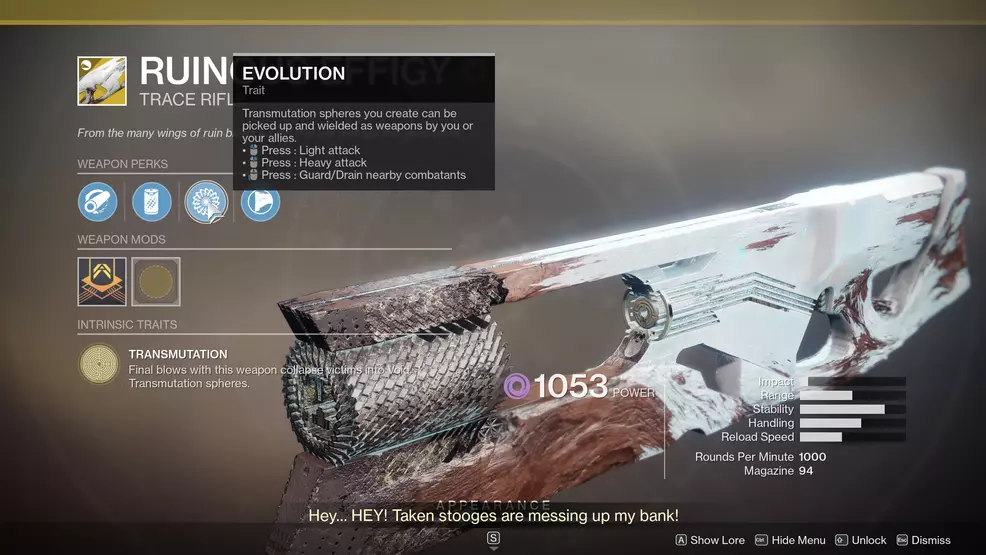
Ruinous Effigy is one more Exotic Trace Rifle players will want to add to their collection. This weapon is extremely unique, as it doesn't really kill enemies so much as turn them into a weapon for players to use. Here's a look at the perks:
- Hammer-Forged Rifling - Durable ranged barrel, increases range
- Particle Repeater - Constrains recoil for every bolt, increases stability
- Composite Stock - This weapon has versatile dual-purpose stock, slightly increases stability and handling speed
- Transmutation - Final blows with this weapon collapse the victims into Void Transmutation spheres
- Evolution - Transmutation spheres you create can be picked up and wielded as weapons by you or your allies
The quest to unlock Ruinous Effigy is a bit long, but it's certainly not the worst one out there. Players should be able to knock it out in one sitting. Once you've got Ruinous Effigy, you can use it and then get to work completing its Exotic catalyst. Be sure to check out the Shacknews Destiny 2 guide for even more Exotic weapon unlock walkthroughs.

-
Shacknews

 reply
replyBill Lavoy posted a new article, How to get the Ruinous Effigy Exotic Trace Rifle - Destiny 2
