
How to take stunning screenshots with NVIDIA Ansel
The GeForce Experience allows users to take breathtaking screenshots with NVIDIA Ansel in compatible games. Here's how to get Ansel set up and begin taking shots.
While PC gamers have a few different options when it comes to making their own screenshots, it requires great timing, composition, HUD removal, and more if you want jaw-dropping results. NVIDIA has taken steps to provide their graphics card owners with a new tool that makes taking high-quality and panoramic screenshots a breeze. Ansel is a tool included in the GeForce Experience software suite that allows players to set up for the perfect shot, as well as providing a way to view the shots in a 460 degree panorama. All you need is one of the supported NVIDIA graphics cards and a compatible game. Here’s how to take screenshots with NVIDIA Ansel.
How to enable NVIDIA Ansel
To get up and running with Ansel, you will need a compatible NVIDIA GPU. Any model from the GTX 600-series and above will work, including the newer GeForce RTX graphics cards. This means that you can take beautiful shots with a GTX 750 Ti, GTX 970, GTX 1060, and many other GPUs. You will also need to install the latest version of the GeForce Experience software package, available here.
You must also ensure that the game you want to take Ansel screenshots in is compatible with the feature. Many of the biggest releases of the last few years are designed to make use of Ansel, including The Witcher 3, Ghost Recon: Wildlands, and ARK: Survival Evolved. More than 200 games support Ansel, with nearly 50 of those games offering full 3D camera capability.
Once you have GeForce Experience installed and are logged in, you will notice a small popup upon the launch of your 3D games indicating the overlay is working correctly.
Screenshots with NVIDIA Ansel
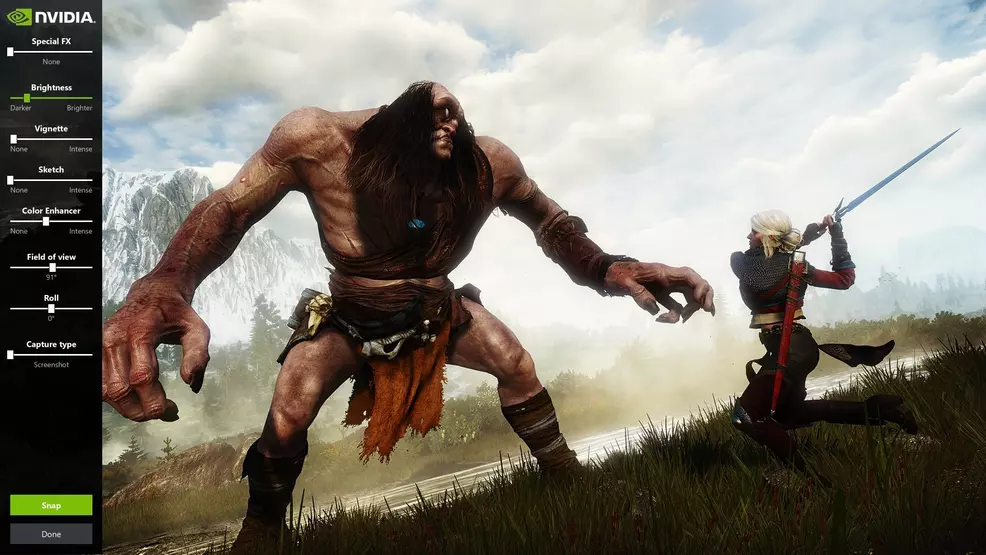
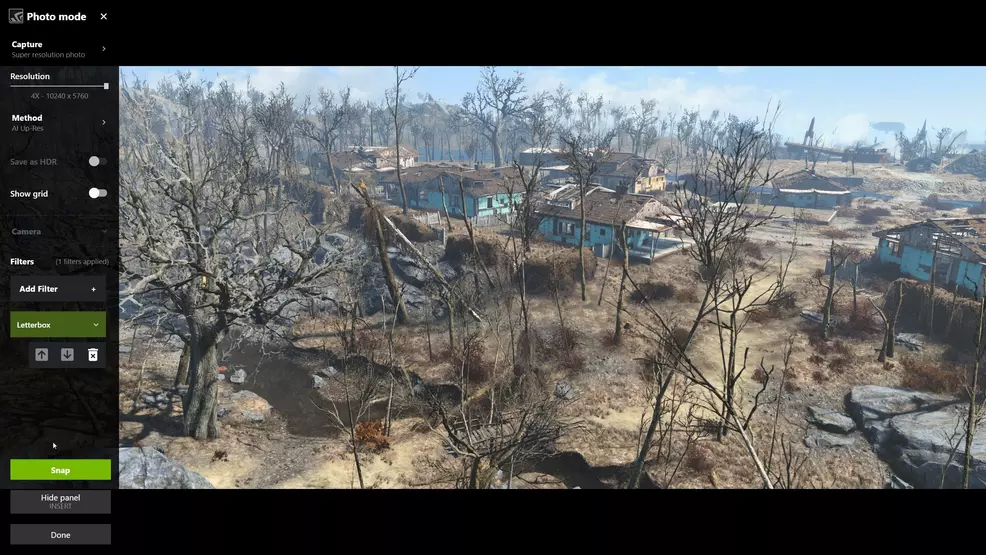
Once you have the software set up properly and enter an Ansel-compatible game, you can enable the feature at any time by pressing Alt+F2. This will open the photo mode overlay, offering a variety of options for fine-tuning your screenshots. Which options will be available varies from game to game. All games can make use of the various visual filters, HUD removal, and super resolutions. Games must be fully Ansel SDK-compliant to make use of features like 3D camera movement or 360-screen capture.
Once you have your scene looking the way you want it, simply press the SNAP button near the bottom of the overlay to capture the screenshot with Ansel. By default, Ansel will save your screenshots in the Videos folder of you Windows user account. Each game that you take screenshots in will create a new folder in the Videos root folder, using the name of the game.
For example, if you take screenshots from Tekken 7 using Ansel, you can find the photos at: C:\Users\YourUsername\Videos\Tekken 7
The photos can be opened with your photo viewer of choice, while 360-degree shots will need to be opened from a web browser or VR-capable photo application. All Ansel shots can be viewed from within the GeForce Experience overlay.
Accessing your Ansel screenshots and sharing online

In addition to the hard copies of the screenshots in your Videos folder, you can view Ansel photos from within the GeForce Experience overlay. You can access this overlay at any time from within a game by pressing Alt+Z. Your image gallery can be accessed from here and you also have the option of sharing your Ansel shots online through social media.
From the Share screen in the GeForce Experience overlay, you can select which social media platform you want to share the photo to, title it, and set parameters for sharing. You must link your social media accounts to GeForce Experience prior to using this feature. Account linking can be done from the main settings menu within GeForce Experience.
For more great guides for your PC games, as well as walkthroughs and more, check in with the Shacknews Guides home page.

-
Shacknews

 reply
replyChris Jarrard posted a new article, How to take stunning screenshots with NVIDIA Ansel
