
Shores of Gold Tall Tales Sea of Thieves campaign walkthrough
A complete walkthrough of the Shores of Gold, the first Tall Tale in Sea of Thieves.
The Shores of Gold is the first of the Tall Tales coming to Sea of Thieves. This nine mission quest takes players all over the Sea of Thieves in search of the fabled Shroudbreaker. Along the way, you can collect journals and repeat the missions to earn extra cosmetic gear and commendations. There are a lot of puzzles in this story, so let us help guide you on your way to the Shores of Gold.
Use the following links to jump to the section you need:
- How to start Tall Tales
- The Shroudbreaker guide
- The Cursed Rogue guide
- The Legendary Storyteller guide
- Stars of a Thief guide
- Wild Rose guide
- Art of the Trickster guide
- The Fate of the Morningstar guide
- Revenge of the Morningstar guide
- Shores of Gold guide
Shores of Gold Tall Tale guide

The Shores of Gold Tall Tale comprises 9 separate voyages. The first voyage is the Shroudbreaker voyage, which kicks off the entire adventure. Each voyage can take anywhere between two and three hours, depending on your crew, how aggressive other players are, and how quickly you try to complete each step.
Because this is the first voyage of its kind in Sea of Thieves, it’s definitely worth taking your time to soak up the atmosphere!
Once you reach the endpoint of each mission, the primary character you dealt with at the start of the mission will typically inform you where to find the next voyage. For example, after completing the Shroudbreaker, the Mysterious Stranger will reveal that Madame Olivia at Plunder Outpost might know something. However, there are some instances where you are given little information from the quest-giver. To work out where to go next, follow this guide or open up the Tall Tale, highlight the voyage you want, and press the "more information" button.
The first time you play the Shores of Gold Tall Tale you will have to complete it in sequence. Once you play through the entire Tall Tale, you can launch any voyage at any time. When you first begin, you may find journals out in the wild that you cannot interact with, this is because you have yet to complete the previous voyages.
How to start the Shores of Gold Tall Tale
To start the Shores of Gold Tall Tale in Sea of Thieves, head to the nearest Outpost. Locate the tavern and go inside. At the back of the tavern, leaning against a door, is character wearing all-black clothing – this is the Mysterious Stranger. Beside the Mysterious Stranger on a barrel is a book titled, The Shroudbreaker, this is the start of the Shores of Gold.
Approach the journal and vote for it. A majority vote is needed to begin the quest, so have your crew members cast their vote as well. Once the required votes are in, the Shroudbreaker quest will start. From this point onward, you will be completing the Shores of Gold Tall Tale!
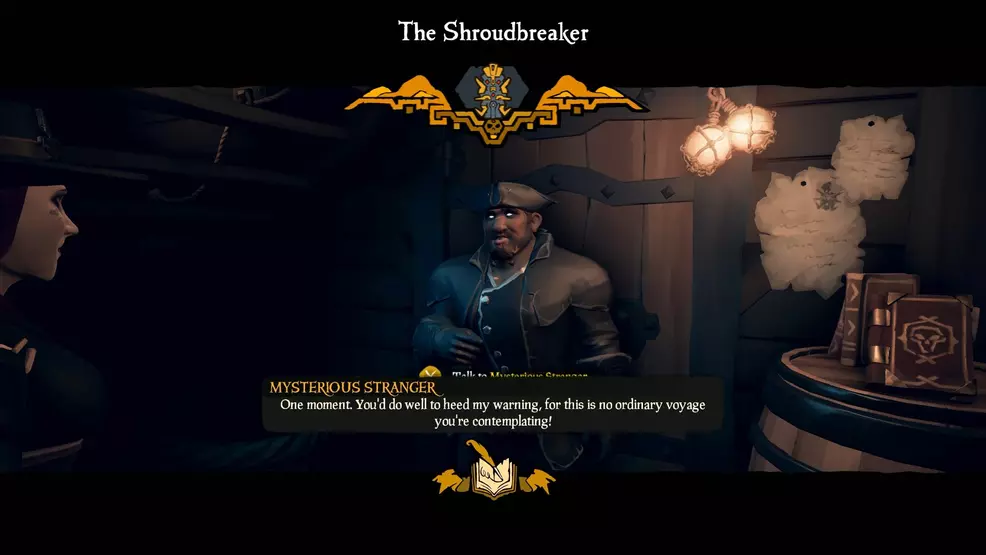
The Shroudbreaker Guide
A Mysterious Stranger speaks of an ancient relic with the power to reach a lost island…

As mentioned above, the Shroudbreaker is the first mission available to players as part of the Shores of Gold Tall Tale. This voyage tasks you with tracking down the Shroudbreaker and bringing it back to the Mysterious Stranger. The steps in this quest are as follows:
- Receive the journal
- Learn the fate of the Magpie’s Wing and track it down
- Collect the ship’s log from the captain’s room
- Read the route the Magpie’s Wing took and where they dropped the ancient chest
- Go to the island and retrieve the ancient chest
- Take the totem and the map from the chest
- Look at the map and figure out which island is shown
- Sail to the island
- Search for a spot to place the totem
- Enter the vault
- Light the four braziers and press the button
- Use the journal to input the correct symbols using the spinning blocks
- Figure out where the image shown on the table is located on the island
- Go to the spot and dig up or pick up the medallion
- Insert the medallion into the table, repeat this two more times
- Collect the Shroudbreaker from its stand
- Return to any Outpost and deliver the Shroudbreaker to the Mysterious Stranger
There are a lot of steps in the Shroudbreaker voyage as part of the Shores of Gold Tall Tale. The first task will be to read through the journal and learn where the Magpie’s Wing went down. The location you’re looking for is between Crook’s Hollow and The Crooked Masts, an uncharted island at N13.

When you reach the uncharted island, begin searching for the wreckage of the Magpie’s Wing. Once found, enter the captain’s quarters and search for the ship’s log. After picking up the ship’s log, the journal will have additional pages.

Read through the ship’s log and track the Magpie’s Wing’s journey across the Sea of Thieves. The directions in the ship’s log is random, so the route I got may not be the same as yours. You will need to accurately follow the steps. Once you have located the island where the ancient chest was thrown overboard, sail to said island and retrieve the chest.

This chest will contain a map and a totem. Do not lose the totem or else the quest will fail and you must start again.

Inspect the journal again to see a map that is just the outline of islands. Use the map on your ship to figure out what island lies at the center and head there.

Once at the island, begin searching it for a place to use the totem from the chest. You will be looking for a symbol on the wall that matches the totem. If you have the scarab totem, you want to look for a scarab symbol. Look for a little button, this is where you’ll place the totem, causing a cave to reveal itself.
Inside the cave is a large flat plinth with a brazier in each corner. Light all four braziers and hit the button to begin the next puzzle.

Water will begin pouring in from one of the stone heads. Your task will be to use the journal to input the correct code using the spinning blocks by the walls. Approach the blocks and interact with them to spin it. Ensure all the symbols match what’s in the journal and press the button. Repeat this process until you have entered all the codes.

At this point, an image will appear on the plinth in the center of the room. This image will show a location on or around the island you’re currently on. Find the location pictured and either dig up the medallion or pick it up. Bring the medallion back to the vault and put it into the plinth. Repeat this process two more times.

After putting all three medallions into the plinth, a wall will shift, revealing the Shroudbreaker. Take it, return to any outpost, and give the Shroudbreaker to the Mysterious Stranger. He will reveal that the Shroudbreaker is missing some gems and that perhaps Madame Olivia at Plunder Outpost will know more.
Mercia’s Lost Memories – Shroudbreaker
There are five journals belonging to Mercia that can be found as part of the Shroudbreaker story. Collecting all five journals is required if you want to unlock all commendations and the special cannons on offer.
Each journal will point you to the location of the next journal. Finding where the journals are on each island is the tricky part.
The journals only appear when the quest is active. If you hand in the Shroudbreaker, the journals will disappear and you must vote for the voyage again.
N13 uncharted island: The first journal is located at the wreck of the Magpie’s Wing, on the sand of the middle-ish island.

Ancient Spire Outpost: Start at the back of the tavern and cross the rope bridge. Follow the bridge down and into the cave. Turn left and look between the candles to find the journal.
Devil’s Ridge: This journal is found on the north-east side of the island, up on the raised cliff near the cannon. This ledge is also where you can find the entrance to the island’s cave system. The journal is resting right beside the cannon.
Thieves’ Haven: Enter into the middle of Thieves’ Haven and look across from the ship wreck. You’re looking for a little sheltered area with a few crates. Search the box on the ground to find the journal.
Plunder Outpost: The final journal is beside the Gold Hoarder’s tent, sitting inside a rowboat near a campfire.
The Cursed Rogue Guide
Only the Order can help locate the Skeleton Lord who split apart the Shroudbreaker…

The second mission in the Shores of Gold Tall Tale is The Cursed Rogue. This mission has players hunting down the legendary Briggsy, a Skeleton Lord who might know about the Shroudbreaker.
- Visit Madame Olivia at Plunder Outpost
- Vote on the Cursed Rogue voyage
- Receive the journal
- Read the journal and discover the islands depicted
- Travel to the islands and track the path of the skeletons
- Defeat the skeletons and take or dig up the chest or key
- Take the contents of the chest back to Madame Olivia at Plunder Outpost
- Use the enchanted compass to track down Briggsy
- Defeat Briggsy
- Take her skull back to Madame Olivia at Plunder Outpost

There aren’t as many steps in this voyage compared to the previous mission. The tricky part will be working out what islands are depicted in the journal. You will only have the islands’ silhouettes to go on and the two islands are entirely random.

Set sail to the islands and use the journal to work out where the skeletons went. For example, in the above image you can see the skeletons pass a large bird statue and then went into a cave. Search the island for these reference points and then listen for the skeletons. The skeletons talk between themselves, making it easier for you to track them down.

Defeat the skeletons and then either retrieve the skeleton key from their bodies or dig up the skeleton chest. Use the key to unlock the chest, revealing the broken spyglass and the star map of Briggsy's.
Take these two artefacts back to Madame Olivia at Plunder Outpost to have her create an enchanted compass. You can find the compass in the same place you’d find maps and bounties. This enchanted compass will point toward Briggsy.

Equip the compass and look where the needle points. Set sail and follow the needle to an island to discover Briggsy’s location.
How to defeat Briggsy

All that’s left to do now is defeat Briggsy. This is not your usual skeleton boss fight. Briggsy is extremely tough, has the ability to teleport, can do a shockwave-slam attack that deals damage and pushes you away, and can summon skeletons to fight on her behalf. It will take you and your crew a long time to defeat her, so bring a lot of supplies.
It’s worth stocking up on some gunpowder barrels before the fight. You can place these on the ground near her and then shoot them to deal far more damage than swords and guns. Don’t use the fuse as Briggsy can just teleport away.
Players who have a crew can assign some players to round up the skeletons and kill them. This is helpful as there can be a lot of skeletons on the field. Use any rocks and terrain to your advantage to funnel the skeletons into easy-to-manage clusters.

Watch out for Briggsy’s slam attack, as it can easily deal half of your health in damage. She telegraphs the move for a long time before actually activating it. Briggsy will put her hands behind her back and slowly raise them up over her head. When she starts this move, turn and sprint away to avoid taking too much damage.
It took my crew of three roughly 20 minutes of non-stop fighting to kill Briggsy, so expect the fight to take a while. It can also be worth keeping a lookout, as other players may try to come and harass you during this boss fight.

Once Briggsy is defeated, collect her unique skull and set sail back to Plunder Outpost. Deliver Briggsy’s skull to Madame Olivia and listen to her tale. She speaks of Sudds, Wild Rose, Salty, and Tasha from a tavern – Tasha the tavernkeeper is from Ancient Spire Outpost. At this point, four more voyages will be unlocked: The Legendary Storyteller, Stars of a Thief, Wild Rose, and Art of the Trickster. You can complete these in any order.
Bounty Hunter’s Journals – The Cursed Rogue
Shark Bait Cove: Look for the tunnel on the south side of the island. Go through the tunnel, turn right, and look in the broken rowboat to find the first Bounty Hunter's Journal.
Discovery Ridge: Go to the north east side of the island, pass the waterfall and look in the wrecked rowboat to find this journal.
Kraken’s Fall: Found on the south side of the island, just past the tunnel near the fence. Look for the pile of bones resting against the fence, the journal is tucked behind them.
Wanderer’s Refuge: Find the well on the middle section of the island (near the south) and go up the hill to the ruins of the house. The journal is tucked between the stones and the wood.
Crook’s Hollow: The last journal is inside the cave system on Crook's Hollow. Start at Wild Henry on the pier, turn around and go into the cave opposite him. Take the first left and follow it as it curves along. You will come across a skeleton bound with rope beside a campfire, the final Bounty Hunter's Journal is beside the bones.
The Legendary Storyteller Guide
Shroudbreaker pieces are scattered far and wide – could this childhood keepsake mean more?

The Legendary Storyteller is the third quest in the Shores of Gold Tall Tale. As Madame Olivia mentions at the end of the previous quest, Tasha the Tavernkeeper at Ancient Spire Outpost might know something about Briggsy.
- Go to the tavern at Ancient Spire Outpost
- Vote on the Legendary Storyteller journal
- Listen to Tasha and then look over the journal
- Figure out the three islands mentioned in the book
- Travel to each island to collect the two keys and the chest
- Work out what island to go to next based on the wooden board
- Use the wooden board to find the place to dig
- Dig up the Ancient Crown
- Return to the Ancient Spire Outpost and give Tasha the Ancient Crown
The Legendary Storyteller begins in the tavern at Ancient Spire Outpost. Look for the journal beside Tasha the Tavernkeeper and have your crew vote on it. You will receive a book of Tasha’s childhood drawings depicting the adventures of Briggsy’.
Open up the journal and investigate each chapter for clues on the islands to visit. Each chapter details on adventure of Briggsy’s, which sees her hiding or losing treasure on an island. Using the clues in the drawings, you will need to work out the islands where the treasure hides. This can be a bit challenging, as you may need to work backwards.

As an example, the information in the image above shows Golden Sands. This is presumably the island where Briggsy started her journey. From the outpost, she sailed towards some rocks, struck the rocks, and then was transported to an island by a mermaid. The next piece of information is that when standing on the unknown island and looking northeast, she could see her ship’s wreck.
One way to decipher this would be to travel to Golden Sands Outpost, look for any large rocks that look similar to the drawing and sail to them. Then, because you know Briggsy was looking northeast to spot the rocks, you could look southwest to spot the island. If the island matches the drawing, you know you’re in the right spot.
Alternatively, if you are intimately familiar with the Sea of Thieves map and island structure, you might be able to figure it out without following Briggy’s path to the letter. Regardless, you will need to use this kind of problem-solving to work out the other two islands. Some of the islands may require you to guess their silhouette. For the gif above, you can track your way from Ancient Spire and then look out for a silhouette which looks like three spikes, which would be The Crooked Masts. Keep in mind your journal may be different.
The three pieces of treasure will be two keys and a chest. Use the two keys to unlock the chest, revealing a plank of wood with holes. This is your clue on where to go next.

Find the wooden plank in your voyage radial menu and hold it. Flip it over (using left trigger or right mouse click) to find a coordinate carved into its back. Use the map on your ship to find the island and set sail.
Once on the island, you will need to use the features and landmarks to “fill in the holes” of the wooden board. Do this by holding up the board (right trigger or left mouse click) and looking for rocks and objects that fit the holes. When you find the right spot, the little hole will reveal where you must dig.
Dig up the treasure and return to Tasha at Ancient Spire Outpost. Hand over the Ancient Crown to complete The Legendary Storyteller.
Briggsy’s Journals – The Legendary Storyteller
Lone Cove: The first of Briggsy’s journals can be found in the cave on the northwest side of the island.
Mermaid’s Hideaway: By the cooking stove on the northwest shoreline, in the broken barrel.
Old Salts Atoll: At the bow of the shipwreck, in the hole on the port side.
Dagger Tooth Outpost: This journal is found in the tavern, on the bookshelf beside the fireplace.
Galleon’s Grave Outpost: Another journal can be found at the very top of Galleon’s Grave, in the cage hanging from the outpost’s namesake.
Stars of a Thief Guide
An old stargazer’s notes point to the heavens and a way to reach a piece of the Shroudbreaker…
The Stars of a Thief is the fourth voyage of the Shores of Gold Tall Tale. As mentioned by Madame Olivia at Plunder Outpost, Sudds might know a thing or two about Briggsy. Find Sudds at The North Star Seapost to locate the Stars of a Thief voyage journal.
- Go to Sudds and vote on the Stars of a Thief journal
- Read the journal
- Find the North Star and find the island you must go to
- Dig up the enchanted spyglass
- Use the Spyglass to navigate to the islands mentioned in the journal
- Find the treasure on the island and dig it up or pick it up
- Take the two Star Jewels to the final island
- Swim into the cavern below and place the jewels in the eyes of the statue
- Take the totem and the unsolved star charts
- Place the totem in the door behind you (if it’s the crab totem)
- Light the braziers
- Use the unsolved story to solve the symbol sequence
- Take the Shroudbreaker Stone back to Sudds
The Stars of a Thief voyage contains a few challenging tasks. What makes it difficult is you must navigate to islands using nothing more than constellations. After voting on the voyage, you will receive a journal of Sudds detailing some stories and songs he’s heard as well as a list of all the constellations.

The constellations take on different forms, like a crab, mermaid, boar, or snake, and they each have a little blurb about their role as well as their name. These details will help you solve some of the puzzles.
Read through the journal to discover three separate stories. The first two take you on an adventure to collect Star Jewels with the last story being where the jewels must be taken.

To begin the adventure, you will need to find the North Star. You can do this at night or during the day. Find the brightest star in the north and then look for the island the journal mentions. The journal might tell you to sail toward the star or sail with your back to it. The island should be rather close to Sudds’ seapost.
Dig up the treasure chest and claim the spyglass. This enchanted spyglass can be found in your map wheel. When looking through the spyglass at the stars, the constellations will reveal themselves to you.

Now you can begin finding the islands mentioned in the stories. These stories are may be random and can have different puzzles. Some of these puzzles might be a poem mentioning constellations, another might be a simple image, and another might be a mixture of the two.

In the example of the song, Sudds gives a little introduction and a guess about where to start. “One Eye’s direction far from my seapost” is a reference to the shark constellation. Find the stars and then set sail. From here, cross-reference the poem with the map. The poem speaks of rings of land and water and the only island in the direction of the shark constellation that matches that description is Shark Bait Cove. Here we found a Star Jewel.

In this next example, the journal shows a couple of constellations, a few islands, and a starting point. The trip begins at Crescent Isle where the next step is to figure out where the warrior constellation is and travel to the island in that direction. From there, the snake constellation leads to the island where the Star Jewel is buried.

The final story of the journal, An Elusive Story, appears to be the same for each voyage. To solve this puzzle, read the story and use the constellation names to find the correct islands. The isle of the singer refers to the snake constellation, which means Snake Island. Search the sky for the fish constellation and travel that direction. You will be looking for an uncharted island with a tunnel beneath the ocean. This uncharted island is the same one used in the Shroudbreaker quest with the Magpie’s Wing.

Find the entrance to the underwater tunnel and then take the two Star Jewels into the cavern. Place the jewels in the eye sockets of the statue and grab the totem and the unsolved star chart. Use the totem on the hidden door behind you and then read the final unsolved story.

Enter into the vault room, light the braziers, and get ready to solve the symbol sequence. The solution to the sequence is hidden in the Unsolved Story. The story uses the names and information about the star constellations. If you can’t remember them, have someone reading the constellations as another reads the story.

Read each line and select the correct symbol based on the story. In the example above, the first solution would be the mermaid, shark, scarab, and then the warrior. Press the button to lock in your answer. Once both solutions are in, the wall will drop and you can collect the Shroudbreaker Stone.
Take the Shroudbreaker Stone back to Sudds at the North Star Seapost to complete the Stars of a Thief voyage in the Shores of Gold Tall Tale.
Sudds’ Notes – Stars of a Thief
Rum Runner Island: Northeast islet, by the rocks and the star tools.
Plunder Valley: At the very top of the island, beside the beacon near the telescope.
Snake Island: The center island, on the north by the star-gazing equipment. Check over the edge to find the journal.
Devil’s Ridge: Go to the top of the island near the beacon. Use the rocks of the outcropping to climb up to the star-gazing telescope. The journal is under the parchments.
Crescent Isle: Found on the southwest side of the island, on the rocky outcropping.
Wild Rose Guide
Briggsy knew of Wild Rose… Can two lost lovers lead the way to the Shores of Gold?
Wild Rose is the fifth voyage of the Shores of Gold Tall Tale in Sea of Thieves. This adventure takes you on the path of two pirate lovers as they revisit some of their old memories before their wedding. To start this quest, speak with Madame Olive at Sanctuary Outpost, you can find her in the Order of Souls tent.
- Read the journal
- Go to the island where they buried their chest of memories
- Dig up the chest and retrieve the new journal pages
- Visit the islands mentioned and dig up the mementos
- Give the mementos to Madame Olive at Sanctuary Outpost
- Use the enchanted compass to track down Rose and George
- Take the two heart halves back to Madame Olive to finish the Wild Rose voyage
The Wild Rose voyage is reasonably short in duration, but its puzzles can be a bit tricky to solve. The first step is to visit Madame Olive at Sanctuary Outpost and vote on the journal. After story time, you will receive a journal detailing the love story of Rose and George. Read through the journal to learn where they went and what they did.

Look for the page that mentions where they buried their chest of mementos and set sail to that island. Here you must dig up the chest and claim the extra pages from within.

These new pages will take you to two islands. Your job will be to figure out what islands to visit. To do this, you will need to cross-reference the rest of the pages for the information given. For example, one page might talk about where they had their first kiss. Search the journal for where they shared their first kiss and head to the island. Once you arrive, use the drawing from the journal to find where on the island they kissed – this is the spot you must dig.
You may not get the image of them kissing as these puzzles can be random. One page might talk about the first time they made landfall, the time when they were ambushed, or something else entirely.

One particularly tricky puzzle relates to the first time Rose and George danced. You must visit the island where they practice and then use their dancing notes to locate the buried treasure. For example, they always dance in three steps, so if the note says “Left, two, three”, take three paces left. It is important to stand in the same spots as Rose and George in the picture, else you won’t finish in the correct spot.

With the two mementos dug up, return them to Madame Olive at Sanctuary Outpost to receive an enchanted compass. Use this compass to track down Rose and George, who will be on two different islands. Find Rose and George and take their heart halves. Listen out for music that plays as you get closer to their location on the island.

Return to Madame Olive at Sanctuary Outpost and hand over the two heart halves to complete the Wild Rose portion of the Shores of Gold Tall Tale.
Lovers’ Notes – Wild Rose
Rapier Cay: This journal is found right in the middle of the island, inside some pots and pans near some barrels.
Cannon Cove: In the bay by the campfire, in the barrel that’s half buried as a seat.
Lone Cove: Go to the center of the island to the graveyard, the journal is beside the large bolder.
Lagoon of Whispers: This Lovers' Note is on the barrel on the southeast side of the island
Sailor’s Bounty: Go to the northeast side of the main island and cross the shallow water onto the islets. There will be a stack of barrels and crates, the last journal is on the ground beside them.
Art of the Trickster Guide
An infamous trap-maker knows of the Shroudbreaker – but will she turn out to be friend or foe?

Madame Olivia mentions Salty, who long-time players will already be familiar with. All you have to do is track down Salty to find the Art of the Trickster voyage. Salty can now be found on Plunder Valley, near the shipwreck. The Art of the Trickster voyage only takes place across three specific islands, so there’s no randomness to where you will go, only the puzzles you will receive.
- Read the journal and follow the clues to find the large bird statue
- Enter the cave system and look for the skeletons in the cavern
- Position the skeletons according to the clues in the journal
- Retrieve the pages and the spyglass
- Sail to Discovery Ridge
- Use the journal to find the places to stand on the island
- Look through the spyglass at the correct symbols to find the right place to dig
- Dig up the extra notes and repeat the process
- Dig at the third location, take the Trapmaker’s Gunpowder keg and run!
- Take the Trapmaker’s Gunpowder Keg to Sailor’s Bounty
- Place the Gunpowder Keg on the stand deep below the island
- Fight off the waves of skeletons and defeat the boss
- Take the pages and the totem
- Set sail to the last island and find where to use the totem
- Light the braziers around the plinth
- Take the Shroudbreaker Stone
- Fight off the waves of skeletons, putting the medallions into the plinth
- Take the Shroudbreaker Stone back to Salty on Plunder Valley
The journal you receive from Salty will direct you to a little cave on Plunder Valley. Find the entrance to the cave on the western side of the island, near the large bird statue at the end of the canyon. Enter the cave and take the first left and then the first right to enter a room full of skeletons.

Use the clues from the journal to position the skeletons in the correct way. You will need to interact with each skeleton to move them around. Once all skeletons are in the correct position, a cage will lower. Collect the pages of the journal and the spyglass. This is a unique spyglass that has a skull image on its lens with an X in its mouth. Read the journal to get the next location and a clue about what to do next.

Set sail to Discovery Ridge where you must use the maps in the journal to find the correct Trapmaker’s marking. The journal cryptically mentions symbols, and if you’re standing on the right marking, you should be able to see these symbols on the island.

Using the spyglass, you can put each symbol in one of the skull’s eyes. When positioned correctly, the X will be on the ground somewhere – this is where you must dig. Dig up the item and use the new journal entry to find the next marking and symbols. This will be another page of the journal, revealing the final buried item.

There is a trap with the final dig spot, and if you’re not fast, you will fail the voyage and must start again. As soon as you dig up the final item (the Trapmaker’s Gunpowder Key), a series of explosions will erupt over the island, blasting down to toward you. If you do not get the unique gunpowder barrel to safety, it will explode and Salty must be visited again to restart the voyage.
With the Trapmaker’s Gunpowder Keg safely on your ship, set sail to Sailor’s Bounty to hunt down the Trapmaker’s workshop.
Once at Sailor’s Bounty, take the gunpowder barrel to land and look for the cave mouth in the center of the island. You will need to find a winding cave system that leads down to the heart of the island. This is where the Trapmaker’s workshop is located.

Place the Trapmaker’s Gunpowder Keg on the stand to begin the next phase. Several waves of skeletons will spawn, and you will need to defeat them to summon a boss. Defeat the boss to get more journal pages and a totem. Read the pages to learn what island to go to and then set sail.

After reaching the island, search for a place to insert the totem, revealing a vault. Enter the vault, light the brazier, and then collect the Shroudbreaker Stone.

Defeat the waves of skeletons, being sure to place the medallions in the plinth. With all three medallions in place, the door will open and you are free to leave.
Sail back to Salty on Plunder Valley and hand over the Shroudbreaker Stone to finish this portion of the Shores of Gold Tall Tale.
Trapmaker’s Journals – Art of the Trickster
The Trapmaker’s journals are one of the easier collections of writings to collect. Each journal will tell you where the next one is located. There is one on Plunder Valley, another on Discovery Ridge, and the final three are on Sailor’s Bounty.
Plunder Valley: The first Trapmaker’s journal is found in the room with all the skeletons you need to position.
Discovery Ridge: The next journal is just before the highest point on Discovery Ridge, right above the mouth of the valley that leads down to the sandy islands. As you walk up the hill, look for a post with some barrels, the journal is on the barrels.
Sailor’s Bounty: All three journals are in the Trapmaker’s workshop. One is between the two work benches, another is under the bed, and the last is beside the anvil.


As mentioned above, the final Trapmaker's Journal can be found beside the anvil in her workshop on Sailor's Bounty. With the last journal found, all that's left to do is complete this voyage a few more times to unlock the commendation.

The Fate of the Morningstar Guide
The Ferryman’s tome describes lost souls. Their sad fates are somehow tied to the Shroudbreaker…
The Fate of the Morningstar is the seventh voyage in the Shores of Gold Tall Tale. To begin this quest, your crew will need to go to the Ferry of the Damned. The journal is found on the helm, beside the Ferryman.
- Read the journal
- Travel to the Ferryman’s resting place and dig up the sarcophagus
- Retrieve the lantern
- Sail to Old Faithful Isle
- Use the lantern to track down the fates of the three pirates
- Follow the footsteps to find the buried chests and the keys
- Unlock the three chests to free the souls
- Return to the Ferryman to finish the voyage

Reading the journal given to you by the Ferryman will tell you about the fate of three pirates, Dinger, Fontaine, and Eli. Most importantly, it will tell you where the Ferryman died. In this instance, it was on Marauder’s Arch, at the highest peak below a dying tree. Set sail to the appropriate island and dig up his sarcophagus.
Inside the Ferryman’s sarcophagus is an enchanted lantern. Lighting this lantern and holding it high will reveal ghostly images of those who died. The next task will be to go to Old Faithful Isle and use the lantern to discover what happened to the three pirates.

Make landfall on the southern shore of Old Faithful Isle. Hold the enchanted lantern up to see three skeletons pursuing Dinger, Fontaine, and Eli. From here, you will need to follow the footsteps and watch where the pirates died. This task will take you all over the island.
When you come across the death scene of a pirate, continue to follow the skeletons’ footsteps. You will discover a vision of the skeletons with a chest. Follow the skeletons to where they buried the chest and then follow another skeleton to where they hid the key. The chest must be dug up and the key retrieved. Use the key to unlock the chest to free the soul of one of the pirates. This must be done three times, once for each of the pirates killed by the skeletons.

The chests on Old Faithful Isle are found in the following locations:
- On the western shore, near the cliff’s edge
- North of the isle, along the edge of the cliff overlooking the shoreline
- On the north side of the island, just past the wooden barricade
The keys to the chests are found in the following locations:
- Western side of the island, in a hanging cage with a skeleton.
- Deep underwater on the north, located by using a cannon at the top of the island. Match the skeleton’s cannon to find the right firing solution.
- Northeast of the island, under water. Found by jumping from the wooden platform on the east where the skeleton threw it.
After unlocking all three chests, the souls of the pirates will be freed and you can return to the Ferryman on the Ferry of the Damned to finish the voyage. With Fate of the Morningstar completed, only two more voyages remain in the Shores of Gold Tall Tale.
Ghost Hunter’s Journals – The Fate of the Morningstar
All of the Ghost Hunter’s Journals are found on Old Faithful Isle. Due to the large size of the island, it is easier to find the Fate of the Morningstar journals in a specific order.
Ghost Hunter’s Journal 1: The first journal of the Fate of the Morningstar voyage is found on the southern beach. Go to the beach and run east into the cave system. Go past the flag on the wooden platform to find the journal on a rock beside a candle.
Ghost Hunter’s Journal 2: To find the next Ghost Hunter Journal, start at the southern beach and go west up the slope. Look for the kraken skull on the cliff, the journal is in its eye.
Ghost Hunter’s Journal 3: From the kraken skull on the western side of Old Faithful Isle, walk up the slope and take your first right-hand turn. Continue up the hill, going under the hanging cage and between the large rocks. Look to your left to find a twisted tree near a shrine of skulls, the journal is at the base of the shrine.
Ghost Hunter’s Journal 4: Start at the shrine of skulls in the middle of the island and turn to face the highest peak. Climb the peak to find the journal near a skeleton.
Ghost Hunter’s Journal 5: Begin at the highest peak on Old Faithful Isle and face East-Southeast. Walk down the hill, past the wooden barricade and across the open battlefield. Go through the wooden wall and immediately turn right to find a wooden bridge that ends at a rock wall with a tower. Sitting on the ground in the tower is the final Ghost Hunter’s Journal.
Revenge of the Morningstar Guide
A ship whose crew were cursed by a Skeleton Lord. Does its wreck hold clues to the Shores of Gold?
The penultimate voyage in the Shores of Gold is Revenge of the Morningstar. To begin this voyage, head to Sandra the Shipwright at Dagger Tooth Outpost. Have your crew vote on the journal to start this quest of vengeance!
- Read through the journal to learn where the Morningstar was abandoned
- Sail to the island and search the Morningstar for the ship’s logs
- Figure out where the crew buried their uniforms, dig them up, and put them on
- Sail to Sanctuary Outpost
- Speak with Tracy the Tavernkeeper to learn of an island to visit
- Talk to Tyler to learn of another island to visit
- Sail to the two islands, kill the group of skeletons and recover Graymarrow’s orders
- Use the cipher to decode the message and learn where to dig
- Dig up the skull and the chalice
- Go to the coordinates that Graymarrow mentions
- Place the skull and chalice on the shrine to summon Graymarrow
- Defeat Graymarrow and take the Shroudbreaker Stone back to Sandra the Shipwright at Dagger Tooth Outpost
Sandra will give you a book detailing the last few entries of the Morningstar. Reading the journal, you will discover the last known location of the Morningstar.

Set sail to Boulder Cay to find the shipwreck of the Morningstar, along with three entries from the crewmates hidden in the wreck. Use these ship’s logs to discover where the crew buried their uniforms. Dig up the uniforms and put them on using your ship’s clothing chest.

Included in the chest with the uniforms was a note from Tracy the Tavernkeeper at Sanctuary Outpost. Sail to Sanctuary Outpost and speak with Tracy to learn more about Graymarrow. Tracy will tell you of an island where some of Graymarrow’s gang was hiding out. She will also mention that Tyler may know a thing or two about Graymarrow.

Speak to Tyler in the equipment shop. He’s not too good at remembering details, so you might need to decipher what he’s talking about. Tyler will mention an island by name, but it won’t match any island on the map. Find an island that sort of matches what Tyler says. For us, he said “Sinking Cove” which was actually Sunken Grove.
You will now have two islands to visit. Set sail to each one in part. On each island, you will need to hunt down a group of skeletons and kill their captain. The captain will drop orders from Graymarrow. The orders will be written in a skeleton language, use the cipher in the journal to work out the code. The message will tell you where to start, where to walk, and where to dig, leading you directly to the buried treasure.


After visiting both islands and digging up the skull and the chalice, you will need to go to where Graymarrow awaits. Graymarrow has left alphanumeric coordinates in his message to the captains. He will give a letter to one and a number to the other. Put these together and find the coordinate on your map to work out where he’s hiding.

Sail to the island and find the shrine. Place the skull and chalice on the shrine to summon Graymarrow from his hiding place. All that’s left to do now is fight!
If you’ve killed Briggsy, you will know how to complete this fight. He has the same types of moves: teleport, summon skeletons, and a slam attack.

Killing Graymarrow will cause him to drop a Shroudbreaker Stone. Take this piece of the Shroudbreaker back to Sandra at Dagger Tooth Outpost to finish Revenge of the Morningstar.
Eli Slate’s Journals – Revenge of the Morningstar
Marauder’s Arch: The first of Eli Slate’s Journals is found just below the very highest peak on Marauder’s Arch. As you approach the point, stick to the right and follow the path down to the barrels to find a journal on top.
Boulder Cay: Found on the western side of Boulder Cay, in a crate beside three barrels.
Sanctuary Outpost: Inside the tavern, to the left behind some crates leaning against the wall.
Cannon Cove: Found up from the bay toward the south, behind two barrels and an ammo chest.
Sunken Grove: The last of Eli Slate’s Journals is on the northeast island of Sunken Grove. The journal is on the rocks near the barrels.
Shores of Gold Guide
The fabled Shores of Gold are now in reach – but what dangers might be lying in wait?
The Shores of Gold is the final voyage in the first Tall Tale in Sea of Thieves. This is what you have been fighting toward over the past eight voyages. To begin the Shores of Gold voyage, head to Morrow’s Peak Outpost and find Grace outside the tavern. Beside Grace will be the voyage book in a cart. Vote on the book to start the Shores of Gold.
- Set sail to the Shores of Gold
- Read the journal to learn about the four vaults, the center chamber, and the entrance to the heart of the island
- Go to where there are question marks on the map and make note of the symbols you discover there
- Find each of the four vaults and solve them to receive a medallion to the center chamber
- Take all four medallions to the center chamber and retrieve the key
- Use a cannon from your ship to reach the top of one of the statues
- Open up the door in the statue’s feet and take the key down
- Insert the key to open the door
- Fight your way through the gauntlet and into the heart of the island
- Defeat the Gold Hoarder
- Sell the Gold Hoarder skull to the Order of Souls
Listen to what Grace has to say about the Shores of Gold and then read through the journal you receive. Take note of the details written by Briggsy, as these are the clues to solving the four chambers around Tribute Peak.

Sail into the Shores of Gold and reach Tribute Peak. At this point, you and your crew can begin exploring the huge island at your leisure. The area is split into a few distinct sections, as if they were the cardinal directions on a compass.

To the north is the kraken vault, to the east the hunter, to the south the shark, and to the west the boat. Briggsy has written in her journal the solution to each of these vaults.

North Kraken vault solution: Always the same four symbols. Simply rotate the pillars until you find a symbol that they all share. The only tricky part is that the floor has rotating spikes that will instantly kill you.

East Hunter vault solution: Unlike the other vaults, the solution to this vault is to make a Gold Hoarder symbol using the blocks. Spin them until the key is made, including the little dot.

South Shark vault solution: One of the pillars in the southern vault is broken. To find the solution, you must use the diagrams in the book and work out what three symbols can be used. For example, you might not be able to find the feather icon on the three working pillars – this means it must be on the broken one. From here, make sure each pillar has one of the other symbols. Work through each of the circles until the puzzle is solved.

West Boat vault solution: The symbols for this vault are hidden around the island at the question marks Briggsy has drawn on her map. Make note of where these symbols were found, as their location will dictate the order they must be entered from left to right.
- One symbol is slightly northwest of the shipwreck and can be found by pulling the levers to open the mouth of the statue.
- Another is to the north of the statue alley. Walk down the stairs and pull the lever to partially open the door. Behind the door is a mural showing which of the pillars around the outside has the correct symbol. It will be the pillar to the “northwest” position assuming the entrance gate is “south”.
- This symbol is found by standing on a pressure plate which raises a pillar across the water. Have one player swim out to it, as the symbol is not visible from the cliff.
- The last symbol is similar to the third in that you must stand on a pressure plate to raise a stone. This symbol can be viewed from the pillar.
After solving the four vaults, take the four medallions to the center of the island to the “Compass Vault”. This vault is accessed by starting near the shipwreck and walking up toward the peak. Instead of taking the western path down to the statues, go right and through a cave partially covered by vines. Follow the path up and over a wooden bridge and down into the compass vault. Insert the medallions and retrieve the Gold Hoarder’s Coin.

Take the Gold Hoarder’s Coin to statue alley. The inner most northern statue has been shattered, revealing an opening that leads to a door. To open this door, sail your ship around the western side of the island and use your cannons to fire someone up and onto the statue. Drop down the inside of the statue to find a lever that opens the door. Take the Gold Hoarder’s Coin into the statue and place it in the lock to open the door to the left.

From this point on, you will need to fight through the gauntlet, avoiding traps and climbing around jumping puzzles.

For the most part, the challenges are fairly straight forward. Avoid the spikes in the walls, jump across the ship masts and use the anchor to position it for you friends. Avoid swinging traps, blade traps, and more. Find three levers in the spikey-floor room to open the door. Defeat enemies and use the anchor to open the gate. Once through the gauntlet, you will be face-to-face with the Gold Hoarder himself.

The fight against the Gold Hoarder plays out in the same way as Briggsy and Graymarrow. He has three main moves: teleport, summon skeletons, and a slam attack. He will also use a sword, blunderbuss, and a flintlock to attack you. The easiest way to beat the Gold Hoarder is to use the blunderbuss and restock using the ammo crates around the room. Attack as a group and clear out skeletons so you don’t get overrun.

Once the Gold Hoarder dies, collect his skull and listen to what the Pirate Lord has to say. Pick up the Gold Hoarder skull and go through the door on the side of the room. Follow the path out and return to your ship. Sail back through the Devil’s Shroud, return to any outpost, and sell the Gold Hoarder’s skull to the Order of Souls!
Briggsy’s Journals – Shores of Gold
There are ten of Briggsy’s journals to be found on Tribute Peak. Five are found aboveground and five are found below the island after you use the Gold Hoarder’s Coin.
Briggsy’s Journal 1: The first of Briggsy’s Journal can be found in her shipwreck toward the south of the island. Search what would be the stern of the ship in the captain’s quarters, it’s on the ground in the corner.
Briggsy’s Journal 2: Another journal can be found up the main path toward the compass vault. Look for the pressure plate overlooking the small island and then continue following the path up the hill a short way. On the left of the path will be some wooden crates, between which you will find the journal.
Briggsy’s Journal 3: This journal is located inside the compass vault room where the medallions are placed. Look in the crate on the right to find the journal.
Briggsy’s Journal 4: A journal is found just northwest of statue alley, at the place on the map marked with a question mark. Go down the stairs and look behind the fallen statue to find the book.
Briggsy’s Journal 5: This journal requires you use your ship’s cannon, as it is on the arm of one of the statues in statue alley. The statue is the second one from the south, on the inner line.
Briggsy’s Journal 6: The first of the underground journals is found immediately after the door opens. Look in the crate to the left to find the journal.
Briggsy’s Journal 7: After reaching the first mermaid statue, turn right and navigate around the debris. The journal is tucked between some stones and wooden support beams.
Briggsy’s Journal 8: Another journal is found right after crossing the ship mast jumping puzzle. Look in the crate beside the chest to find the journal.
Briggsy’s Journal 9: This journal is in the room with the pressure plates, the three levers, and the spikes that stick out of the floor. Up the back of the room is some wooden scaffolding, on this is the journal. You can use the statue on the left to reach the scaffolding.
Briggsy’s Journal 10: The last of Briggsy’s Journals is right after the spikey-floor room with the levers. As you walk up the wooden slope, search the platform on the right. The journal will be on top of some crates.
The Shores of Gold is an epic Tall Tale that takes you all around the Sea of Thieves. With plenty of puzzles, traps, and mysteries to solve, it’s the perfect campaign for those looking for adventure. If you’re looking for more helpful walkthroughs and tips, check out the Shacknews Sea of Thieves guide and walkthrough.

-
Shacknews

 reply
replySam Chandler posted a new article, Shores of Gold Tall Tales Sea of Thieves campaign walkthrough
