
All Sleeper Node Locations in Destiny 2: Warmind
Learn how to get the Destiny 2 Sleep Simulant exotic by tracking down each of the Sleeper Nodes in the Warmind expansion.
The Sleeper Simulant is returning in the Destiny 2: Warmind expansion, but players looking to grab the exotic weapon will have their work cut out for them. Among other requirements like side missions and kill counts, players looking to unlock the Sleeper Simulant will need to acquire four Resonant Stems and ultimately seek out a number of different Sleeper Nodes spread across various locations.
Combining Resonate Stems creates an Override Frequency, and players can hover over the Override Frequency in the menu to see a string of characters that looks somewhat like a file directory location. Each one of these strings will contain a clue to the location of one of 40 total Sleeper Nodes, i.e. Drift.Gatehouse.Catwalk points players toward the Glacial Drift location around the catwalk near the gatehouse.
The Sleeper Nodes themselves shouldn't be too hard to find assuming the player is in the right area: when one is nearby, a new musical cue will play and the environment lighting will change, letting players know they're close. Here's a look at all of the Destiny 2: Warmind Sleeper Node locations. Use the links below to jump to the appropriate section:
After unlocking Sleeper Simulant, make sure you get the Sleeper Simulant Exotic Catalyst!
- Olympus Descent
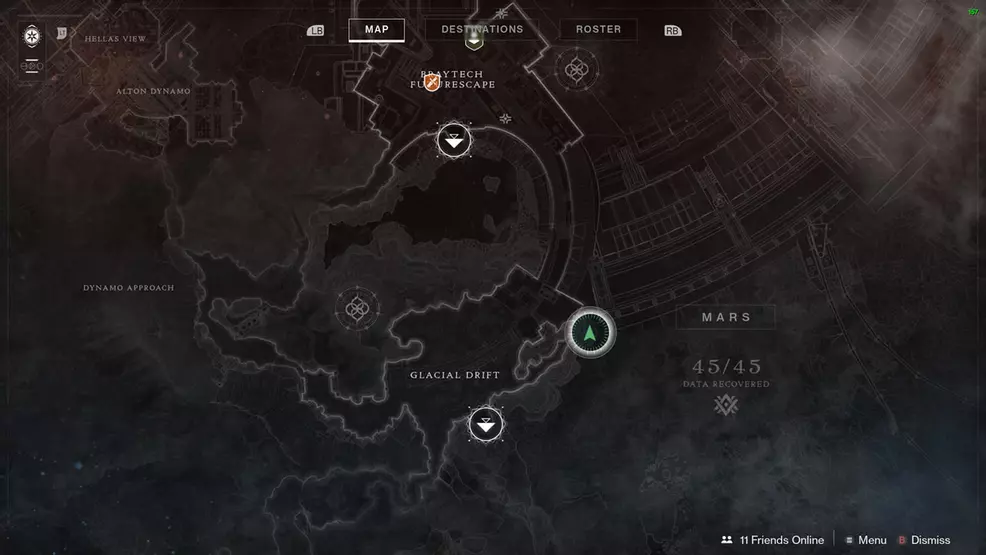
- Glacial Drift
- Dynamo Approach
- Alton Dynamo
- Braytech Futurescape
- Aurora Reach
- Mindlab: Rasputin
Olympus Descent Sleeper Nodes
To find the Descent.Cavern.Warsat node, head to the Glacial Drift and then into the caves to the south. Once at the crashed Warsat, look over cliff behind the Warsat to locate the node.
The Descent.Chasm.Ledge node can be found in the cave system to the south of Glacial Drift. Head through the cave system, past the crashed Warsat, hugging the left wall all the way to the cliff. Look over the lip to spot the Sleeper node.
The Descent.Cave.Runes Sleeper node is south of the Glacial Drift at the entrance to the Penumbral Depths. Head into the caves and follow the path along to the doorway to the Penumbral Depths, it will be locked with Hive chains. To the left is the Sleeper node near the edge of the cliff.
Glacial Drift Sleeper Nodes
The Drift.Subterrane.Cliffside node can be found on the left side of the entrance to the Ma'adim Subterrane Lost Sector in the Glacial Drift. From the spawn point in Glacial Drift, go right to reach the entrance to the Lost Sector. Inside of going in the cave, look to the left to spot the Sleeper node near a dead tree.
The Drift.Transit.Freight node is on top of the bridge in Glacial Drift. Head left from spawn and onto the bridge, the node will be inside the partially-opened box sitting by itself on its own section of the train.
The Drift.Gatehouse.Catwalk node can be found in the building to the right of the Glacial Drift fast travel point. Head inside the building and use the box to reach the catwalk running along the upper sides of the room. The node is on the left catwalk.
The Drift.Transit.Foundation node in in the Glacial Drift, below the main bridge. From the spawn point, go to the right to spot the node behind a boulder, tucked between the bridge and the ground.
The Drift.Service.BackEnd node is found in Glacial Drift, sitting within a small building on the path toward Braytech Futurescape. Head to the left of spawn and into the tunnel toward Braytech and look up to the right to spot a ladder, at the top will be the node.
The Drift.Checkpoint.Elevator node is found in Glacial Drift, just to the left of spawn in a building by the bridge. Go up to the bridge and look for the building labeled C-67, the node is inside in a little side room.
The Drift.Flammable.Storage node is in a building to the left of the Glacial Drift spawn point. Follow the path up to the left toward Dynamo Approach to find a little building by two tall silos, the node is inside the small building.
The Drift.Subterrane.Chasm node is located within the Ma'adim Subterrane Lost Sector in the Glacial Drift. Head inside the Lost Sector, past the first bridge and into the cavern with the crashed ship. Follow the path down and look under this next stone bridge to find the node.
The so-far unnamed Lost Sector node can be located not too far from the bridge as the player makes their way toward the Cabal.
Dynamo Approach Sleeper Nodes
The Dynamo.Approach.Tree node can be found in Dynamo Approach, right up against the cliff. Look for the dead tree by the stone arch, behind it and toward the cliff is the Sleeper node.
The Dynamo.Approach.Arch Sleeper node is found in the open area of Dynamo Approach. Look by the base of the big stone arch to find it. This Sleeper node may be mission-specific, so it will likely disappear or not be visible until that mission is available.
The Dynamo.Approach.Cavern node can be found in Dynamo Approach, above the entrance to the cave toward Alton Dynamo. Enter the cave and once the icy stalactites are visable, turn around, the Sleeper node is above the entrance.
Alton Dynamo Sleeper Nodes
The Dynamo.Deck.Dampener node is located just within Alton Dynamo after jumping across the gap and onto the underground structure. Follow the path around and look to the left of the stairs, the node is tucked in the corner.
The Dynamo.Control.Door node found in the second main room in Alton Dynamo. Jump across the gap into Alton Dynamo, go around the path and through the diamond doors. Take a left, go up the right-hand stairs and through the next diamond door. Turn around to the right to find the Sleeper node sitting beside the door.
The Dynamo.Coolant.Ventilation node can be found in Alton Dynamo, hidden behind a breakable ventilation grate. Jump across the gap from the cave to Alton Dynamo and continue along the main pathway deeper into the facility. Pass thorugh the first set of diamond doors, turn left, and look up to the right in the large room. Shoot the ventilation grate to knock it off, then climb up. Crouch-walk through the grate into a small room to find the node.
The Dynamo.Observation.Door node can be found within Hellas View in the outdoor area. Jump across the gap in Alton Dynamo and follow the main facility path along. Pass through the first set of diamond doors and turn left. Continue to the cavernous outside area and then look over the left wall to spot the Sleeper node sitting on a ledge.
The Dynamo.Observation.Valkyrie node is located in Hellas View, in the cavernous outside area. From the jump across to Alton Dynamo, pass through the first set of diamond doors and turn left. Continue through the facility to reach the outside area. Turn right and head around the outside area to reach the node sitting on the raised platform.
The Dynamo.Observation.Core node is found in Hellas View, just past the outside area of the facility. Jump across the gap in Alton Dynamo and follow the main facility path along. Pass through the first set of diamond doors and turn left. Continue to the cavernous outside area and then go through the next diamond door on the other side. Stop in this small room and look above the doorway to spot the Sleeper node.
The Dynamo.Core.Brace node can be found deep within Hellas View. Starting at the entrance to Alton Dynamo, jump across the gap and follow the main path, through the first set of diamond doors and turn left. Continue through the facility until to reach the final room full of Hive and a Wizard. Jump up to the top right balcony to find the node sitting near the railing.
The Dynamo.Core.Catwalk node is found deep within Hellas View. From the cave leading to Alton Dynamo, jump across the gap and follow the main path along. Pass through the first set of diamond doors and turn left. Continue along this main path, passing through diamond doors, hallways, and an outdoor area all the way to the end. The last room has a Wizard and some other Hive, the node is found beneath the little bridge.
The unnamed Alton Dynamo sleeper node is sitting right out in the open in the hallway flanked by various pillars.
The Dynamo.Server.Stairwell node is hidden in the server room deep within Alton Dynamo. From the cave leading to Alton Dynamo, jump across the gap and run along the main path. After passing through the first set of double doors, turn right and follow the hallway to the server room. Run into the center of the room and then go down the left set of stairs. Look for another set of stairs slightly to the right, the Sleeper node is tucked below them.
The Dynamo.Server.Heatshield Sleeper node is found inside Alton Dynamo, in the server room deep within the building. Starting from the jump across to Alton Dynamo, follow the main path long and after passing through the first set of diamond doors, turn right to reach the server room. The node is on the right-hand side of the server room, behind a big generator.
Braytech Futurescape Sleeper Nodes
The Futurescape.Transit.Service node can be found to the south ofBraytech Futurscape, along the subway tracks. Follow the tracks along and look for the notch in the left wall to find the Sleeper node.
The Futurescape.Dock.Outpost node is found on top of a building near the trainline that connects Braytech Futurescape to Glacial Drift. Starting at the Braytech spawn point, turn right and head toward the traintracks leading to Glacial Drift. Jump onto the first building beside the tracks and look around the back to find the node.
The Futurescape.Dock.Garage node found to the right of Braytech Futurescape, tucked between two buildings. From the Braytech fast travel point, turn right and pass between the building labelled with 03 and then turn slightly right to spot two more buildings. Go between these next two buildings to find the Sleeper node behind a scissor lift.
The Futurescape.Dock.Silo node is found to the right of the Bray building, behind the three large cylinder silos.
The Futurescape.Reception.Overlook Sleeper node can be found inside the Braytech Futurescape building, across from Ana Bray, up on the balcony.
The Futurescape.Plaza.Console node is found in the building to the left of the Braytech Futurescape building. From the spawn point, head slightly left and follow the track to the back of the area. Pass under the bridge and look for a little door leading into a small room. The Sleeper node is sitting in the corner of the room, beside a bank of computers.
The Futurescape.Plaza.Infestation node is located in the room where the Core Terminus Lost Sector entrance can be found. From the spawn point, head slightly left and enter the first building on the left labelled with 02. Go through the corridor into the Hive-infested room, the node will be up on the raised area at the back.
The Futurescape.Terminus.Console node can be found inside the Core Terminus Lost Sector. From the Braytech Futurescape spawn point, head slightly left to find the entrance to the Lost Sector in the Hive-infested room. Head done deep into the Lost Sector and look for the room with the red pillars with screens attached to them, the node will be on the right-hand side of the room.
The Futurescape.Ridgeline.Waterfall node is to the left of the Braytech Futurescape fast travel node. Follow the path along and look for the water trickling over the cliff.
Aurora Reach Sleeper Nodes
The Aurora.Mindlab.Observation node is found inside the Braytech Futurescape, below a grate in the floor. Head into building and follow the hallway on the left. Walk up the steps to the left of the Warmind statue and then stop immediately after walking past the boxes stacked on the left. The grate opening is on the right-hand side of this connective room, drop down to find the Sleeper node.
The Aurora.Mindlab.Supplies node is found in the Braytech Futurescape area, just past the statue of the Warmind diamond, and in the following outdoor area. Head through the building, past the Rasputin statue and outside into Aurora Reach. Walk up the left-side of the area, ignoring the Hive, to find the node sitting behind some crates.
Mindlab: Rasputin Sleeper Nodes
The Mindlab.Conveyor.Junction node is just past the entrance to the loading screen of the Mindlab, an area through the Braytech Futurescape. After hitting the Mindlab: Rasputin area, drop over the left of the catwalk and turn around to spot the node sitting by the wall.
The Mindlab.Conveyor.Bridge node is found in Aurora Reach, the path that leads into Rasputins chamber. After exiting the Braytech Futurescape building and passing through the small tubular tunnel, continue into the next outdoor area where a few Hive sit. Look under the bridge where the Knight stands to find the Sleeper node.
The Mindlab.Elevator.Right node can be found up near Rasputin's chamber, through the Braytech Futurescape building. After passing through the Mindlab, head immediately to the right and down the stairs to a lower platform, the Sleeper node will be sitting beside a door.
The Mindlab.Elevator.Service node is near Rasputin's chamber, the area through Braytech Futurescape. Go through the Braytech building, out into Aurora Reach, through Mindlab, and onto the Rasputin structure. Head up to the second level and instead of climbing onto the pipe catwalk where the Acolye spawns, turn left to spot the Sleeper node tucked beside the building.
The Mindlab.Overhang.Node node is located through the Braytech Futurescape building right near Rasputin's chamber. Head through Braytech, through the thin pipe, and into the Mindlab area. Continue onto the Rasputin structure, being sure to climb up the left catwalk where the Acolyte spawns. Jump across the gap onto the platform and look around the right-hand side of the doorway to find the node.
The unnamed Mindlab sleeper node can be found just outside the Mindlab on the right-hand side of the building.
There's still a lot more to see and do in Bungie's latest Warmind expansion, so be sure to head over to our Destiny 2 strategy and collectible guide hub to stay fresh on the latest missions, exotic gear, updates, and more.

